Web Push Notifications are a great way to engage with customers. However, engaging at the right moment and with the context of the user behavior on your site is critical to success. In this article, we will discuss the most effective trigger push notification campaigns to increase eCommerce conversions.
Being an eCommerce website, you have a lot of people checking out your product and making a purchase. Using Browser Notifications, you can make engagement more effective for both you and your customer. Trigger push notifications for eCommerce have far more benefits than just sending regular notifications. Check out the trigger push notification campaign ideas for eCommerce to get started with:
8 Trigger Campaigns That Help an eCommerce Site
Price Alert Campaign For eCommerce
Price is a motivating factor for making any purchase. Customers always look for the best price and for this they will search online for discount coupons and codes which can give them a discount. Even as a business you may change the product price from time to time to increase your sale. Especially during the sale event, most of the eCommerce reduce their prices. Using push notifications you can create triggers for Price Alert.
Condition to trigger a price alert push notification:
- Customer has selected for price alert
- Price had drop from current price
Once the above two conditions satisfy, you can trigger a price alert push notification. Notification will go automatically with product image and link.
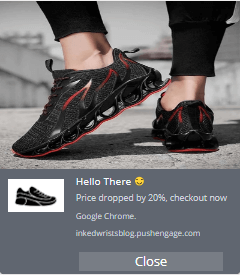
From the PushEngage dashboard, you can select the price drop change in % or absolute value. Integrating the price drop alert is simple. You have to just activate the campaign and put the code. This is one of the most converting push notification campaigns.
Inventory Alert Campaign For eCommerce
What happens if a customers lands to a product page only to find out that the product is out of stock? You lost a potential customer. This is a common scenario in most of the eCommerce website where the product goes out of stock.
Using web push notification, you can easily recover the lost customer using inventory alert campaign. It will automatically send alert to customer whenever the product is back in stock.
This way your customer will be notified at the earliest. To receive this alert, you have to enable the option on the product page. Once customer Allows, he will receive the inventory alert notification when product is back in stock.
Cart Abandonment Trigger Notifications For eCommerce
Many times users add products to their cart but don’t go for the final checkout. In such cases, the user is already convinced about the product and for some reason didn’t complete the checkout. An abandoned cart push notification on time can help to convert them to the customer.
Conditions to trigger push notification cart abandonment:
- Added product to cart
- Didn’t complete the purchase
- Time passed after adding the product to cart is 15 minutes
Notification: Send out a notification with the details about the product. It should include:
- Product image
- Personalized message
- Link to product review page or mention ratings in the push message
- Maybe limited time discount code to convince the user to make the purchase
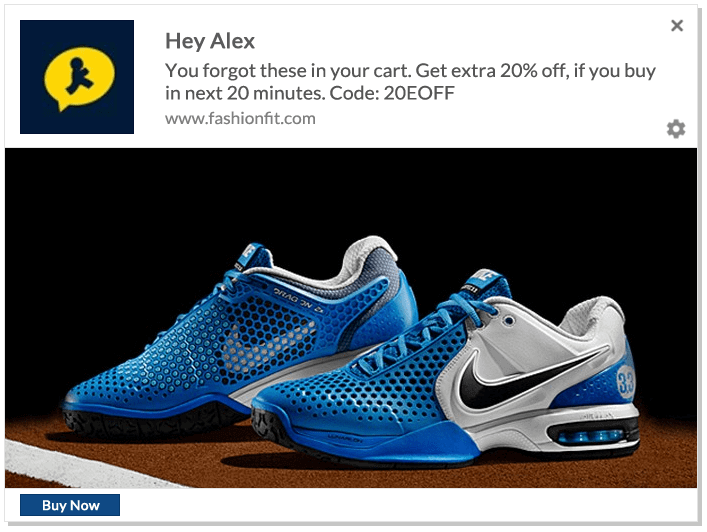
With abandoned cart notification, like an retail store, we need to convince the user that he has chosen a good product and support it with user ratings. Also if the reason for cart abandonment was price, including a limited time coupon code can lead to purchasing. For e.g. customer has added a Pair of Woodland shoes but didn’t complete the purchase. A personalized notification can lead to purchasing.
Configure your Cart Abandonment Push Notification campaign now and start capturing the lost sale. You can start getting the benefit of implementing an abandoned cart notification for your eCommerce site. It gives you another opportunity to promote your product. You can also create a series of notifications to convince the user to complete the purchase.
Browse Abandonment Trigger Notifications For eCommerce
Many times customer just browses through the products. He didn’t make up his mind to do the purchase. You know what the customer was browsing. You can capitalize on customer behavior by sending relevant notifications on time.
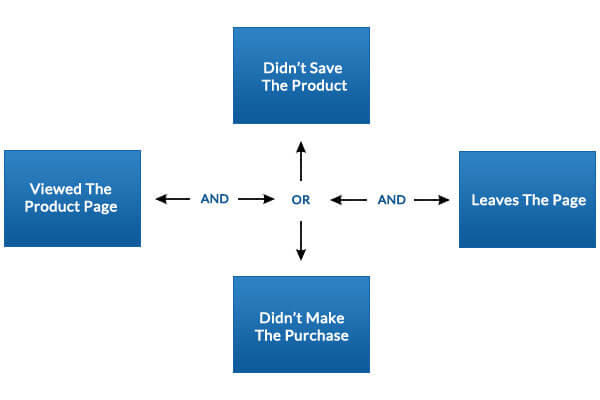
Conditions to trigger push notification for browse abandonment:
- Viewed the product page
- Didn’t save the product
- Didn’t make the purchase
- Leaves the page
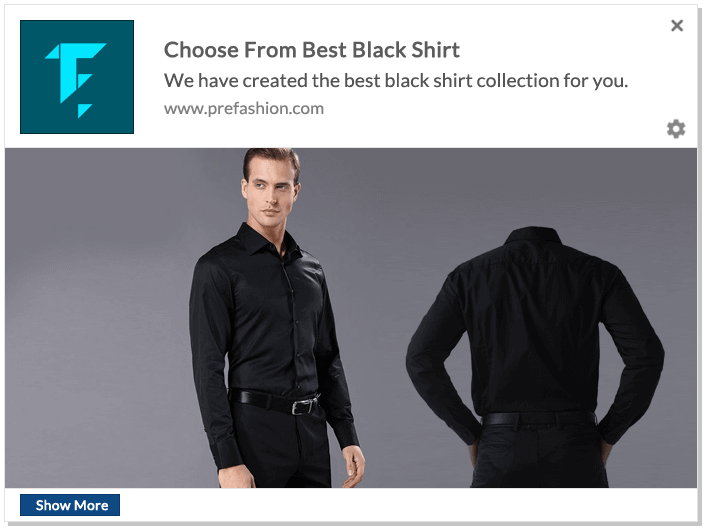
Notification: The notification should include:
- Image of his recent product search
- Link to product page
When the customer is shown the same product after some time, it may trigger him to visit the product page once again. A lot of times customers do not make the purchase on a single visit but after repeated visits. This is a good way to convince the customer to complete the purchase. For e.g. customer browses through black shirts but didn’t select any of the shirts and leaves the site. Send notification and bring him back to the page he was browsing.
How to configure Browse Abandonment Web Push Notification For eCommerce
- Log on to your PushEngage Dashboard.
- Go To Automation -> Browse Abandonment -> Create. Give a name to the campaign like “Browse Abandonment”.
- The condition to trigger Browse Abandonment Notifications are pre-selected. The Browse Abandonment Campaign will send Web Push Notification to subscribers who have browsed products or pages but didn’t complete the purchase.
- Trigger Limit: Trigger Limit is the number of times you want to send a notification to the user. If you want to send 3 notification per subscriber in a day, then set it to 3.

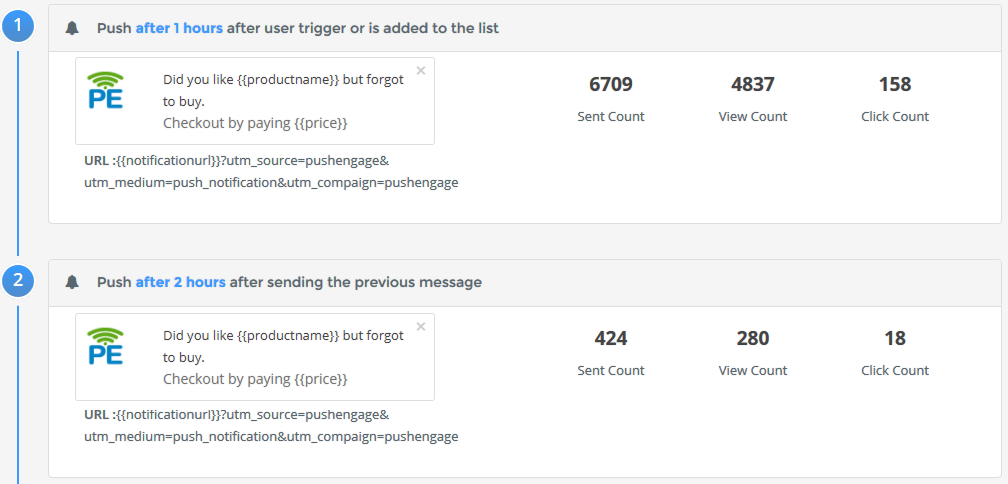
- Browse Abandonment Notification Creation: User may not buy the 1st time. You can create a series of Push Notifications to users who have browsed certain products but didn’t make the purchase. Put a delay in between the Notifications so that you can target them across the day.
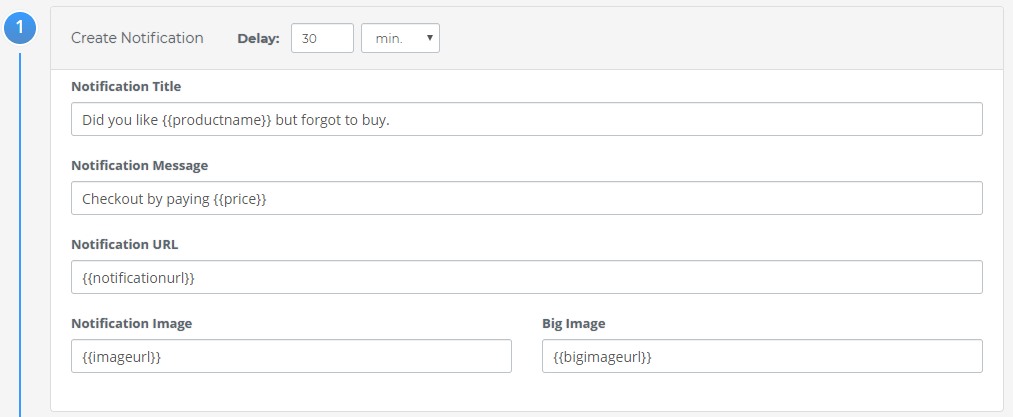
- You can create a series of push notification like the above. Once done you can click on Submit to save the Browse Abandonment Campaign. The number of push notification sent is limited by the Trigger you set above in Browse Abandonment Settings.
- Integrating The Code: Now you have to integrate the code into your website. Integrating the code is very simple. Click on the “Your Code” button to see the code:

There are two parts to the code:
Browse: “Browse” Code to be called when user browses your product. You can put certain logic on when to call the Browse Code:
- Call the code on page load Or
- Call the code after some delay Or
- Call the code after user browses X% of the page
Add To Cart: “Add To Cart” Code to be called in Add To Cart Page
Send the code to the developer to integrate the code into your website.
- Launching The Browse Abandonment Push Notification Campaign: Once your code has been integrated you can go ahead and launch the campaign. Now go to Automation -> Browse Abandonment Analytics. Select the Campaign and Launch.

Once your Browse Abandonment Push Notification Campaign is live, you will see the status of your push notification. When your user browses any product but didn’t make the purchase, they will start receiving browse abandonment notification.
Saved Item Trigger Notifications For eCommerce
Your eCommerce site allows users to create their wish-list or save items to view later. In such cases, we already know that customer is interested in the product and saved it to view or purchase later. For example in Amazon, Flipkart, and many other eCommerce sites, you can save your items for later views.
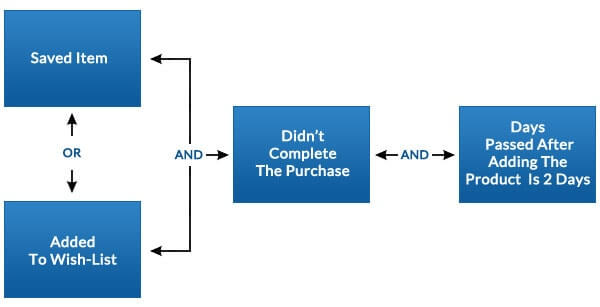
Conditions to trigger push notification for saved item:
- Saved item or added to wish-list
- Didn’t complete the purchase
- Days passed after adding the product is 2 days
Notification: Send out a notification with the details about the saved products. It should include:
- Image of the product saved
- Link to product page
- Show scarcity or limited stock
Once the user has saved the product in their wish-list for later review, they may sometimes forget about that. The goal of the triggered push notifications is to entice the user to complete the purchase or at least add the product to cart. This way we will know which of the saved products is mostly like to get converted. Later we can use our abandoned cart notification to convert the user to customer.
How to configure Saved Item Trigger Web Push Notification For eCommerce
- Log on to your PushEngage Dashboard.
- Go To Automation -> Trigger Campaign -> Create. Give a name to the campaign like “Saved Item Trigger”.
- Set The Trigger Condition: We have already defined the trigger condition above. We need to create it here.
1st Condition (If): Name the condition as “Saved Item”. This is for “Saved Item” action
2nd Condition (Else): Name the condition as “Not Purchased”. This is for “Not Purchased” action
- Trigger Limit: This indicates how many notifications to be sent in a day per subscriber. Keep the number equal to the number of Notification you want to send in a day.

- Saved Item Notification Creation: Similar to Abandoned Cart Notification you can create a series of Notification for Saved Item campaign. 1st add the delay to ensure notifications doesn’t start right away. Usually for Saved Item Notification, put a delay of 2 days. It depends on your business needs. After entering the details of Notification, click on “Submit”.
- Integrate The Code: Click on your code to view the code. The code has two parts:
Saved: “Saved” code to be called when your user “Save” products in wish-list or in favor.
Not Purchased: “Not Purchased” code should be placed in the final thank you page after
Check Out. Send the code to the developer to integrate the code into your website.
- Launching the Saved Item Trigger: Once the code is integrated, go to Automation -> Trigger Campaign -> Analytics. Select the Campaign and Start.

The Notification will be sent: If the user has Saved the product but didn’t purchase for two days.
Cross-Sell Trigger Push Notifications For eCommerce
Cross-sell is one of the easiest ways to increase the cart value of the user. You already know that user is on the cart page and is about to make the purchase. Since the user is already convinced about your website and the product, it’s the best place to push some relevant product. This way you will be assisting the user with other product complementing his current purchase.
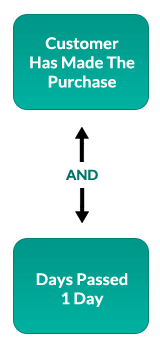
Conditions to trigger push notification for cross-sell:
- A customer has made the purchase
- 1 Day has passed
Notification: Send out a notification with the relevant product. It should include:
- Image of the product
- Link to either product page or list of relevant products
Notification: Send out a notification with the relevant product. It should include:
- Image of the product
- Link to either product page or list of relevant products
- Include discount code if the customer adds any product from the list
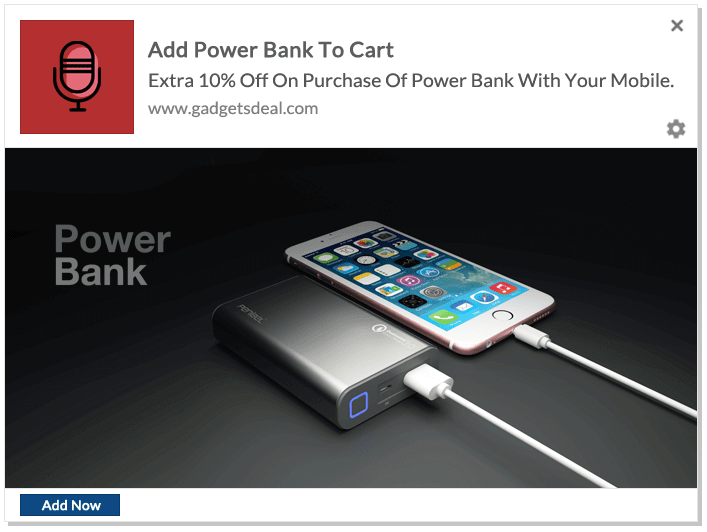
Since the customer has already made the purchase, showing list of other relevant products can add value to his recent purchase. Moreover, if you can show value on shopping bundled products with a discount code, the chances of the customer making the purchase is high. For e.g. customer has bought the latest mobile, you can then cross-promote, power bank and offer a discount on bundle shopping.
Configure the Cross Sell Push Notification Campaign and go live.Cross Sell notification is one the best way to not only increase revenue but also showing the breadth of your product category.
Product Review Trigger Push Notifications For eCommerce
Product review is one of the important sections which every buyer checks out. Products with good reviews are a sure way to an increased sales. For an eCommerce site, getting regular product reviews helps the user to make the decisions. It’s very important to collect reviews from original buyers.
Conditions to trigger push notification review push notification
- The customer has made the purchase
- Days passed after purchase is 15 days
- The customer didn’t give any review
Notifications: Send out a notification with:
- Product Image
- The benefit of providing a review: Everyone is busy and nobody has time to give a review unless there is some benefit. You can offer loyalty points for every product review they submit. Ensure that they are an original buyer of that product else it may seem to be fraud review.
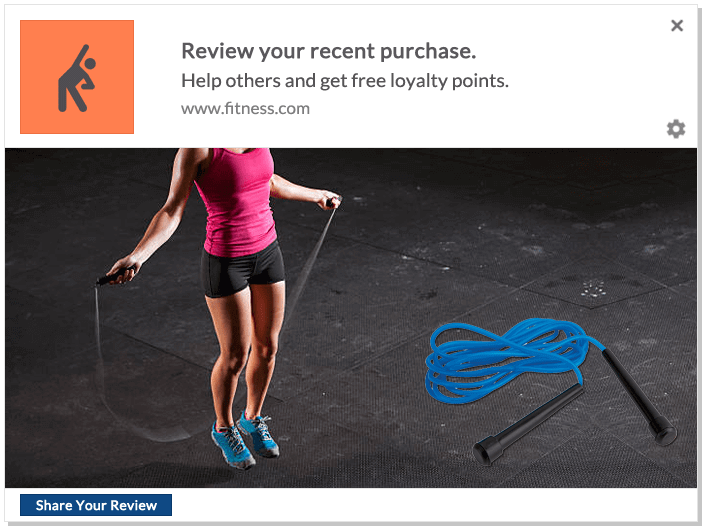
With trigger notifications for review, you can start gathering reviews for your product. This is a very important factor for every new customer. Unless they see reviews, the chances of making the purchase are a little slim. For e.g. the customer has bought the latest Skipping rope. After 15 days of purchase, you can ask about his experience with the product.
Configure the Product Review Push Notification Campaign and go live. Product review is very critical to every online business. The study shows that 88% of online customer take product reviews as a personal recommendation. It has a strong impact on their buying decision.
Welcome Drip Notifications For eCommerce
Whenever user subscribes to your Push Notifications, you should start a Welcome On Board web push notification series. This helps to reiterate your brand image on user mind. The user will also know the benefits of subscribing to your push notifications.
Condition To Send Welcome Drip Notifications:
- Whenever user subscribes to your Push Notification
Once a user subscribes to your Web Push Notification, start your Welcome Drip Notification.
Configure your Welcome Push Notification Drip campaign and go live. Its one of the easiest way to interact with the customer once they subscribe to your notification. You can apply conversion strategies in your welcome notification drip as well. For e.g. offer extra 10% off for the new subscribers and more. Its always good to send a welcome notification to the user when they subscriber. It creates a positive brand on the user’s mind.
Every eCommerce site should implement the trigger push notifications. Web Push Notifications by nature are similar to alerts and has a bigger impact when comes to re-engage with customers. With trigger push notifications, an eCommerce website can re-engage with customers to either bringing them back to the website or complete the purchase. Create different push notification campaigns to engage regularly with your customers. You can also use emojis in push notifications to make it more interactive.

