Looking for a quick guide on how to send Shopify web push notifications and grow your sales?
Push notifications are one of the most affordable growth tools and they’re still pretty new. So, your competitors aren’t competing for attention on push notifications. And the easiest way to send push notifications on Shopify is to use a push notification app.
But which push notifications app do you use? There are so many options out there. And how do you know if the app you’re paying for is easy to use before you pay for it? Do you need any custom coding?
In this article, we’re going to look at how you can send Shopify web push notifications with no coding and in less than 10 minutes!
Let’s dive right in.
Send Shopify Push Notifications for FREE!
Push notifications are a super effective, low-cost marketing tool to help you grow your repeat traffic, engagement, and sales on autopilot.
Why Do You Need Shopify Web Push Notifications?
Imagine getting free traffic on autopilot every time you publish a new blog post without the time-consuming SEO campaigns. If you’re running a Shopify site, you already know how much work it is to promote your content and get readers to keep coming back to your content.
The good news is that there’s an effortless way to generate repeat visitors on autopilot:
- Even if… you’re just starting and your fan base is still tiny
- Even if… you’re running an e-commerce store with hundreds of promos every month
- Even if… you have a mega store that’s already generating a ton of SEO traffic
The answer is:
Shopify push notifications!
The best part is that the notifications pop up even if the subscriber isn’t using a browser. It’s like an email blast, but with a web push notification, your subscribers don’t need to be using an app to see your message.
In short: Sending Shopify push notifications is a simple way to send out a clickable link to your content to anyone who opted in.
With push notification sequences, your audience now has no excuse to ignore you. And unlike social media websites, there is no algorithm throttling your reach to get you to pay for ads.
The coolest part about web push notifications is that you can use them to complement your lead magnets and email opt-in forms!
Pro Tip: If you’re not using lead magnets yet, you should start creating lead magnets with OptinMonster to boost your conversions.
How to Send Shopify Web Push Notifications
Before you get started with Shopify web push notifications, you should select a push notification service. We recommend using PushEngage.
PushEngage is the #1 push notifications software in the world. It’s the perfect choice for creating powerful cart abandonment recovery campaigns. PushEngage is super easy to use and it requires little to no coding at all.
And if you’re running an online store, PushEngage also helps you grow your sales by helping you create automated eCommerce push notifications.
You can get started for free, but if you’re serious about growing your business, you should buy a paid plan.
Here’s what you can get from a paid plan:
- High-converting campaigns including Drip Autoresponders, Cart Abandonment Campaigns, Price Drop Alerts, and Inventory Alerts
- Higher subscriber limits so that you can keep growing your push notification subscriber lists seamlessly
- Higher sending limits so that you can send more push notifications across different campaigns as your business grows
- More ways to target campaigns, including Customer Timezone Sending, Custom Triggered Campaigns, and Personalized Smart Tags
- Goal tracking and advanced analytics to always keep improving the ROI on your push notifications
- Split testing which allows you to test your copy, images, or display rules to see which converts the best
- A Dedicated Success Manager to help you with Success Scripts, Behavior Automation, and Follow Up Campaigns
And these features are built to help small businesses grow. Take a look at our case studies and you’ll know how all kinds of businesses have enjoyed a lot of success from PushEngage’s push notifications.
Let’s look at how to send Shopify web push notifications step by step.
Step #1: Install PushEngage to Your Shopify Site
Then, head over to the Shopify account:
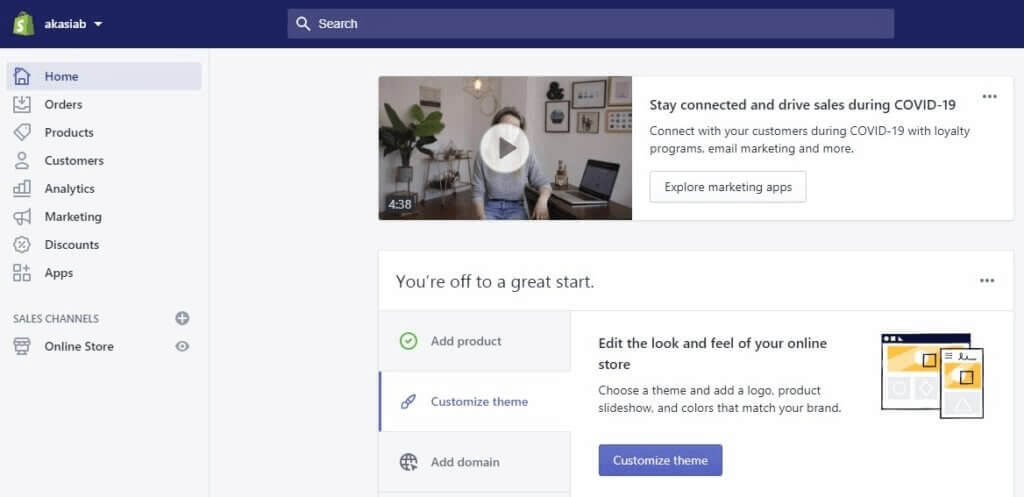
And click on Apps » Visit the Shopify App Store:
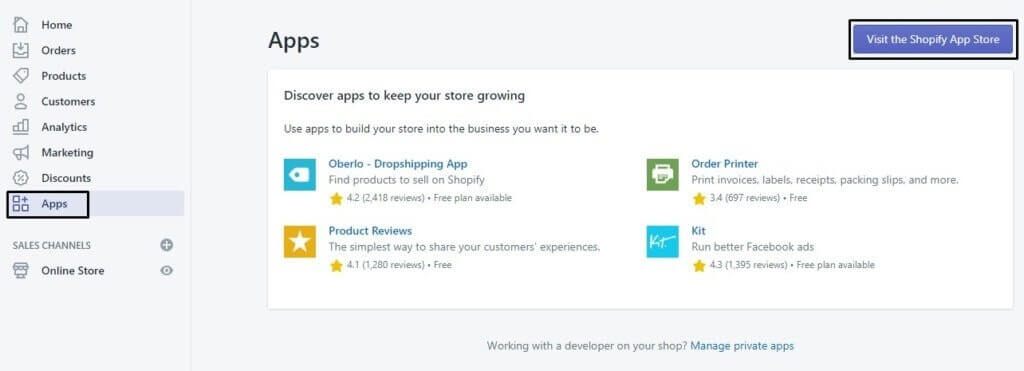
Next, search for the PushEngage Push Notification Shopify App:

And hit Install App:
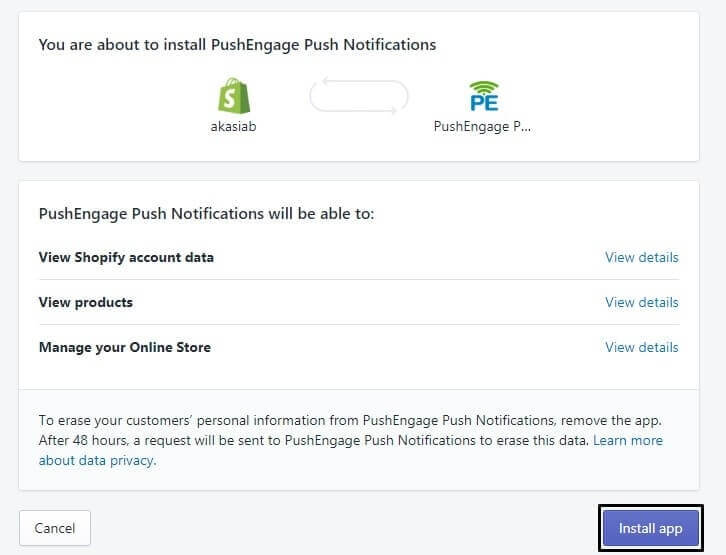
You’re almost done.
Next, you’ll want to head over to your PushEngage dashboard and configure your PushEngage account so that you can send your notifications instantly.
Step #2: Configuring the Shopify Web Push Notifications Opt-In
Finally, in your PushEngage dashboard, go to Design » Popup Modals:
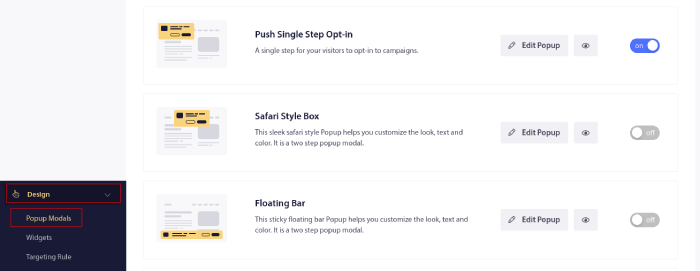
From here, you can customize your push notification opt-in. If you need help with that, you should check out this article on how to create a custom push notification opt-in.
If you need some inspiration, you can check out this article on high-converting push notification opt-ins.
Step #3: Create Welcome Web Push Notifications
Whether you have a new store or an established one, website welcome messages are absolutely essential. Welcome push notifications are great for:
- Confirmation: You want to confirm that your new subscriber is indeed subscribed to your web push notifications.
- Re-engagement: Welcome campaigns are a great way to get your subscribers to come back to your site.
- Sales: You can give your new subscribers a welcome offer with discounts, freebies, and coupons.
Let’s create a welcome push notification campaign now. Head over to your PushEngage dashboard and go to Campaign » Drip Autoresponders » Create New Drip Autoresponder:
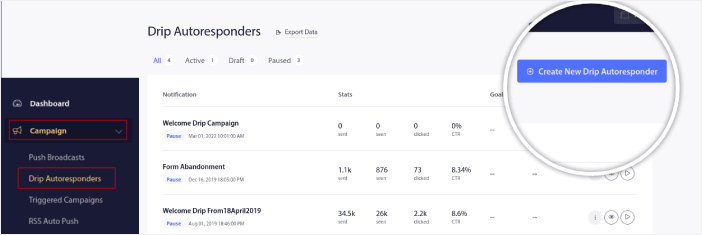
Give your drip campaign a name that you can easily remember. Then, set the first push notification to go out immediately after a visitor subscribes to your push notifications.
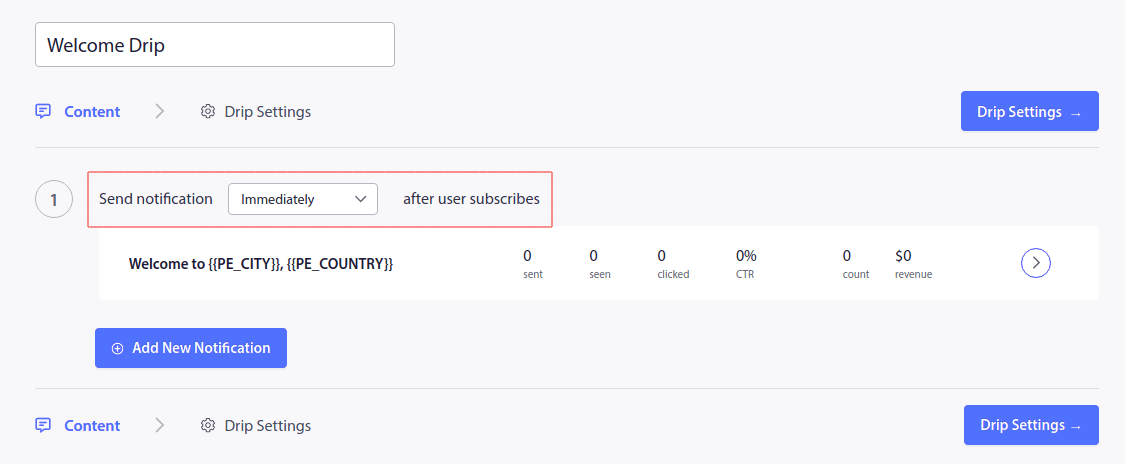
You can edit the notification to create custom content for your welcome message. When you’re done, click the Add New Notification button to add more notifications to the sequence. You can edit the new notifications and set a custom delay between each notification.
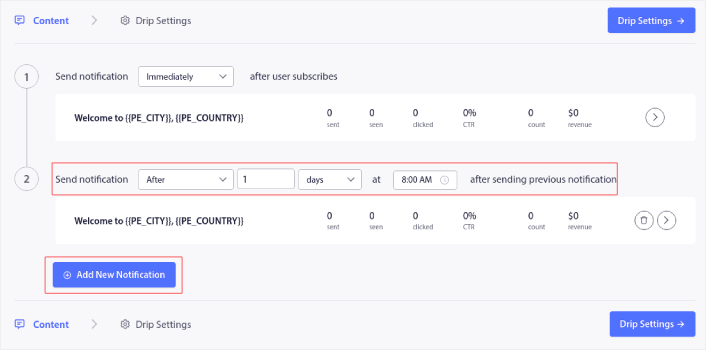
You can add as many notifications as you like, but we recommend creating a welcome drip with 5-7 notifications.
After that, select your audience in Drip Settings:
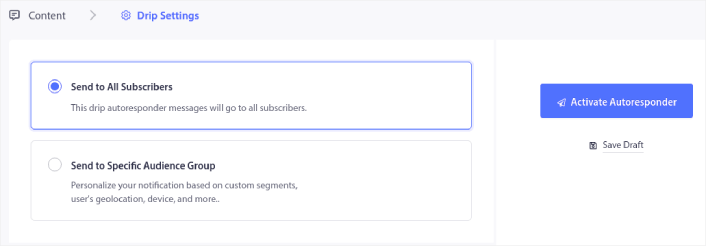
You can send different welcome drips for different segments by using the Send to Specific Audience Group option. This is especially useful when you’re segmenting visitors when they opt for push notifications. When you’re happy with your targeting, click on the Activate Autoresponder button. And you’re done!
NOTE: You can schedule real-time notifications as well. So, if you want to send notifications from a mobile app on Android or iOS, PushEngage is a great choice for you.
You have successfully set up Shopify push notifications on your site. It’s time to head back to your PushEngage dashboard and start creating your push notification campaigns.
What to do After You Send Shopify Web Push Notifications
Now that you’ve already started sending Shopify web push notifications, we recommend doubling down on it. There are many different eCommerce push notifications that you can send to grow your business.
Our advice would be to get started with push notifications as they’re the most cost-effective cart abandonment tool. Push notifications are extremely powerful and you can create multiple automated campaigns using them. Not convinced? Check out these epic resources:
- 7 Smart Strategies to Boost Customer Engagement
- How to Get More Traffic to Your WordPress Blog (9 Easy Ways)
- How to Boost Your Web Push Notification Opt-In Rate (7 Ways)
And the best part is that PushEngage is priced in a way that makes it a good fit at every stage of growth whether you’re looking to start, grow, or scale your business. The philosophy behind PushEngage is to empower small businesses to compete with big brands.
So, if you haven’t already, get started with PushEngage today!
