Looking for an easy way to send back in stock Shopify notifications for your eCommerce site?
Let’s say that a website visitor loved your product and tried to buy it, but the store was out of stock. As soon as you restock your supplies, you need to send out a notification to that website visitor. This is known as a back-in-stock alert or an inventory alert.
Why? Simple: It’s an easy sell. That visitor already loved your product and tried to buy it. So, you know that they’re definitely interested. A simple push notification can generate a ton of extra sales and drive more revenue to your business on autopilot.
It’s super easy to set up back-in-stock notifications on any website. But it can be pretty confusing if you’re doing it for the first time.
This article is going to help you set up back in stock Shopify notifications in less than ten minutes.
Sounds good?
Let’s dive right in!
Send Back In Stock Shopify Push Notification Campaigns Today!
Push notifications are a super effective, low-cost marketing tool to help you grow your repeat traffic, engagement, and sales on autopilot.
How to Create Back In Stock Shopify Notifications
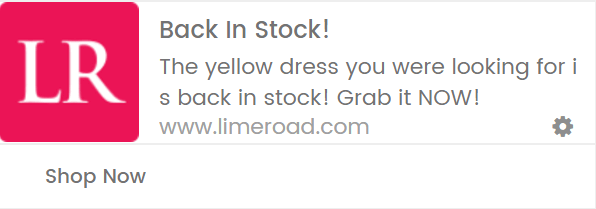
Back in stock Shopify notifications allow you to convert interested browsers into paying customers. And if you follow our tutorial step by step, you’ll be able to send back in stock alerts like this one:
You can even modify the campaign to send inventory alerts like this one:

Let’s dive in.
How to Create a Back In Stock Push Campaign
Before we start creating a back in stock Shopify push notification campaign, we need a push notification Shopify app. I recommend using PushEngage to send push notification campaigns.

PushEngage is the best push notifications service in the world. And we’re not just talking about the free version. It lets you connect with visitors after they leave your site with targeted push messages.
PushEngage is our first choice for push notification services and tools because it’s:
- Super easy to use
- Got a visual campaign builder with pre-built templates which requires little to no coding to set up
- Easy to set up fully automated push notification campaigns for any kind of site
- Fully equipped with Android and iOS SDKs to quickly develop, deploy, analyze, and manage app push campaigns
- Built with multiple options to send personalized push notifications for higher click rates
- Equipped with custom goal tracking, UTM parameters, and advanced analytics
- Got powerful push notification A/B testing options
And this is barely scratching the surface. Check out PushEngage’s full list of features before you go any further. The most incredible part about PushEngage is that it has a forever-free plan that you can try out before making a purchase decision.
You can also check this guide on how to send Shopify web push notifications for an easy way to get started.
You’ll see that PushEngage is hands down the best bet if you want to build traffic, engagement, and sales for your business. And if you’re on a budget, you can always get a little creative with your push notifications. Let’s create our back in stock Shopify push notifications now.
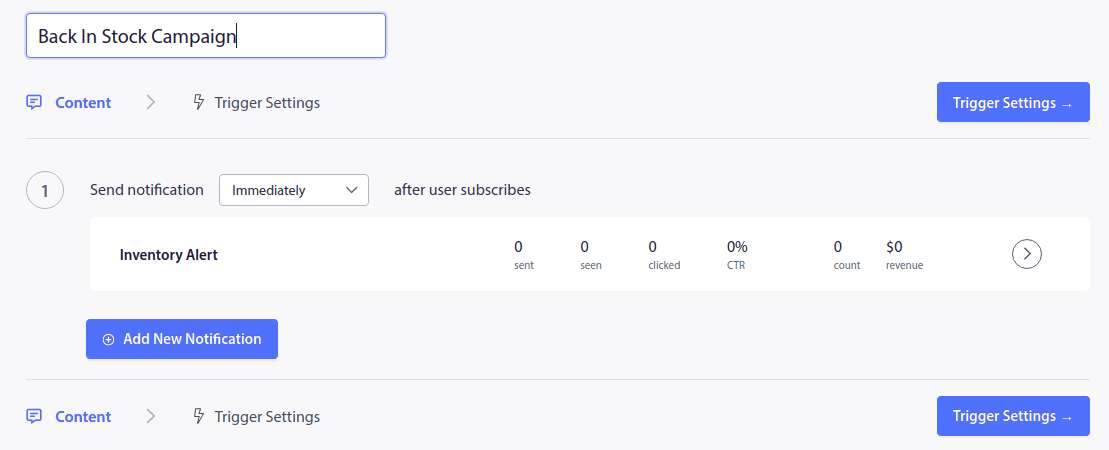
Step #1: Create a New In Stock Alert
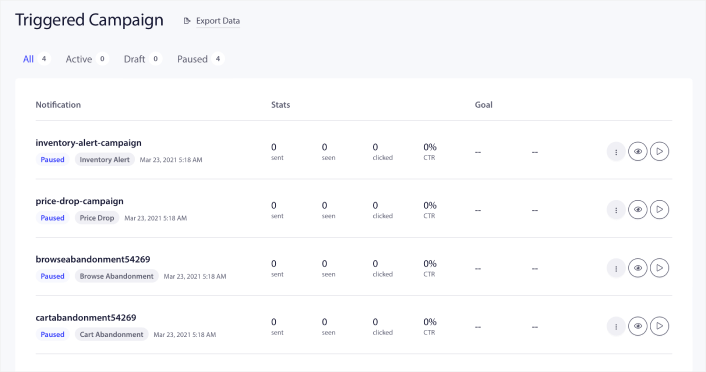
Head over to your PushEngage dashboard and go to Campaign » Triggered Campaigns:
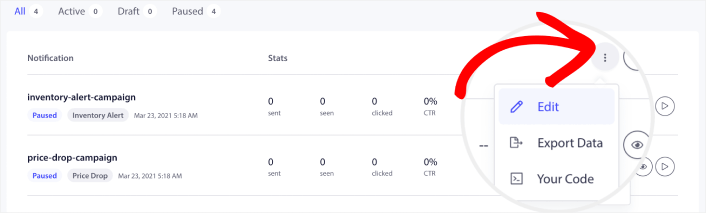
Then, select the template for inventory-alert-campaign, click the options button, and click on Edit:
And you should see a new screen to edit your campaign that looks like this:
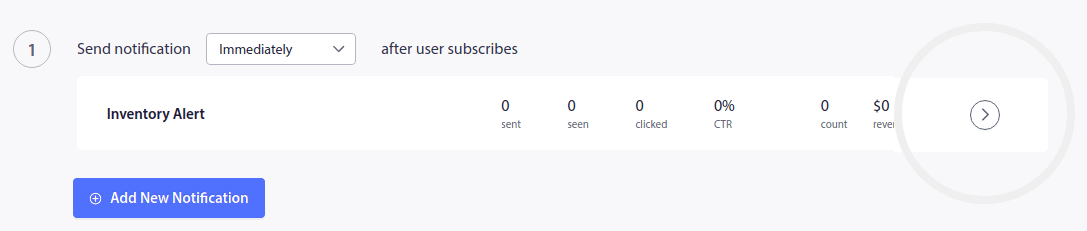
Step #2: Draft Your Notifications
Next, to edit your first notification, click on the arrow mark next to the notification:
Then, edit your push notification copy under Notification Look and Design:
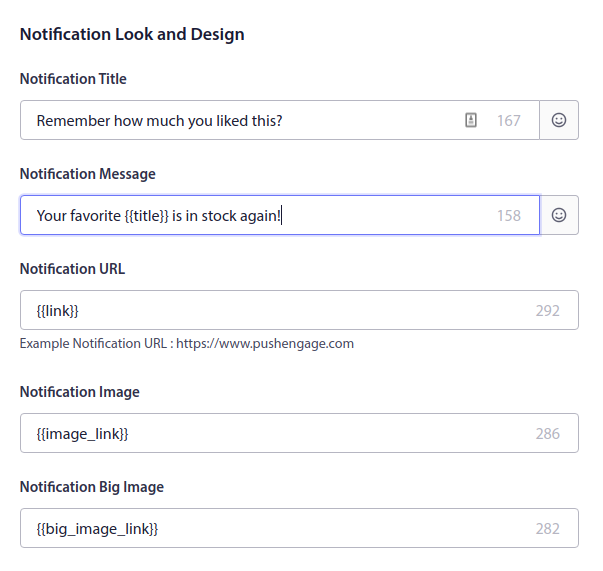
As you can see, there are a bunch of custom tags such as {{title}} and {{link}} in the push notifications. These tags are called attributes. We talk about PushEngage attributes in more detail in our article on how to send personalized push notifications with attributes.
In simple terms, attributes help you automatically personalize your back in stock Shopify alerts. They are meant to dynamically fetch your customer’s saved personal details and product details such as the product image, product name, and product URL.
This way, you can send custom push notifications very easily. We’ll talk about setting up the attributes in more detail soon. First, let’s finish up your first notification by adding call to action buttons:
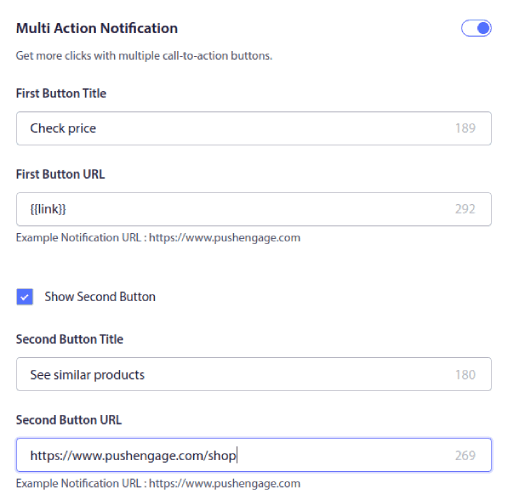
With PushEngage, it’s super easy to create multiple call-to-action (CTA) buttons with different URLs. All you have to do is enable the second push notification CTA by checking Show Second Button.
You can also set a custom Notification Duration:
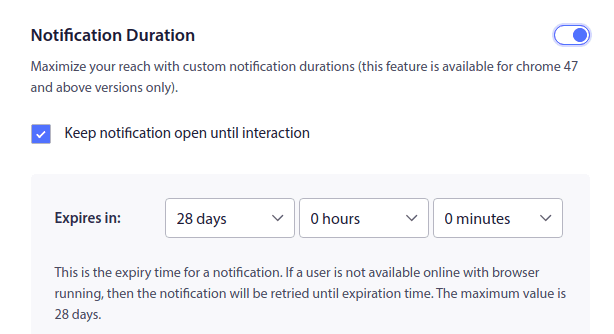
Setting a notification duration allows you to terminate notifications when an offer expires. If you don’t set an expiration date to your notifications, they just keep stacking up in your subscriber’s notification center until they see it. At first glance, this can look super spammy and that’s a great way to lose a lot of subscribers very quickly.
When you’re done, click on Trigger Settings and set Trigger Limits for your campaign:
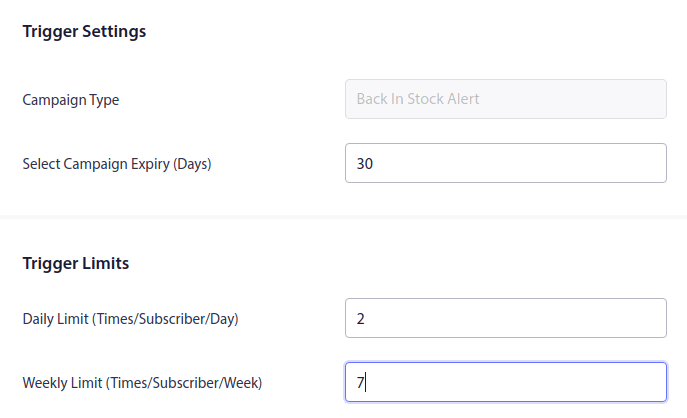
Trigger limits make sure that you don’t spam your subscribers. If you set a daily limit of 2, your subscribers will get two push notifications from you in a day at most in a day.
You can also set up UTM parameters to track push notifications more effectively:

The PushEngage Shopify plugin automatically adds the necessary code for your back in stock Shopify alert. All you need to do is activate the campaign when you’re done editing it.
Step #3: Activate Triggered Campaign
Now, all you have to do is hit the ‘Activate Triggered Campaign’ button:
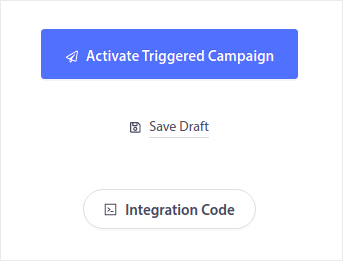
And you’re done! Your site will now send out automated back in stock Shopify notifications.
What to Do After Creating a Back In Stock Shopify Notification
Back in stock notifications are one of the most powerful push notification campaigns you can create for Shopify. Now that you have one up and running, you should also check out abandoned cart notifications, browse abandonment notifications, and price drop alerts.
We recommend that you use PushEngage to start your journey into push notifications. Check out these powerful resources to get started quickly:
- How to Add Shopify Push Notifications to Your Site
- Best Shopify Apps for a Clothing Store
- Best Shopify Trust Badges to Boost Conversion Rates
- How to Send Automated Emails in Shopify (The Easy Way)
PushEngage is the #1 push notifications software in the market and it’s really easy to create powerful automated notifications using PushEngage.
So, if you haven’t already, get started with PushEngage today.
Thankfully, push notifications are not that complicated to set up. And you can always check out this article on automated campaigns th


