Notice: There is no legacy documentation available for this item, so you are seeing the current documentation.
PushEngage audience group feature in enhances the efficiency, effectiveness, and personalization of your push notification campaigns allows you to group together your custom segments, geo-locations, and people who interact with your push campaigns.
Audience groups allow for more precise targeting. By combining different criteria into one group, you can send more personalized and relevant notifications to your users, improving engagement and response rates. Instead of manually selecting multiple segments every time you want to send a campaign, you can select the pre-defined audience group. This saves time and effort, especially when dealing with large subscriber bases.
In this guide today, you will learn how to target your inactive subscribers using Audience Groups. You can try to retarget them for some time with more targeted messages before cleaning them up.
Before You Start
This guide assumes that you have activated PushEngage. If not you can get started here.
Audience Group is available in our Business plan & above.
Creating an Audience Group
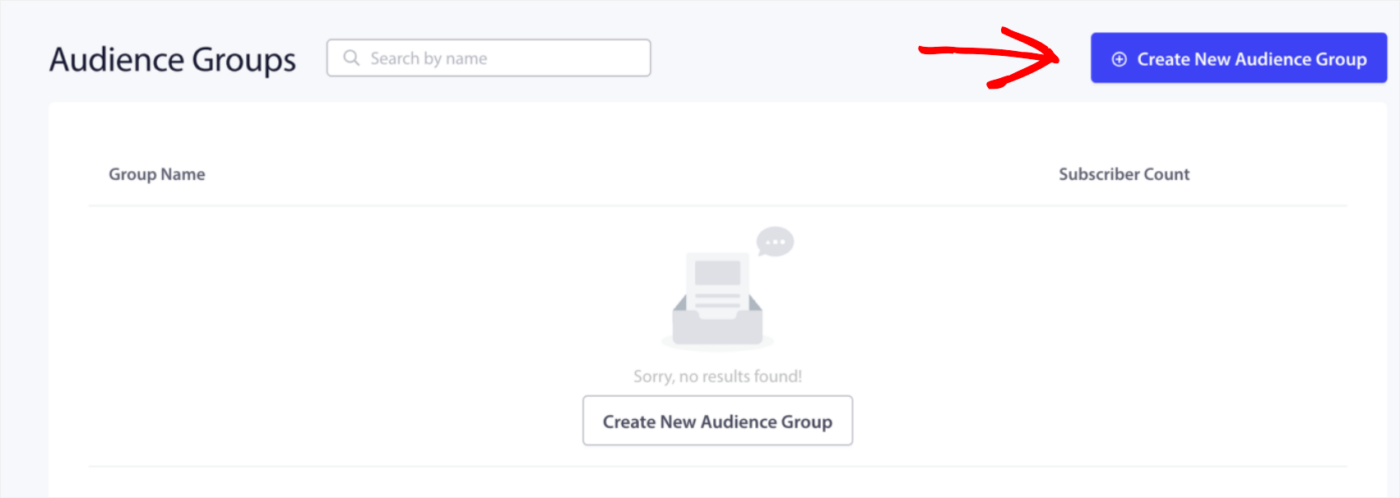
In your PushEngage account, go to the Audience section and select Audience Group.
Click on Create New Audience Group and enter a name for the group.


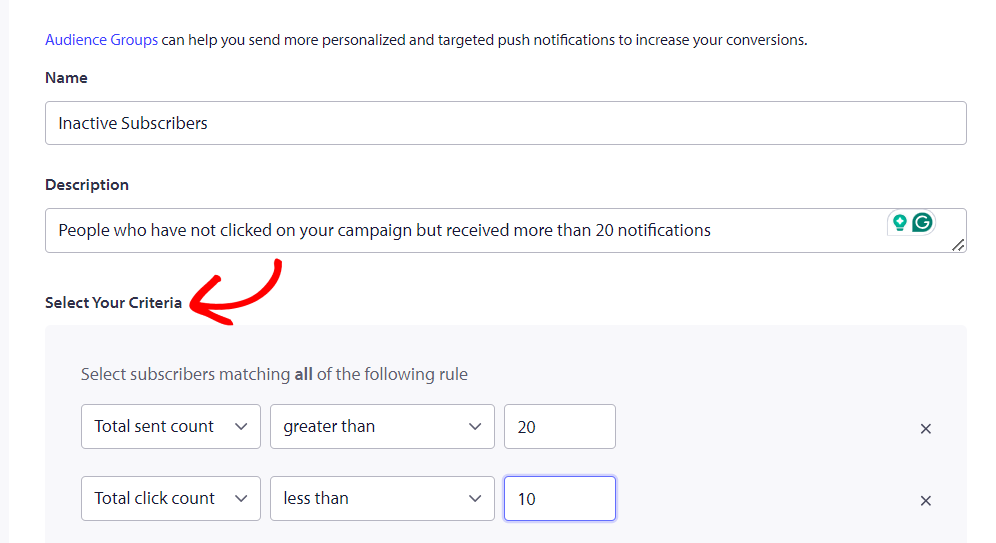
You can also add a description to help you and your team understand the purpose of the audience group at a glance.
Now, you can add the criteria to group the inactive subscribers.
You can filter based on specific user attributes, existing user segments, web browsers, and different devices. Additionally, you can narrow down by geographical locations such as countries, states, or cities. Subscription dates and last-click activity are also useful criteria for targeting users.
With this feature, you can retarget users who haven’t clicked on your notifications in the past few days. For instance, you can create a specific audience group for these users by setting criteria like this – Total sent count is greater than 20 or and click count is less than 10.
This enables you to send more personalized notifications to your least active subscribers, thereby boosting their engagement. Moreover, incorporating additional relevant criteria allows for further segmentation within this audience group, ensuring that your notifications are finely targeted and effective.

Sending Push Broadcast to Audience Group
Now that the Audience Group is created, let’s create a Push Broadcast.
Navigate to Campaign » Push Broadcast. Either choose from the template or create Push Broadcasts from scratch. Here is the guide to creating Push Broadcasts.
As you have to target inactive subscribers, you can choose the specific Audience Group rather than sending it to your entire subscriber base.
You click on send/schedule to send push broadcasts to your inactive subscribers.
Once you have sent them enough campaigns and still do not see very high re-engagement rate. You can also clean up your cold or inactive subscribers. This guide explains how you can manage your list by cleaning up inactive subscribers.
If you run into any issues, please feel free to contact us by clicking here. Our support team will be able to help you.
