Drip Autoresponder is very powerful and you can get higher engagements with your subscribers. Drip Marketing is mostly known in e-mail marketing where you can send a series of promotional e-mails to users. But you can send the drip to your customers in the form of a web push as well. You can use drip in e-commerce business to increase sales and re-engagement.
Once you have created a series of notification as a drip campaign using your PushEngage account and if you wish to switch or interchange the notification in the series you can do it easily with our update. You can just drag and drop the notifications and set the expiry, scheduled time.
For this, you must have at least 3 notification in a series. You cannot change the first notification of the series with drag and drop hence would need to edit it manually. However, you can change the order for the rest of the notifications.
Steps To Reorder Drip Notification
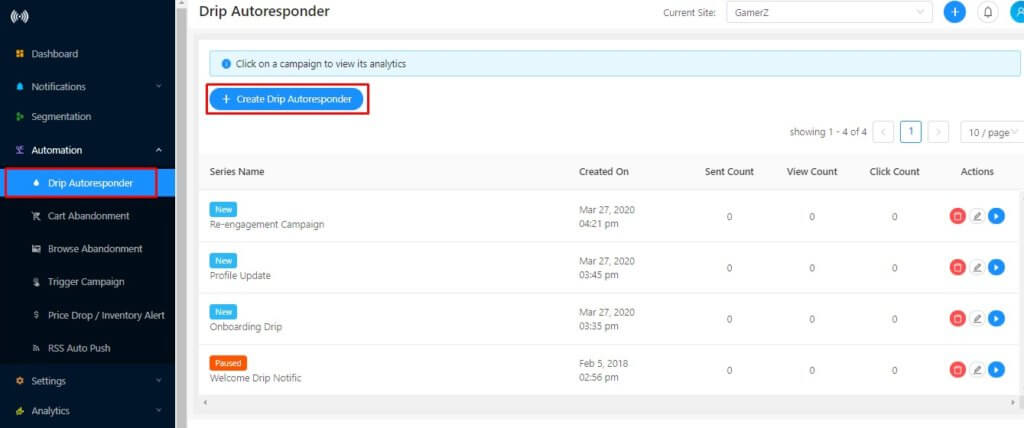
Step 1 – Navigate to Automation > Drip. Now click on Create Drip Autoresponder

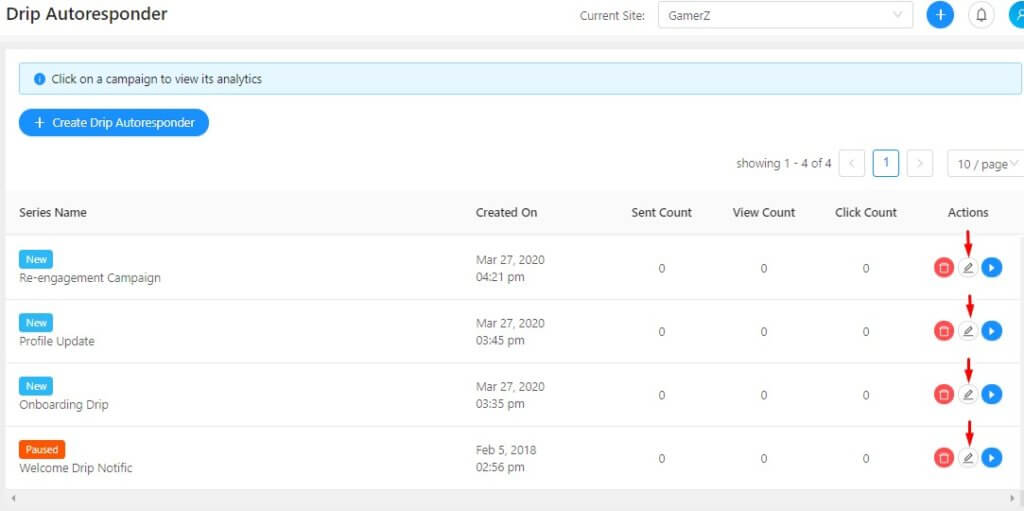
Step 2 – Click the edit button any of the drip campaigns you’ve created before that you would like to edit now.

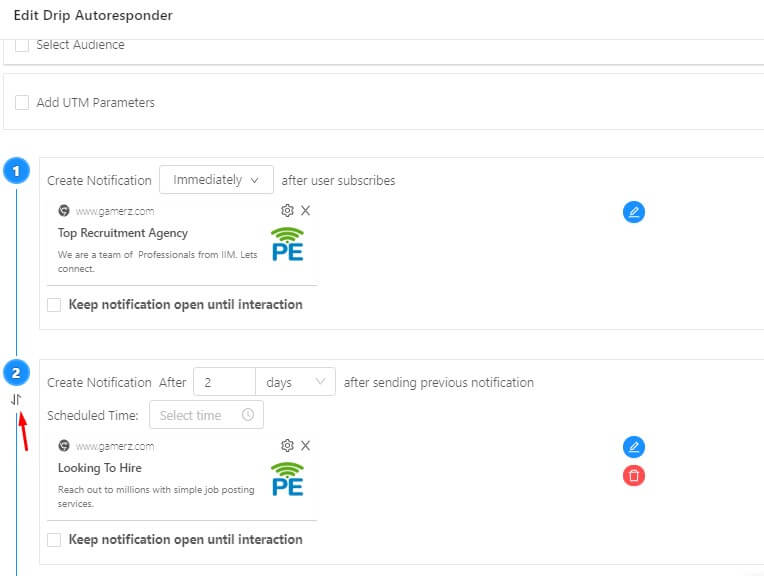
Step 3 – Click on the arrow button of the drip notification you wish to reorder. Drag it and replace it in the series of notification accordingly.

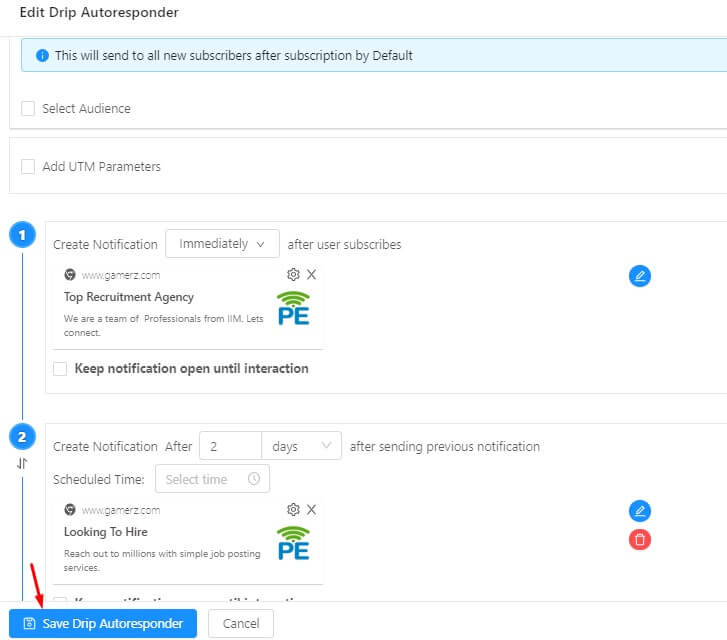
Step 4 – Edit the schedules time of the notification and once it is done, save the campaign.

Note – When you reorder the drip the scheduled time remains the same. So if you move the second drop notification to the third number and both the notification has different timing please ensure you have changed the scheduled time and expiry time as well.
Drip Automation is available from the Premium Plan, so go ahead and register and try it out. For more questions email us at [email protected] or you can check out the support for further queries.
If you want Drip Automation as an add on to your basic plan you can let us know.
