Looking for a quick and easy way to add GTM to WordPress?
Google Tag Manager makes it easy to install tracking scripts and other Javascript snippets on your site without having to manually edit your website’s code each time. It acts like a bucket to store your push notification scripts and more. But GTM has a script of its own that you must place into your website’s code.
So, how do you do it? Do you need coding experience? Where does the tracking script go on your site?
In this article, we’re going to check out how to add GTM to WordPress the easy way. And we’ll do it in 10 minutes without any coding at all. Sounds good?
Let’s dive in.
How to Add GTM to WordPress
Google Tag Manager is a powerful tool and it can help manage multiple tracking code snippets or ‘tags’ without using code. And it’s super easy to add GTM to WordPress. We recommend using the WPCode plugin to do it.
WPCode is a simple, easy to use plugin that allows you to insert code snippets in WordPress without having to edit the code manually. It saves you a ton of time and reduces the number of plugins you need to run your site. Using WPCode reduces unwanted code on your site and improves your site’s loading speed.
Let’s get started.
Step #1: Create Your Google Tag Manager Account
First, you’ll need to create a Google Tag Manager account before you add anything to your WordPress site. Head over to the Google Tag Manager website and then click the Start for free button.

Next, you need to sign in with your Google account and click on Create Account:

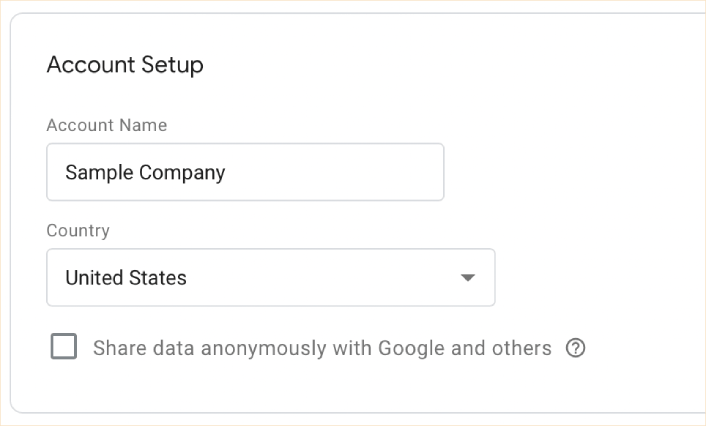
Enter your account name and choose a country in the Account Setup box:

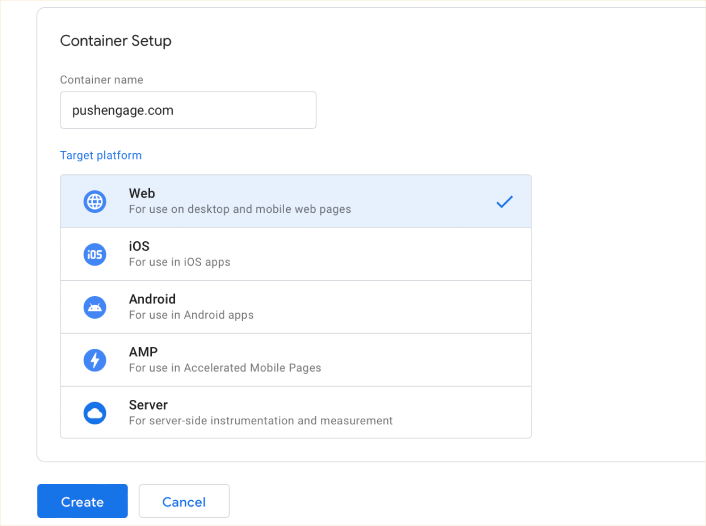
Next, you need to set up your container. A container is the collection of tags, triggers, and all configurations installed on a website. Select Web under Where to use container and give the container a name under Container Name and click Create:

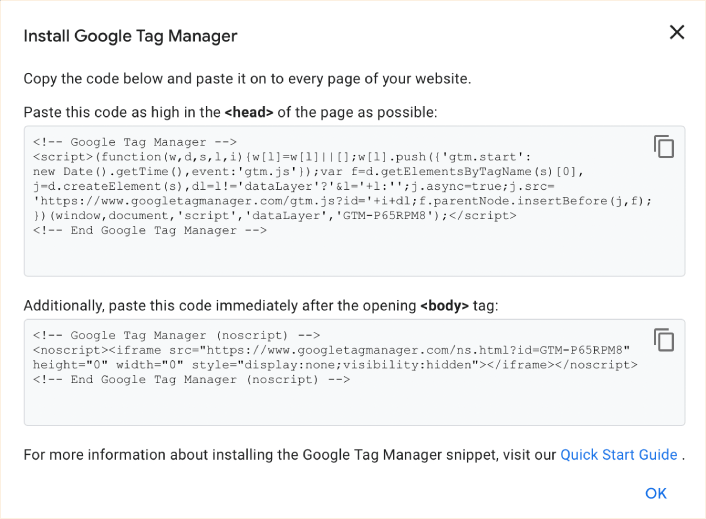
Accept the Google Tag Manager Terms of Service Agreement to proceed and you’ll see the Google Tag Manager Snippet to add GTM to your WordPress site.

Step #2: Add GTM to WordPress
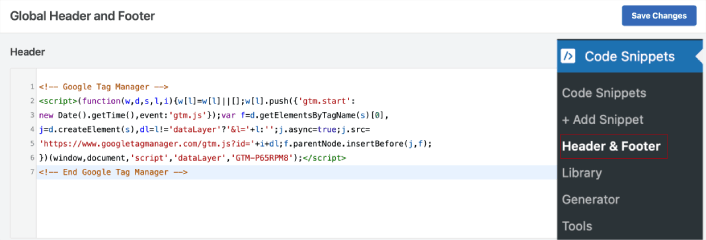
Next, we’re going to install and activate the WPCode plugin as mentioned. If you’re not sure how to do that, check out this article on how to install a WordPress plugin. Then, in your WordPress dashboard, head over to Code Snippets » Header & Footer:

Add the code snippets from GTM in the sections marked as Head and Body as required. The GTM snippets popup will tell you which snippet goes where. When you’re done, hit the Save Changes button.
That’s it! You’re all done. You have successfully managed to add GTM to WordPress. You can now add tracking scripts in your GTM account and publish them from Google Tag Manager. And you’ll never need to edit the code on your site to do it ever again.
What to do After You Add GTM to WordPress
After you add GTM to WordPress, you should go ahead and set up your tracking scripts. But the easiest way to start things off is to install push notifications to your site. You can add push notifications to your site using GTM. You should check out our tutorial on how to create abandoned cart push notifications using GTM.
Push notifications are incredibly powerful marketing tools that can help you grow your site’s traffic, engagement, and sales on autopilot.
- How to Add a Web Notifications WordPress Plugin to Your Site
- 7 Smart Strategies to Boost Customer Engagement
- How to Get More Traffic to Your WordPress Blog (9 Easy Ways)
- How to Boost Your Web Push Notification Opt-In Rate (7 Ways)
And if you haven’t already, go ahead and give PushEngage a try. PushEngage is the #1 push notification service in the world. So, if you’re serious about growing your business, you should invest in PushEngage.

