Hello, Engagelings.
Exciting news: we just added a MAJOR upgrade to RSS push notifications on PushEngage.
We launched RSS autopush campaigns a while back and it became super popular. But, there were limitations to what you could do with RSS notifications. So, we’ve added some more powerful features to our RSS feed campaigns.
Here’s a quick look at the highlights:
- Create multiple RSS feed
- Start/Pause/Delete your RSS push notifications any time you want
- Add a large image for your RSS feeds
- Dynamically select the large image for your RSS feed push notifcations
- Set a notification icon dynamically from the RSS feed or upload your brand icon
- Automatically promote your latest content by scraping the RSS feed in intervals you decide
- Select the audience group you want to target for better personalization
- Add notification expiry rules
- Set custom UTM Parameters
- Get detailed campaign analytics for each RSS feed campaign
We’ve also made it super easy to use. A lot of work went into this upgrade and we think that you’ll love it. It’s also a major update, so there’s a LOT to unpack.
Let’s dive in.
Why Send RSS Push Notifications?
Constantly creating content and managing a blog is hard work. But if you’re running a serious business, you know that just creating content isn’t good enough. You have to be able to promote your content as well.
And push notifications are a great way to gain subscribers in a cost-effective way. What makes push notifications so good as a marketing tool is that they can be completely automated.
That’s where RSS push notifications come into the picture.
If you set up RSS push notifications the right way, every time you publish content on your site, your subscribers automatically get a push notification that brings them to your content.
Make no mistake, though. RSS push notifications are still less personal than other automated push notification campaigns. So, we recommend using a mix of different campaigns to maximize your growth. For instance, you need to enable eCommerce push notifications if you’re running an eCommerce site.
Create Multiple RSS Feed Notifications
Once you’ve installed PushEngage on your site, head over to your PushEngage dashboard and go to Campaign » RSS Auto Push and click on Create New Campaign:
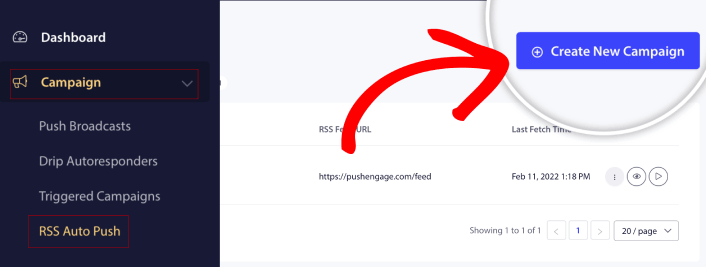
With this new upgrade, you can now create and send multiple RSS feed notifications for different segments and Audience Groups. Your site doesn’t have only one RSS feed. You can create RSS feeds for each category of content on your site.
And it takes very little time to do. But creating multiple feeds allows you to send more personalized RSS push notifications.
Let’s say that you have three audience groups that care only about supercars, bikes, and trucks respectively. You can easily create different RSS feed URLs for each category and send your subscribers push notifications about content that they actually care about.
The result? You’ll see a spike in your site engagement even with a simple RSS autopush campaign!
Start, Pause, and Delete Your RSS Campaign Any Time
The biggest problem with RSS campaigns, even email RSS campaigns, has been scheduling. It’s super difficult to control how many posts you send. And it was even more difficult to pause your campaigns.
Until now!
With PushEngage, you can easily start, pause, or delete any RSS feed campaign at any time. This is a super useful feature if you’re running multiple campaigns.
Let’s say you’re running a Black Friday push notification campaign. Your subscribers should focus only on your promotional offers. But at the same time, you can’t stop publishing new content until the holiday season is over. That’s a great time to hit pause on your RSS feed campaigns.
Since you can run multiple RSS campaigns now, you can even keep sending regular content to subscribers that you aren’t targeting with your promo.
Easy Image Customization Options
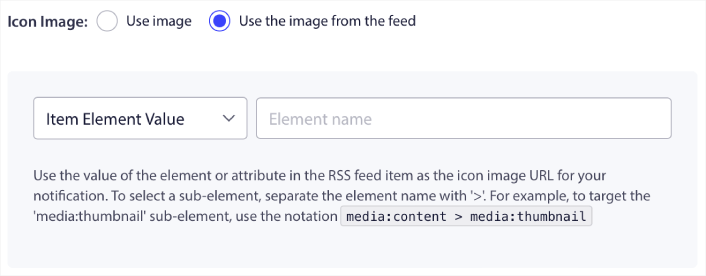
You can customize both the notification icon and the notification’s large image directly from your RSS feed. For the notification icon, you can either upload the icon manually:

Or, you can set up a pattern for PushEngage to dynamically scrape the notification icon from your RSS feed:
Similarly, you can either allow PushEngage to automatically find the large image for your posts:

Or, you can customize the kind of large image you want by fetching it from your RSS feed:
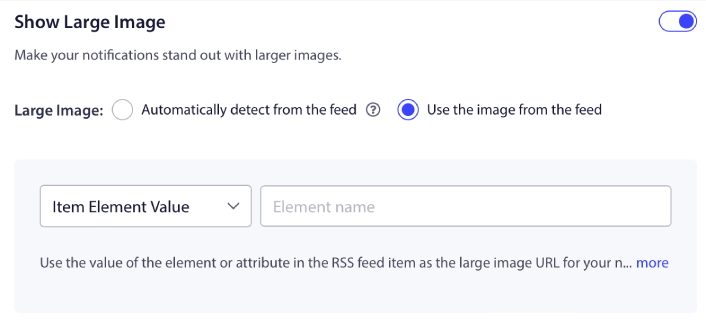
CAUTION: Only use the advanced image scraping options if you’re able to read the XML in an RSS feed. If you’re not comfortable with XML, you should let PushEngage decide your notification large image for you and you should manually upload the notification icon.
Set RSS Notification Frequency
You can also set the Campaign Frequency for each RSS campaign:

The Campaign Frequency is how often the RSS feed campaign looks for new content in your blog to send an automated push notification. The minimum value is 15 minutes and the maximum value is 7 days.
We recommend looking for content to promote once every 2 days unless you’re a news agency. For news agencies, you should keep it to 15 minutes. Keep in mind that PushEngage will only look for new content after you set up and publish your RSS feed campaign.
Set Push Notification Duration
The push notification duration is how long the notification stays in your subscriber’s notification tray before it get automatically deleted.
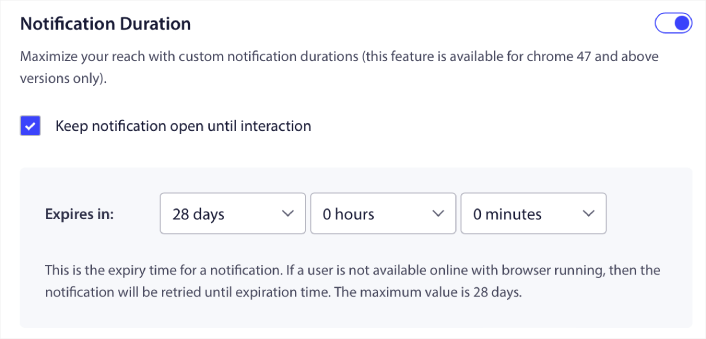
If you don’t want to overwhelm your subscribers with a bunch of unread notifications, it’s probably best to let the push notifications expire in a couple of days.
Unlike broadcast notifications or even other automated push notifications, you can’t really schedule RSS push notifications by timezone or a specific sending time. So, you always have the option to keep the notification open until your subscriber interacts with it, even within the expiry limit.
Set UTM Parameters to Track Your Notifications
You can also set up UTM parameters to track the push notifications:
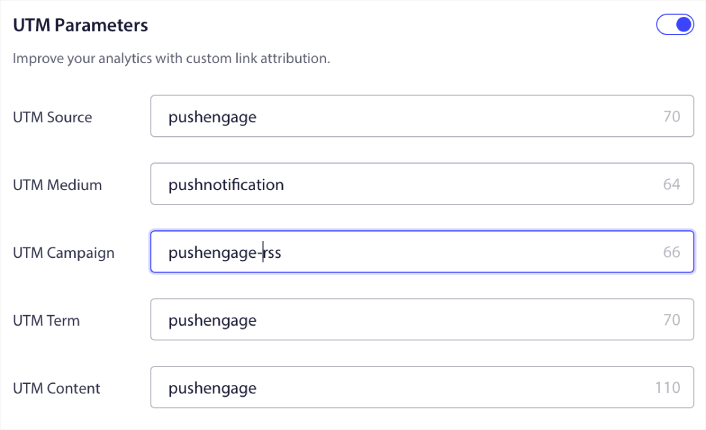
This way, you can attribute your traffic from these push notifications easily in Google Analytics. Of course, you can also get detailed analytics for your entire campaign right from your PushEngage dashboard.
Target a Specific Audience Group
The biggest upgrade to RSS push notifications is your option to select an Audience Group to send targeted notifications. You can either send the RSS feed campaign to all your subscribers, or you can create Audience Groups to send personalized push notifications even from your RSS feed.
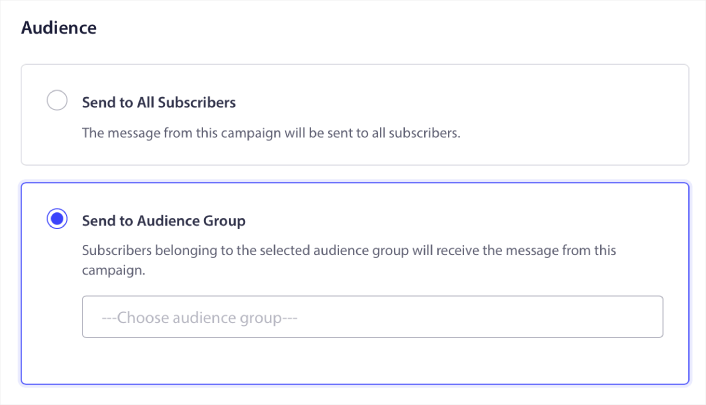
Now, you can still send out automated push notifications by setting them up once. But it’s even better because you can choose what kind of content you want to promote to specific audiences.
What Else?
We know that growing a business is hard work. At PushEngage, we’re always looking to improve our product and your experience. We launched this new feature to help you get even more value out of your PushEngage subscription.
Thank you so much for reading this announcement.
If you have any questions, our Customer Success team is here to help. Just start a conversation on Live Chat or check out our contact page.
And thank you for using PushEngage. Whether you’re using the free version or the Enterprise version, you’re just as important to us. The new RSS autopush features are meant to help you succeed and we wish you all the very best.
Let us know your thought in the comments below and if you haven’t already, get started with PushEngage today!
