Notice: There is no legacy documentation available for this item, so you are seeing the current documentation.
Would you like to enhance customer engagement through web push notifications in your WooCommerce store? One effective way to do this is by setting up push notifications using PushEngage. In this guide, we’ll walk you through the process of setting up and managing push notifications in your WooCommerce store. PushEngage will serve both admin & customers.
Before You Start
Ensure you have the PushEngage Plugin installed on your WooCommerce store. This guide assumes you already have the WooCommerce and PushEngage Plugin.
Connecting PushEngage with WooCommerce Store
It only takes a few clicks in setting up or connecting the PushEngage Account to your WooCommerce Store.You can go ahead and connect your existing PushEngage account with WooCommerce store, or you can also sign up with a new account.
If you already have the WooCommerce Store connected to PushEngage Account, you can skip this and move to Managing Push Notification Settings.

Once you have created account/connected existing account. Please set up your Popup so you can start with building your web push subscriber list.
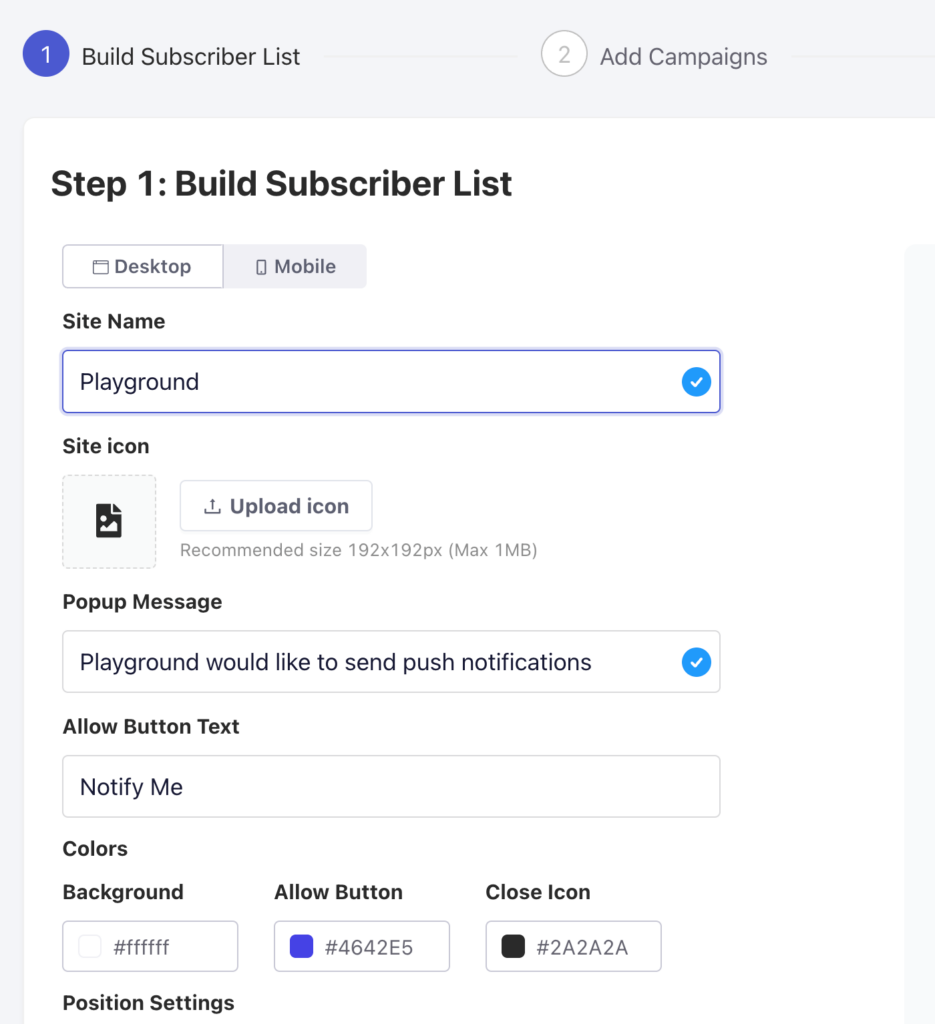
Once your Popup Modal/Subscription Opt-in is customized as per your brand color and message, you can click on Next Button.
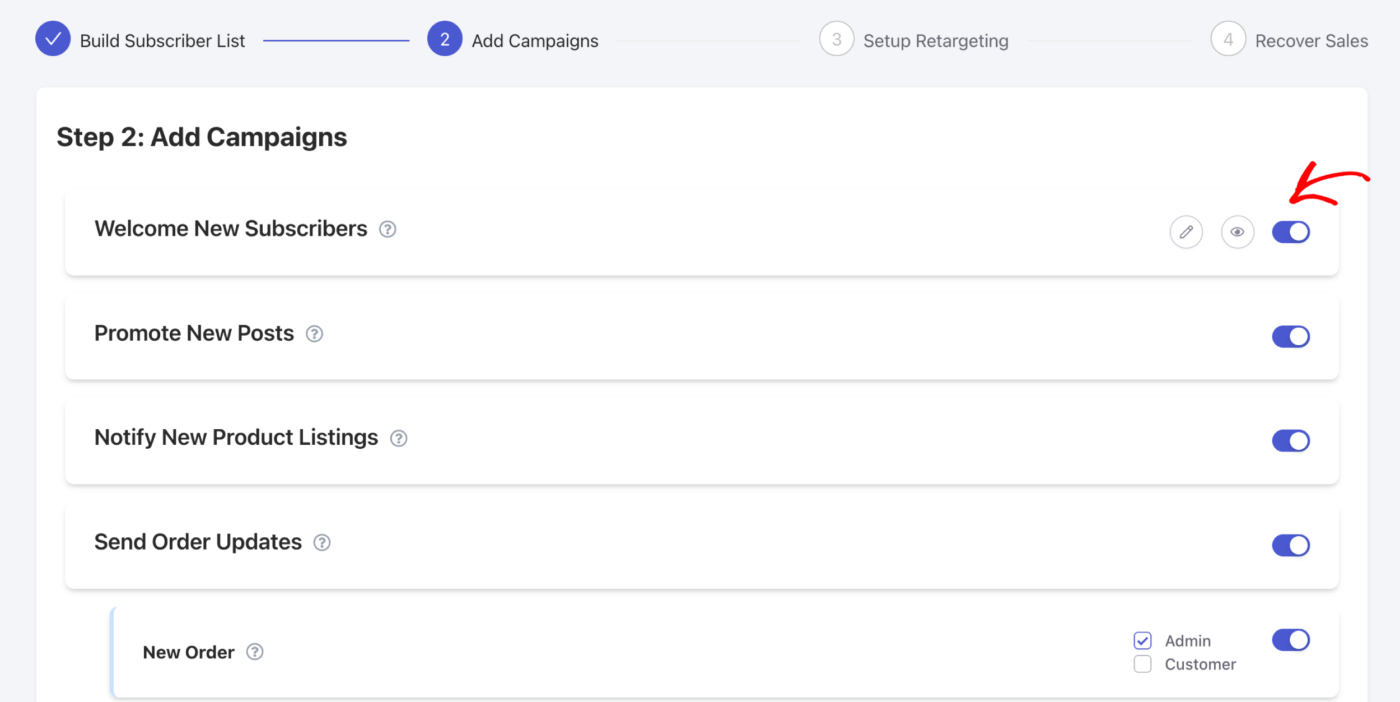
You can choose the initial campaigns you want to enable and even check the preview of these campaigns. You can decide the Audience and choose to send to either Admin Users or Customers. There is also an option, to edit the campaigns here as well. If you are unsure, you can move forward to next step and edit later.
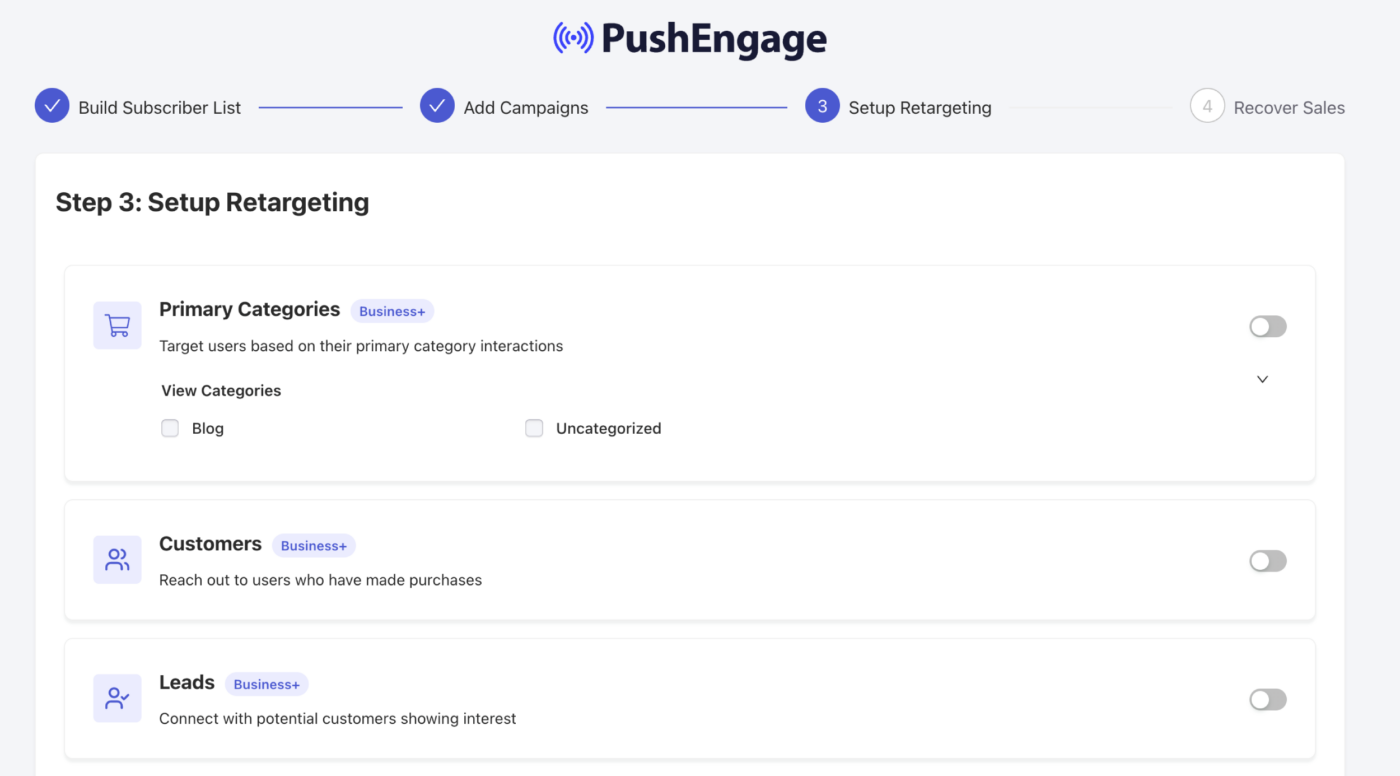
You can choose the retargeting strategy in beginning, this will ensure to help you in creating of segment. So if you have existing segments, they will be shown here. The Primary Categories can also be converted into segments. You can also use the default segments we have created, which is Customers & Leads.
Once you have selected, simply toggle the button on. Now you can click on Next Button.
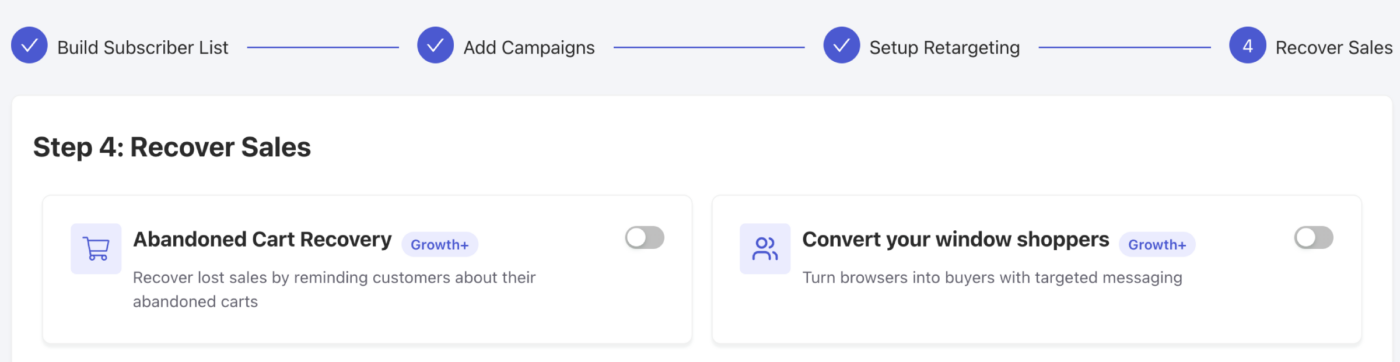
You can choose to automated journeys as these are goal oriented campaigns. You can easily Recover Sales using these strategies of Cart & Browse Abandonment. Once this is enabled, you can continue to Dashboard.
That’s it, in a few clicks you have the WooCommerce Store connected to engage with Push Notifications. Now we can help you understand in managing & editing the campaigns.
Managing Push Notifications Settings
You can navigate to WooCommerce » Settings
Then navigate to Push Notifications Tab

Under this tab, you can go ahead and toggle all the notification type which you want to enable for now. This field also lets you decide that if you want to send to admin only or customers.
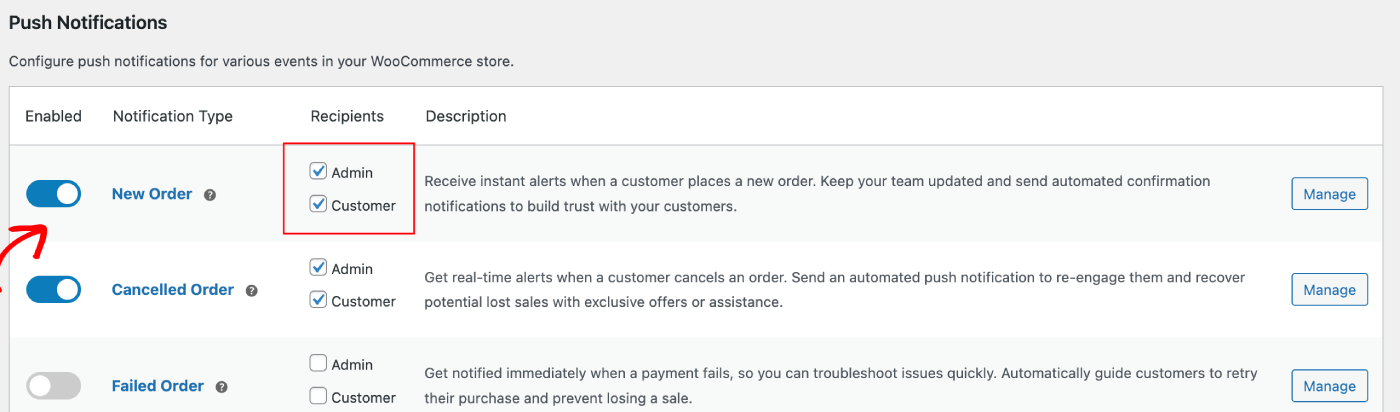
In both cases, the store visitors or admin will only get the push notifications only when they will be a subscribed or opted in for receiving campaigns.
You can choose if the recipients for the campaign would be admin or customers. Once you have chosen that, you can go ahead and manage these campaigns.
Setting Up Admin Side Push Notifications
You can choose the campaign you would like to edit and click on Manage Button.

You can scroll down to the checkbox that enables you to send a push notification to admin when the action is completed.

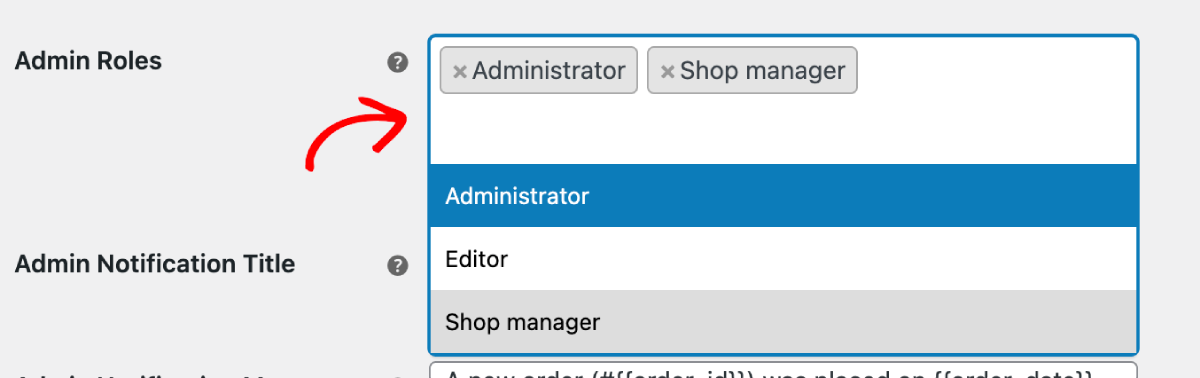
Choose User Roles
You can decide to choose specific people to get the campaigns when an order is placed or the purchase is failed. You can choose roles who should be getting campaigns.
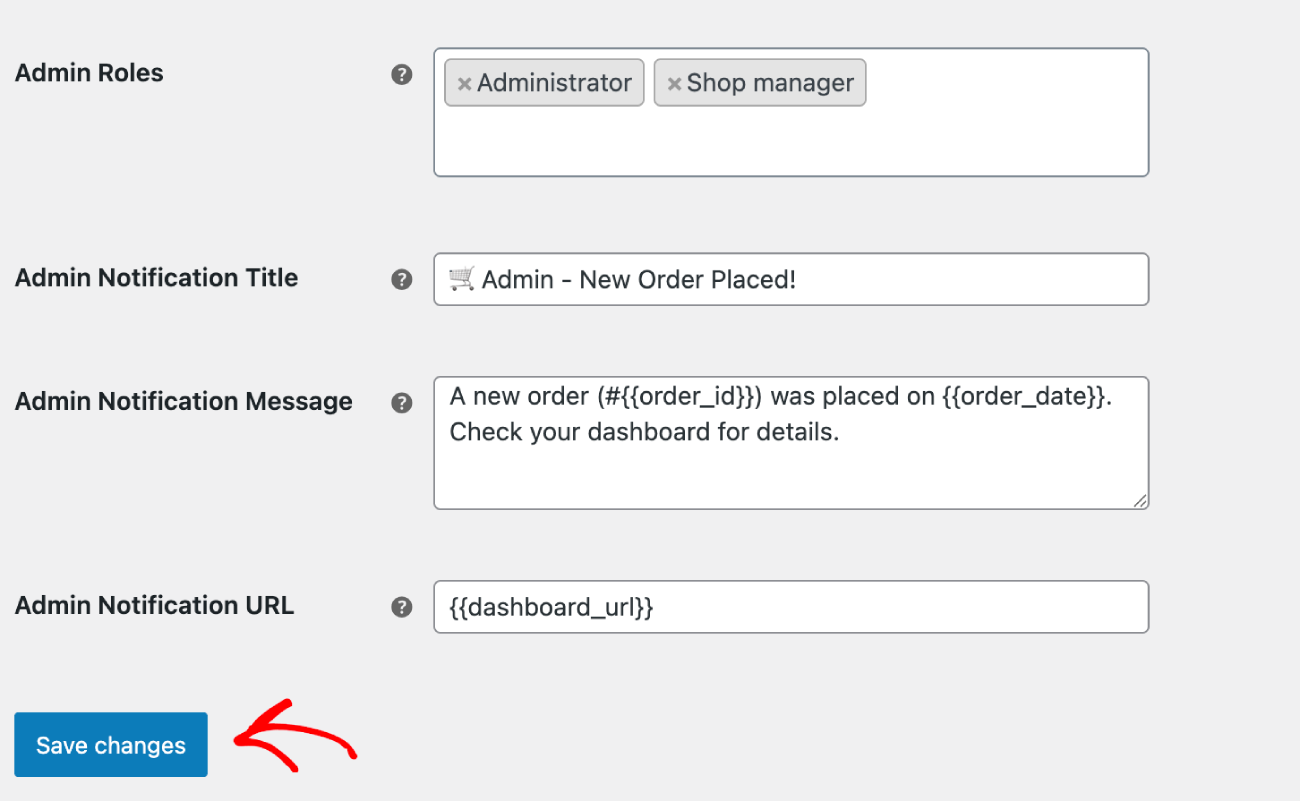
Setting Up Campaigns
You can set up default campaign title & message along with URL. For example – In new order placed campaign, you can have variables like Order ID & Order Date for more specific details of every new order placed.
Setting Up Customer-Side Push Notifications
If you want to send out push campaigns to your website visitors or customers. You can either send out default campaigns available in the WooCommerce Settings or you can design your own campaigns using Push Broadcasts, Drip Autoresponders. We also have some Automated Campaigns created for you which is goal-oriented campaigns.
Default Push Campaigns
You can choose the campaign you would like to edit and click on Manage Button. You can check the box that enables sending campaigns to customers. For example, here we are setting up Push Notifications for Retry Purchase Request.
You can set up the notification Title & Message along with the checkout page URL.
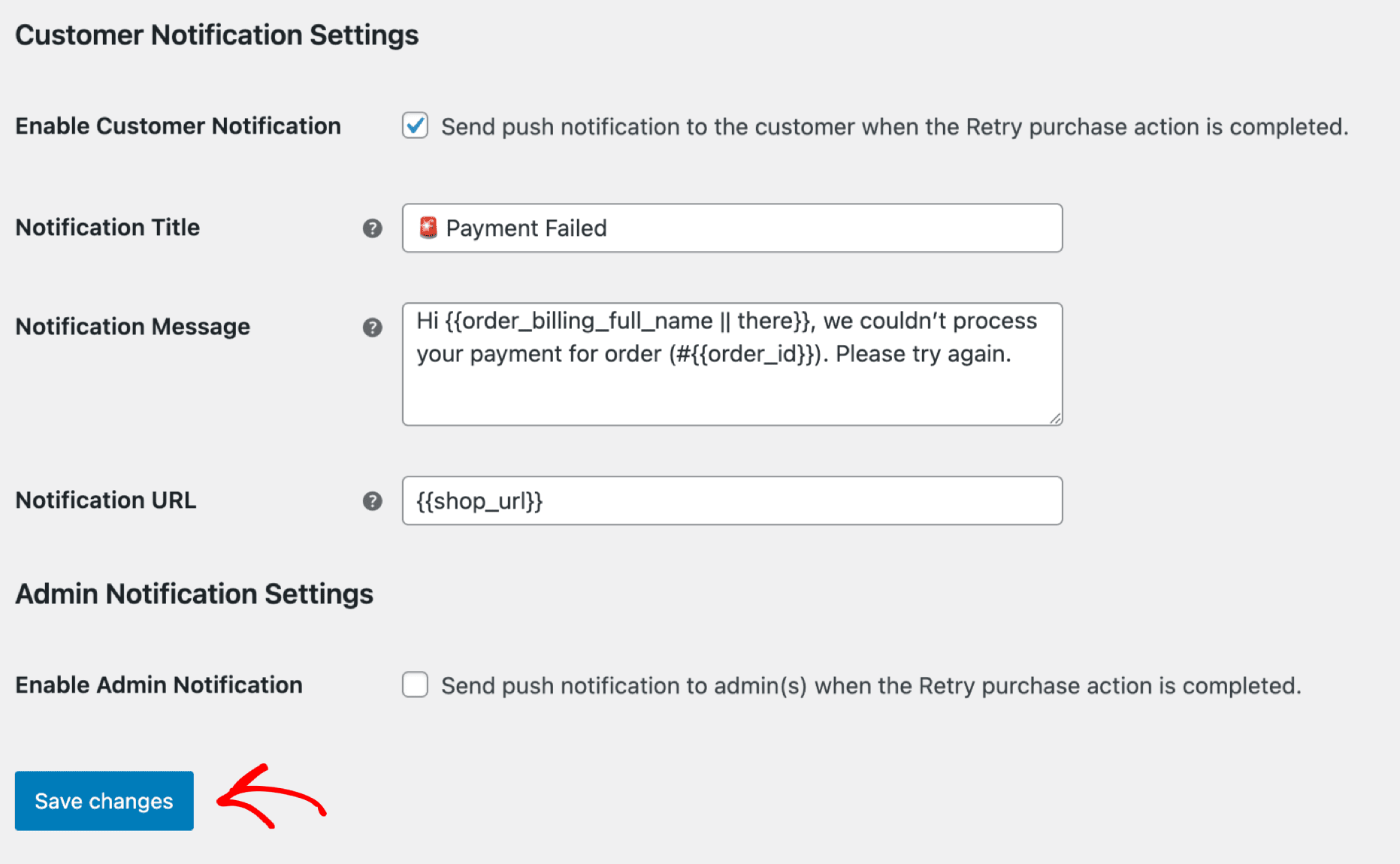
Once you have updated the details, you can click on Save Changes Button.
Customized Campaigns
You can send out Push Broadcasts using our variety of templates.

Automated Campaigns
We have Triggered Campaigns, which are event specific campaigns. It is specific to goals, some examples are – Cart & Browse Abandonment Campaigns. These campaigns are pre-created for your store. You only need to ensure that the campaigns are enabled once your store is connected.
Here is the guide that will help you with detailed steps to enable and set this campaign for your store.
If in case you run into any issues, please feel free to contact us by clicking here. Our support team would be able to help you.


