Notice: There is no legacy documentation available for this item, so you are seeing the current documentation.
WooCommerce stores excel at offering diverse products but often face challenges with cart and browse abandonment. PushEngage offers an innovative solution, enabling push campaigns that directly engage with your product feed and turning potential losses into conversions with our Woocommerce Integration.
Customers do not have to visit their email inboxes to recover abandoned revenue. They can be online or on any other website and still continue to receive automated alerts.
Before You Start
Ensure you have the PushEngage Plugin installed on your WooCommerce store. This guide assumes you already have the WooCommerce and PushEngage Plugin.
Connecting PushEngage with WooCommerce Store
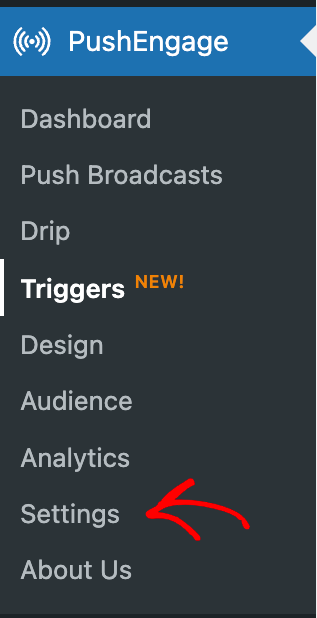
1. To connect your WooCommerce Store with PushEngage, navigate to the Settings
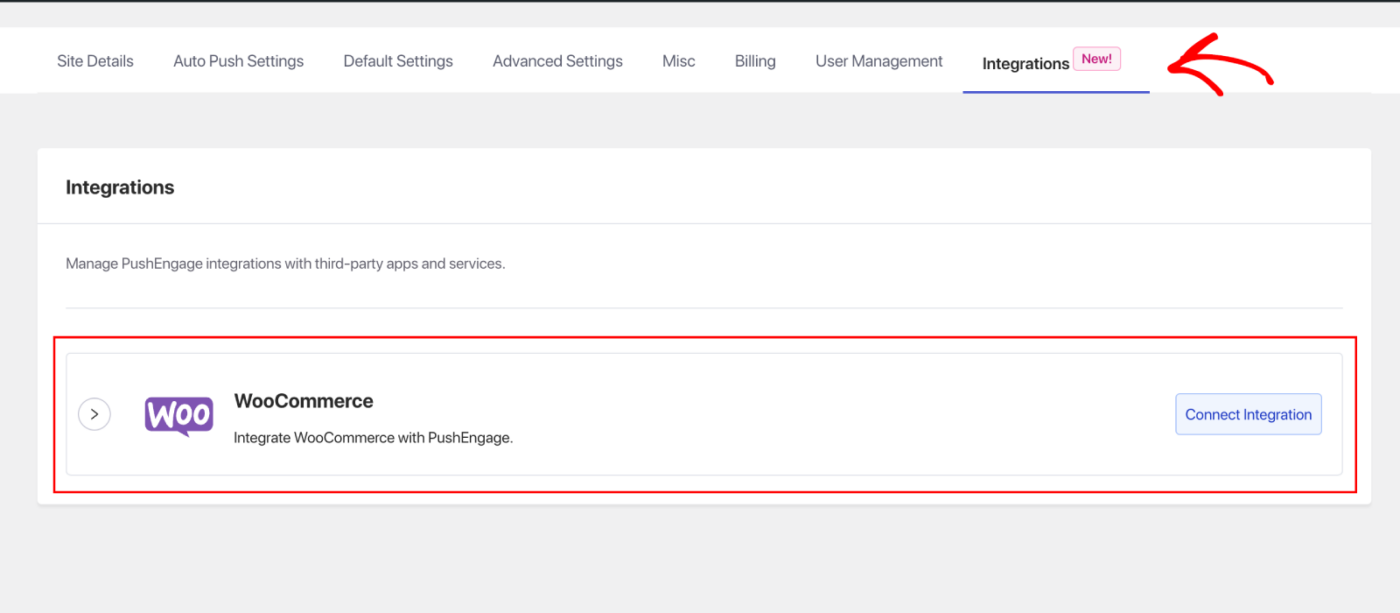
2. On the Settings Page, navigate to the Integrations Tab
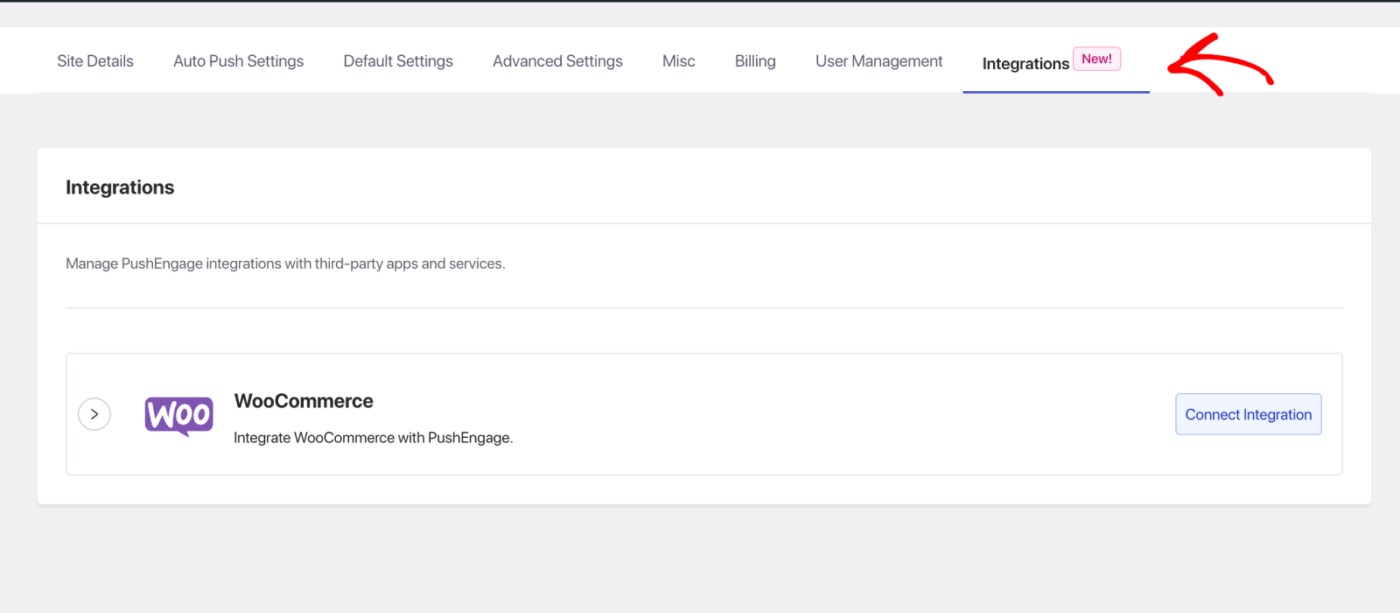
3. Find WooCommerce and click ‘Connect Integration‘
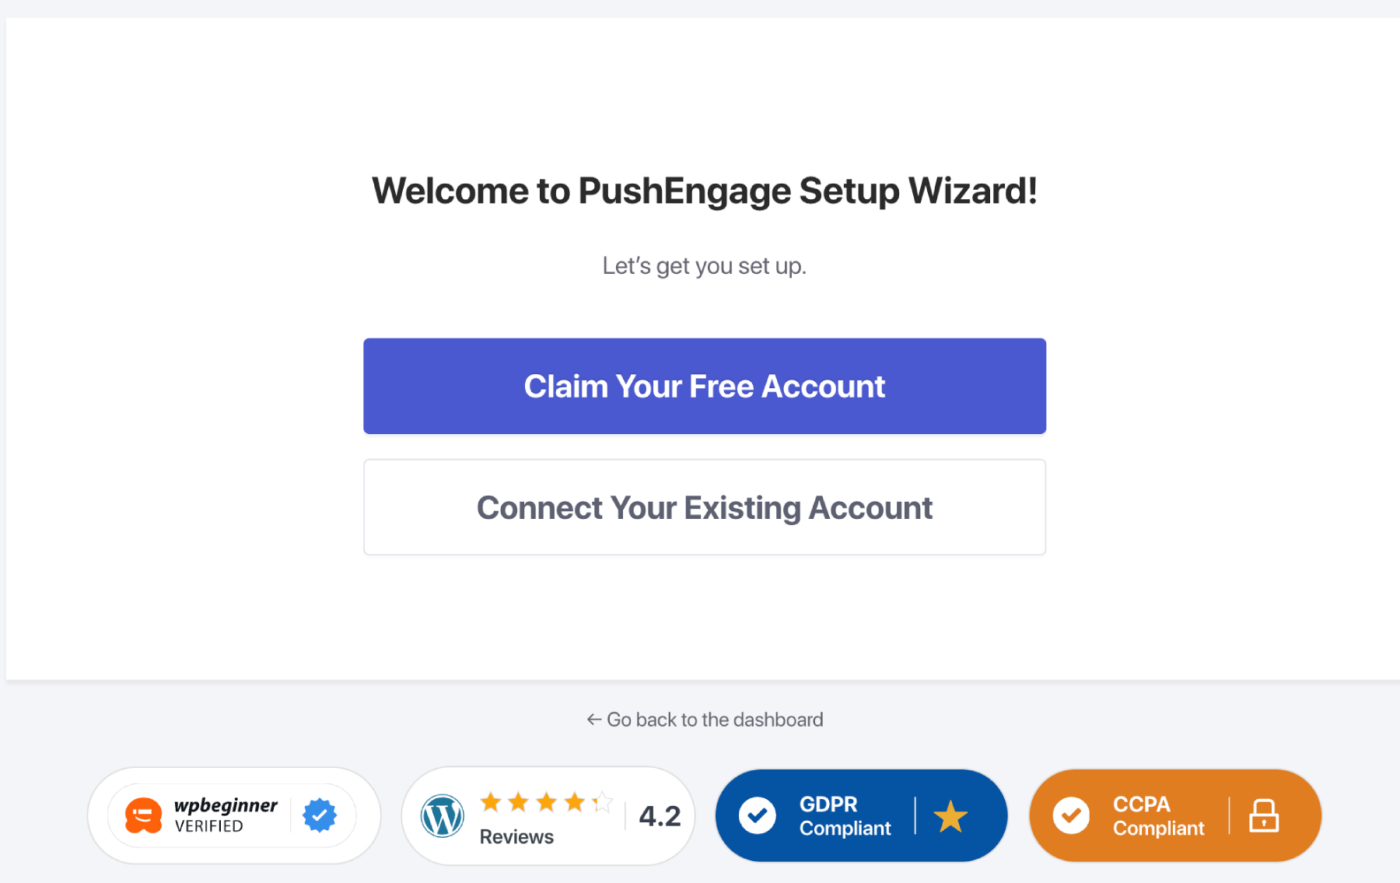
It only takes a few clicks in setting up or connecting the PushEngage Account to your WooCommerce Store. You can go ahead and connect your existing PushEngage account with WooCommerce store, or you can also sign up with a new account.
If you already have the WooCommerce Store connected to PushEngage Account, you can skip this and move to Managing Push Notification Settings.
Once you have created account/connected existing account. Please set up your Popup so you can start with building your web push subscriber list.
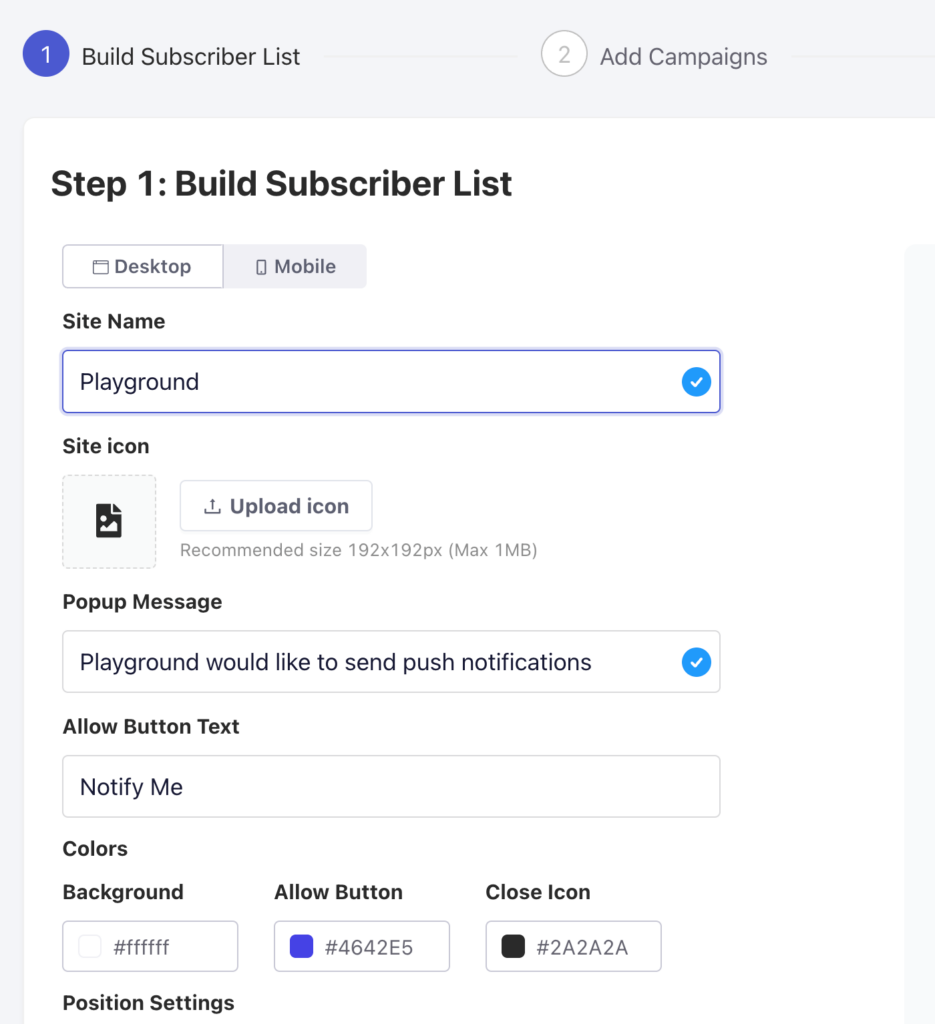
Once your Popup Modal/Subscription Opt-in is customized as per your brand color and message, you can click on Next Button.
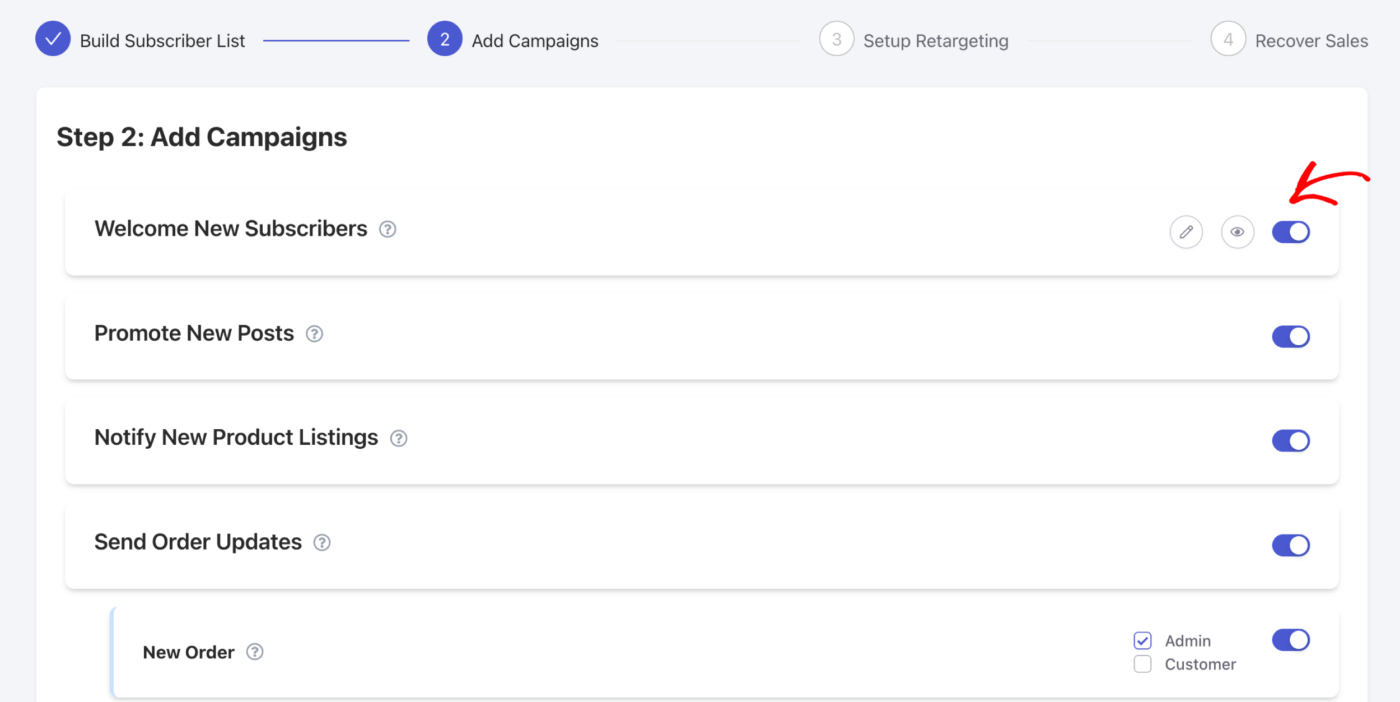
You can choose the initial campaigns you want to enable and even check the preview of these campaigns. You can decide the Audience and choose to send to either Admin Users or Customers. There is also an option, to edit the campaigns here as well. If you are unsure, you can move forward to next step and edit later.
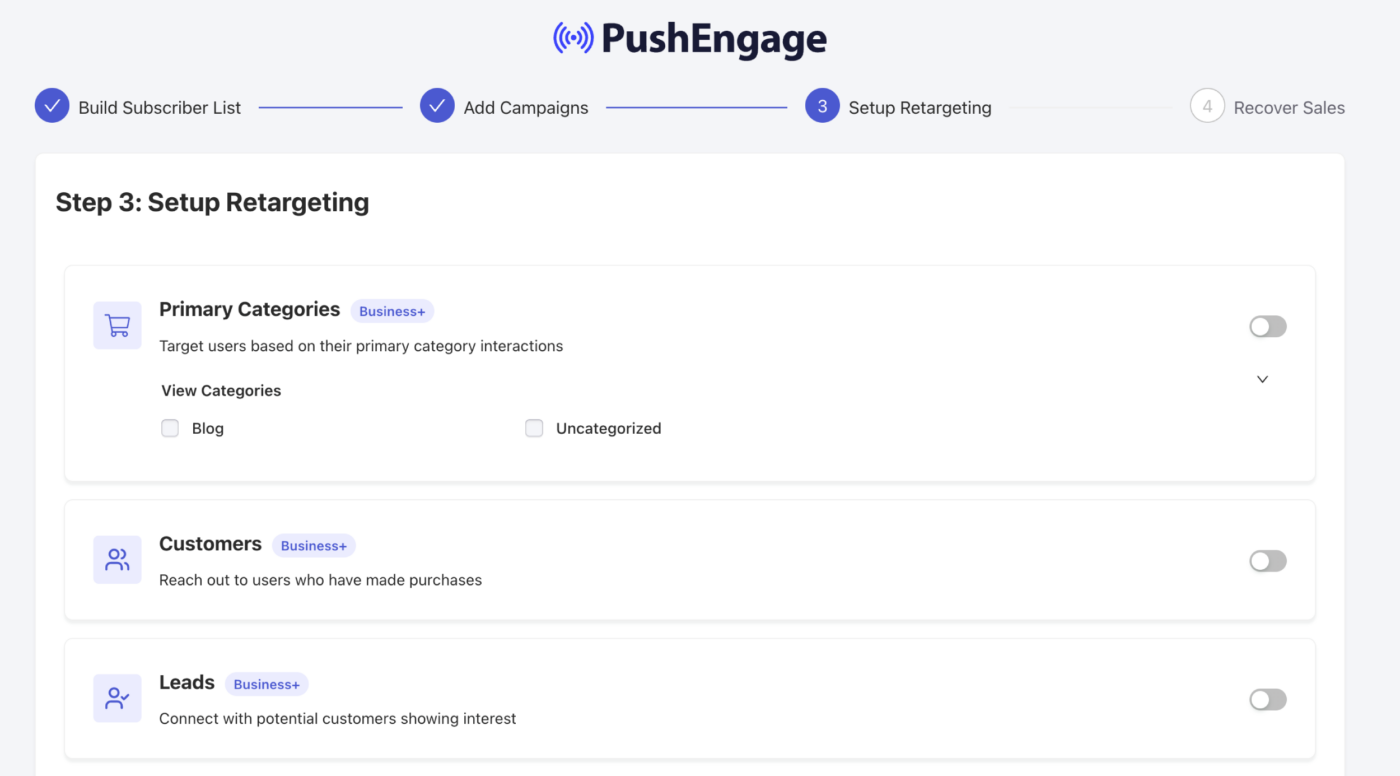
You can choose the retargeting strategy in beginning, this will ensure to help you in creating of segment. So if you have existing segments, they will be shown here. The Primary Categories can also be converted into segments. You can also use the default segments we have created, which is Customers & Leads.
Once you have selected, simply toggle the button on. Now you can click on Next Button.
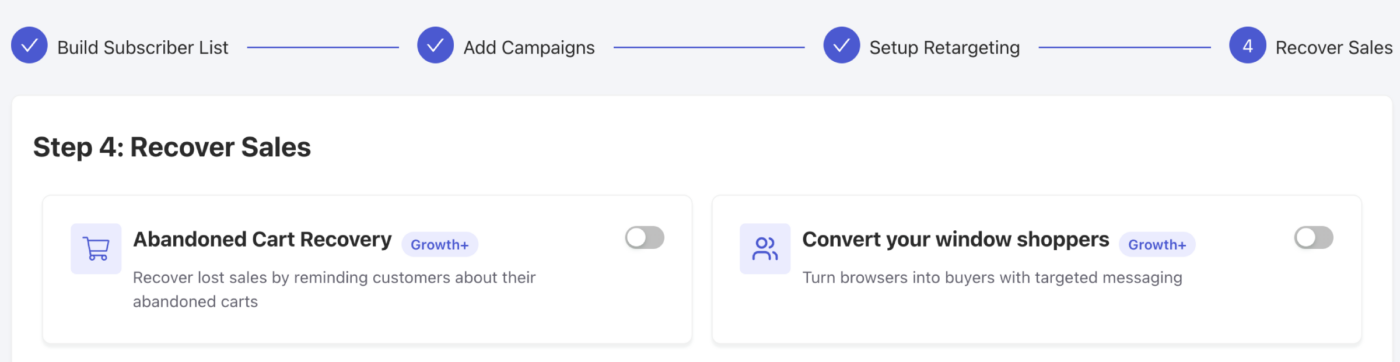
You can choose to automated journeys as these are goal oriented campaigns. You can easily Recover Sales using these strategies of Cart & Browse Abandonment. Once this is enabled, you can continue to Dashboard.
That’s it, in a few clicks you have the WooCommerce Store connected to engage with Push Notifications. Now we can help you understand in managing & editing the campaigns.
WooCommerce integration requires a PushEngage Growth subscription to create a Cart and Browse Abandonment Campaign using our Trigger Campaign feature.
Manage Cart and Browse Abandonment Settings
Trigger campaigns are goal-oriented, event-based campaigns. We have an automated Cart & Browse Abandonment Campaign, which is directly integrated with your store’s product feed. We have a start event and a stop event to prevent further notifications from being sent after the intended goal is completed.
Once your integration is complete, you can manage your cart and browse abandonment settings for your WooCommerce Store.
Navigate to Settings » Integrations Tab and under the WooCommerce section.
Enable ‘Cart Abandonment‘ and ‘Browse Abandonment‘ by toggling the switch on.
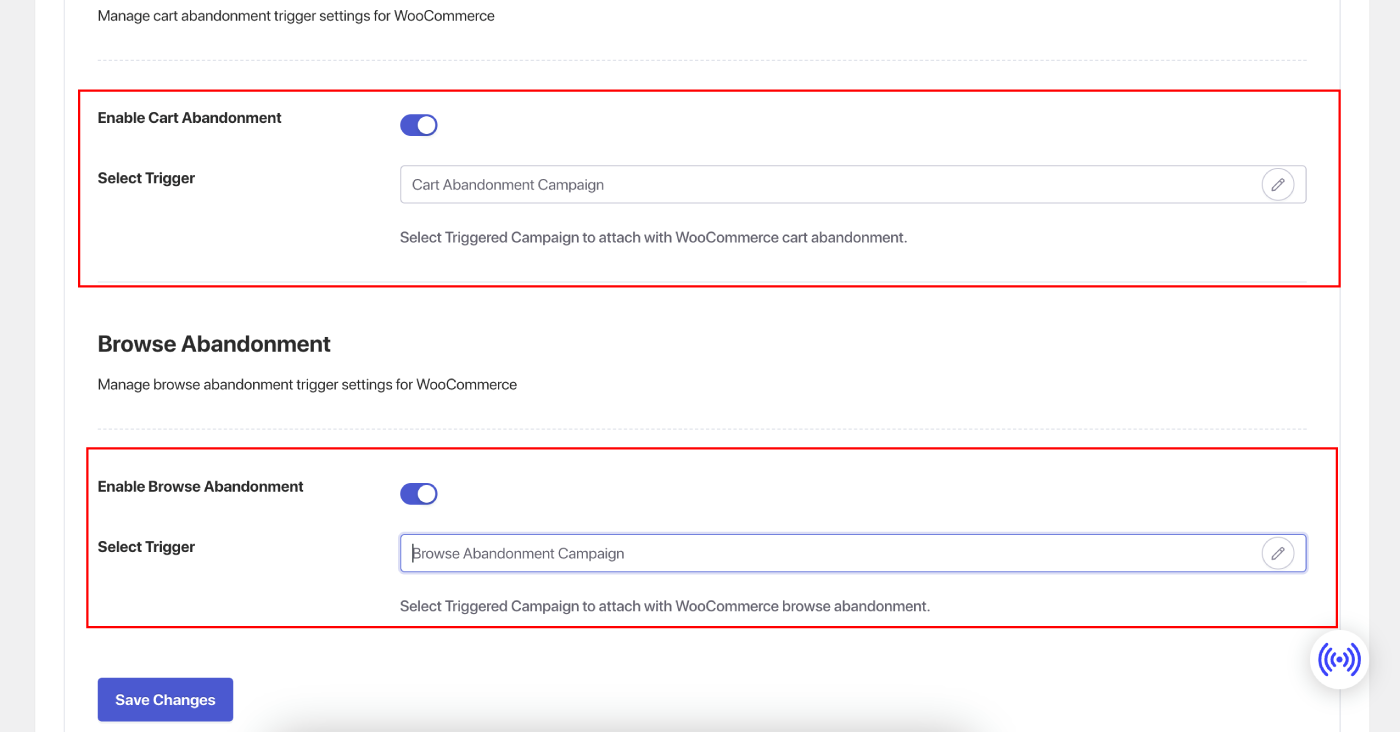
Choosing Trigger Campaigns
We have the Playbooks for Cart & Browse Abandonment campaigns that integrate with product feed and pull in variables we recommend choosing those and saving the changes.
If you have previously created any trigger campaigns, you can connect those with your Store as well.
Customizing Campaigns
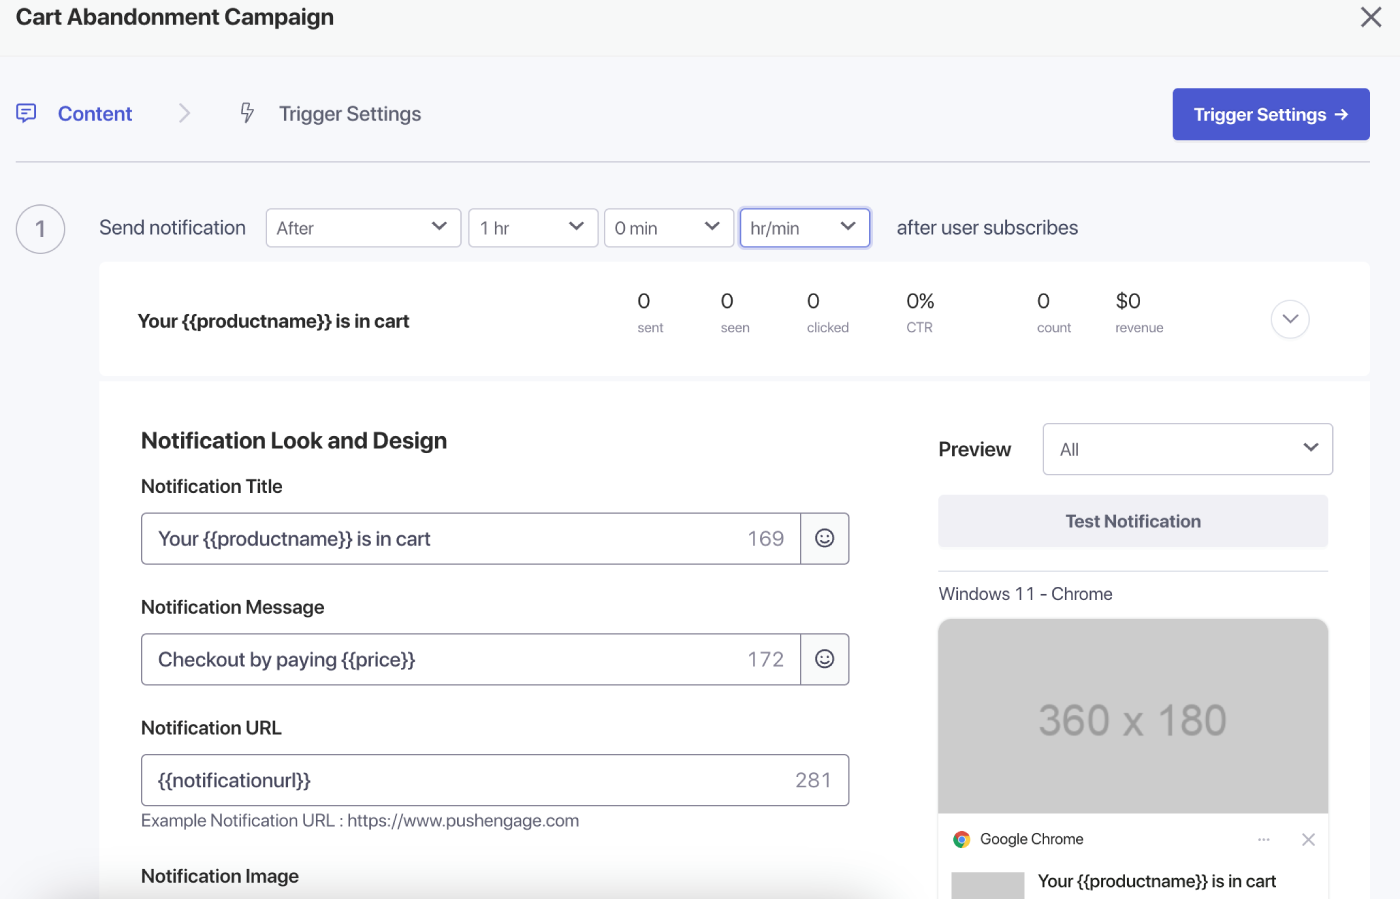
Navigate to ‘Triggered Campaigns’ and add multiple notifications to your campaign.
Specify the delay and conditions for each notification and add fallback variables.
Set Trigger Settings
Under ‘Trigger Settings,’ limit the frequency of notifications to prevent spamming your customers. Here, you can choose a daily or weekly limit. For example, if you have 2 notifications for a daily limit, then add 14 for the weekly limit so that even if people abandon more than 2 products a day, they are not spammed with all push notifications.
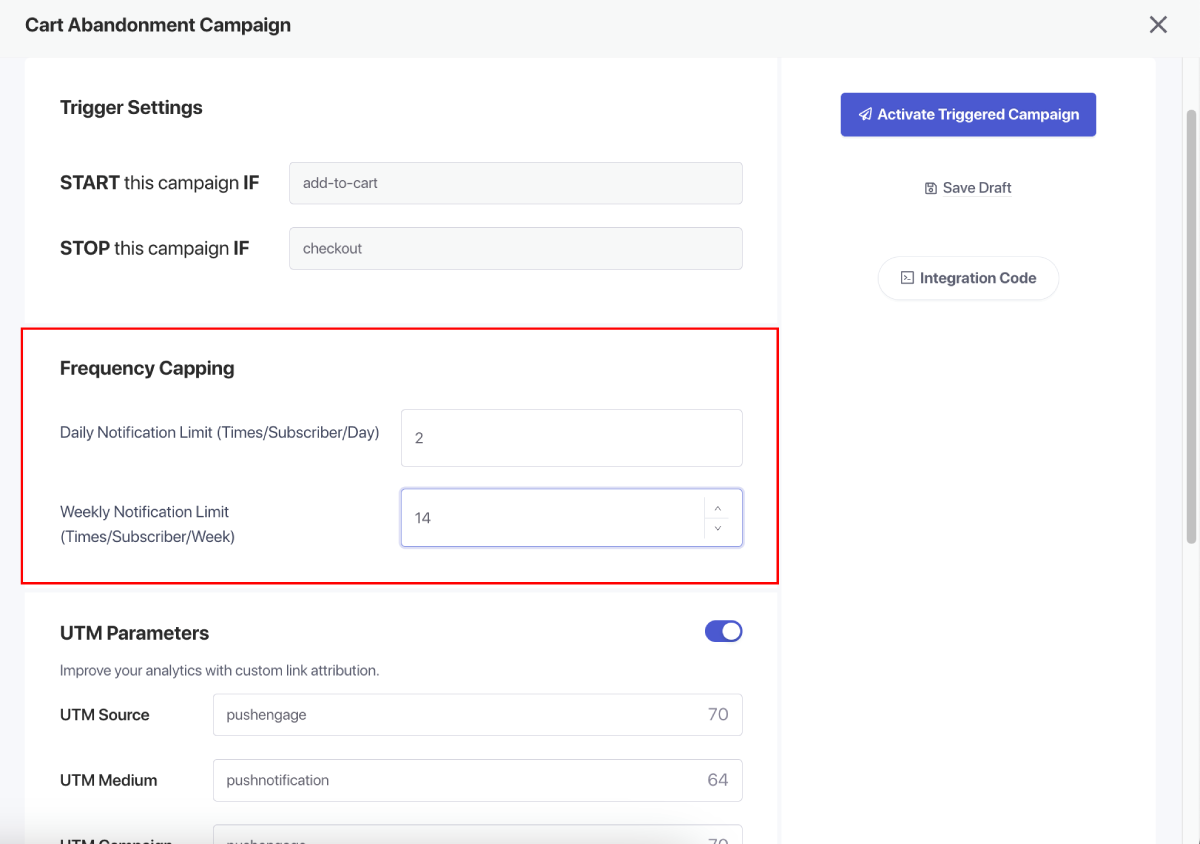
You can also add the UTM Parameters for these campaigns so it is easier for you to track in Google Analytics.
After setting up the triggers, save your changes.
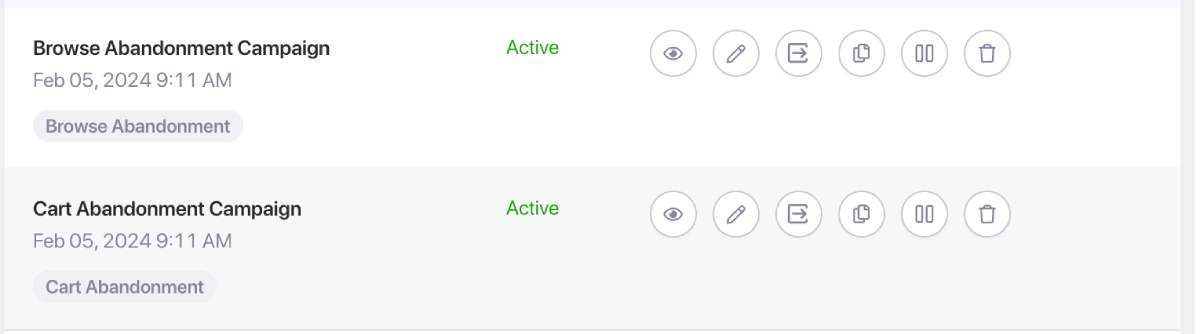
Activating the Campaigns
Once you’re satisfied with the settings, activate your triggered campaign.
You can also watch the video tutorials to go through and understand enabling the Trigger Campaigns faster.

You can view the campaign analytics and see the conversion of the goal revenue if it is enabled.
That’s it; you have connected to WooCommerce Integration and enabled Personalized Cart & Browse Abandonment Campaigns.
If in case you run into any issues, please feel free to contact us by clicking here. Our support team would be able to help you.


