Notice: There is no legacy documentation available for this item, so you are seeing the current documentation.
Push Notifications are a very easy and convenient way to promote your latest offers and seasonal announcements and recover Cart & Browse Abandonment Sales.
Shopify is one of the most popular platforms for creating a website. It’s an easy-to-use platform with free and paid themes. If you are looking for push notifications for your Shopify store, PushEngage helps you add quick steps without any additional code required to be added to your store. You can use web push to drive repeat traffic to your store.
In this guide, you will learn how to go live with Push Notification on your Shopify store with PushEngage.
Adding PushEngage App to Store
First, log in to your Shopify Account and then click on the Apps Section of the dashboard. In the Shopify App Store, search for PushEngage.
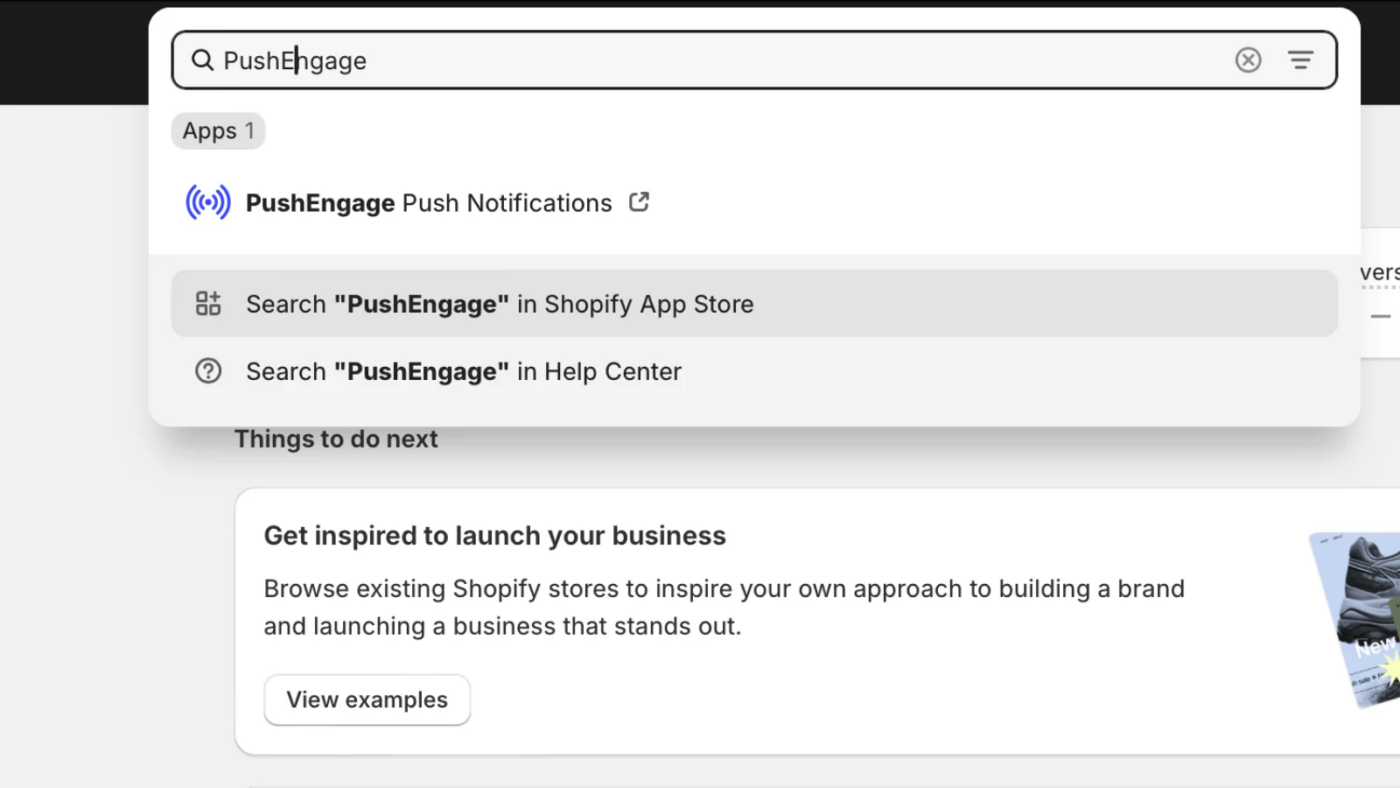
Now install the PushEngage Shopify App and start sending web push notifications. You can go live within minutes as the app will place the required installation code and automatically also create automated playbooks like – Cart, Browse Abandonment, Price Drop & Restock Alert.
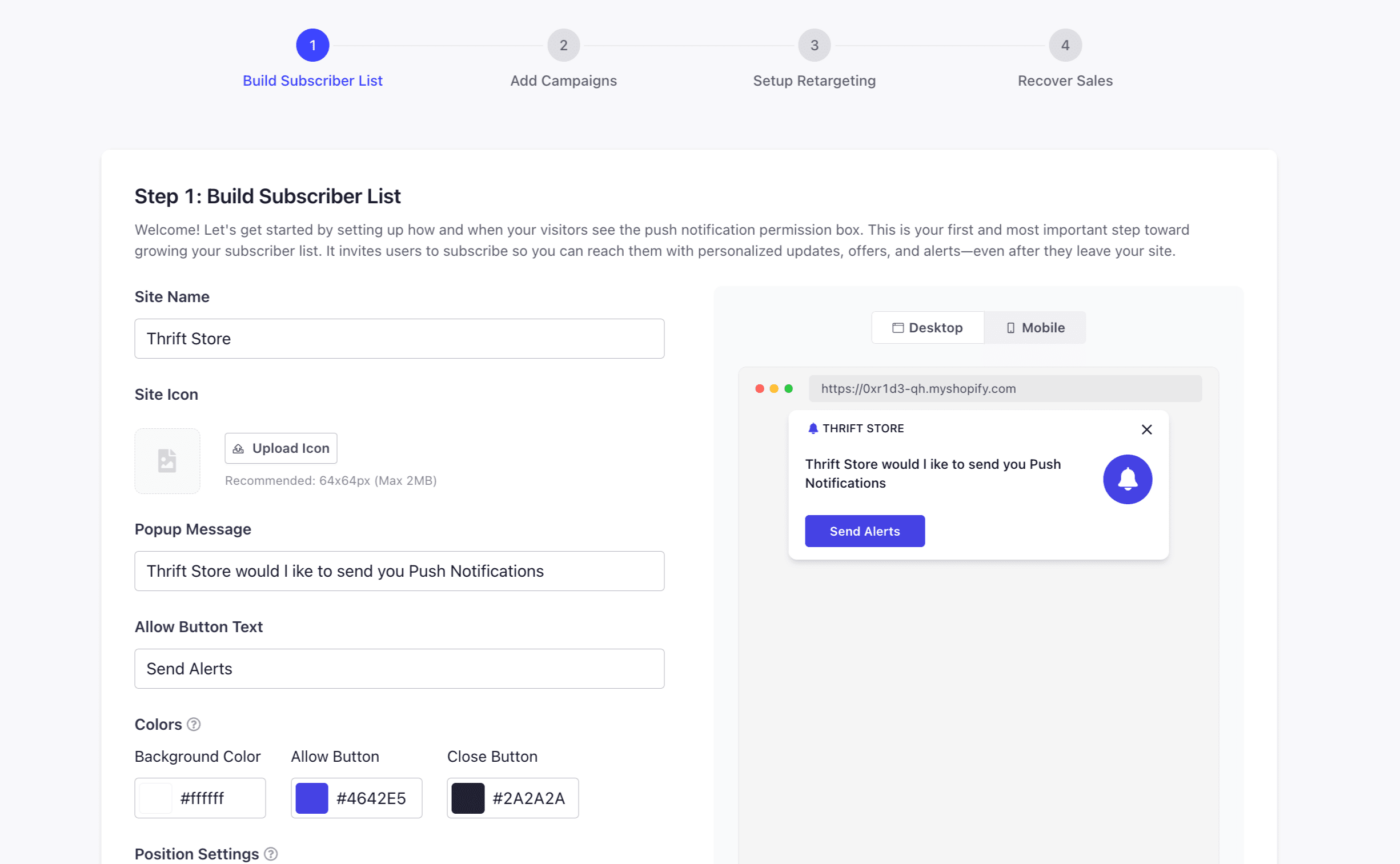
Once you click on the Install App, follow the onboarding instructions to get started with PushEngage Push Notifications. Once you have added the site details and set up the welcome notifications. You will be directed to the PushEngage dashboard.
Web Push Notification has been successfully installed.
Optimizing the Subscription Popup
No code addition is required, so you can directly navigate to Design » Popup Modals.
You can optimize the already selected or choose any other Permission Opt-in or Popup Modals style for your site. This will help you collect the push subscription. The best part is you can customize these according to your brand style. Here is the guide that will help you style the Subscription Popup. You can decide the placement and colors of the popup to suit your brand.
Adding Campaigns for your Store
In step 2, you can add the campaigns and simply toggle them on based on your use case. You have the ability to edit them now, or you can also edit them later. Welcome subscribers with discount code, you can also go ahead and notify about new product listings or send order updates.

Adding a Welcome Offer with a Drip Autoresponder
Welcome Drip can give your customers an offer after thanking them for subscribing to the list. Drip Autoresponders are like Email Workflows series of push notifications in a single campaign based on an event. We have already created a Welcome Drip with one push notification.
You can later view or edit the Notification by visiting Campaigns » Drip Autoresponders. Click Edit to customize.
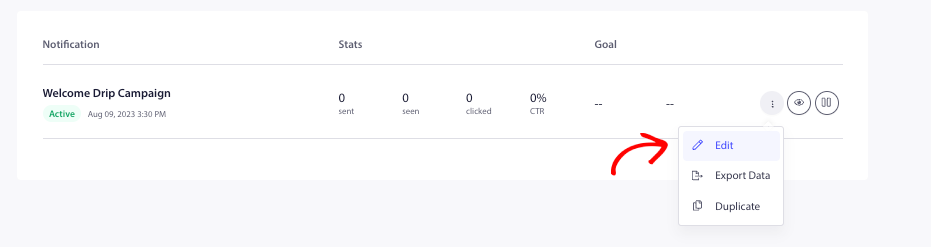
It is a good idea to add a new discount coupon code to your welcome offer so that subscribers can use it to visit your website and make a purchase, increasing your repeat traffic.
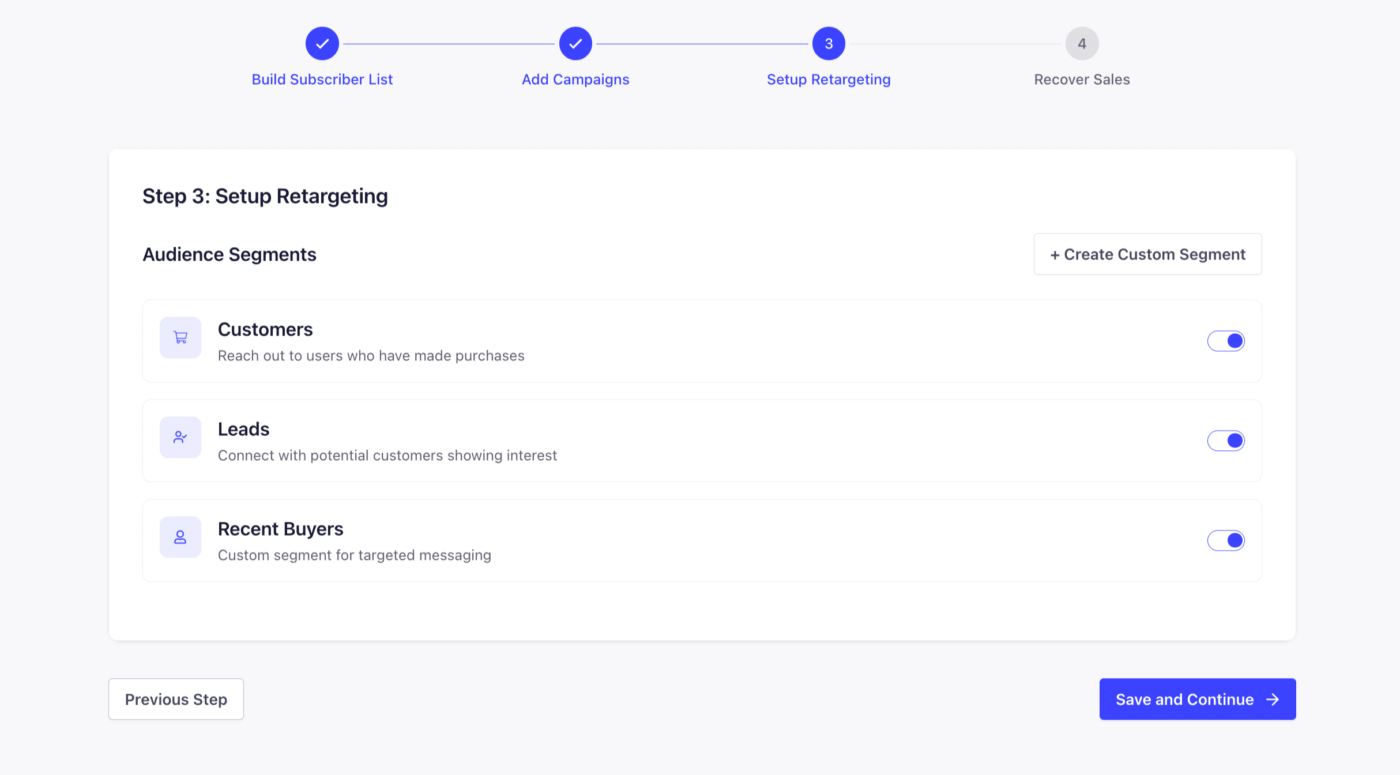
Setting up Retargeting
Sending campaigns with right segmentation is key to get better CTR for your campaigns and conversions as well. We have created some Audience Segments already so you can simply enable and started grouping people into these segments like Customers, Lead.
You can also click on the Create Custom Segment Button on the top right to add segmentation.
Recover Sales with Automated Campaigns
PushEngage’s automated campaigns are personalized and integrated directly with the product feed. They fetch the product name and price and also the product image that the person has abandoned in the basket. These campaigns are must have to capture your low hanging fruits and recover lost sales.
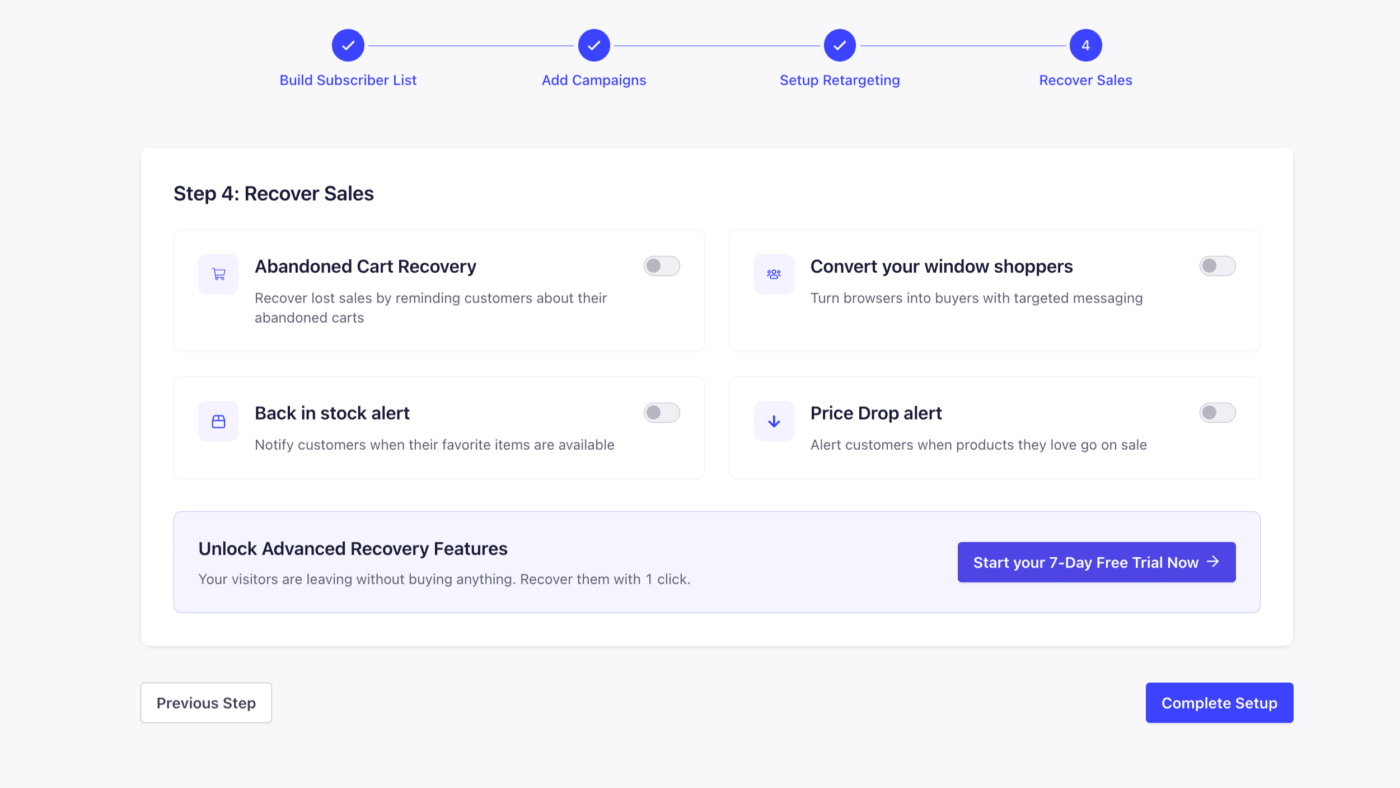
In case you want to edit these campaigns later, you can always do that. Please navigate to Campaigns » Trigger Campaigns. You will see four campaigns already created with personalized variables in the pause state.
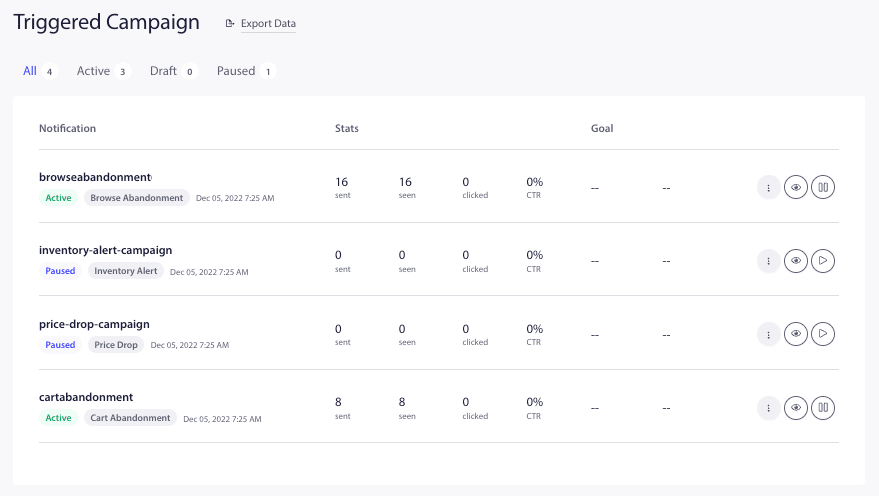
1. Cart Abandonment—This campaign targets push subscribers who add products to the cart and abandon them without completing the purchase. It will stop sending campaigns after the subscriber completes the purchase.
2. Browse Abandonment—This campaign targets subscribers who visit the product detail page but do not add the product to the cart. It will stop sending campaigns once the product is added to the cart.
3. Price Drop Alert—This campaign will be triggered if a person subscribes to the Price Drop Alert Widget to receive notifications. You can control the events that trigger this campaign.
4. Inventory Alert—If a person subscribes to the Restock Alert Widget for any out-of-stock items, they will receive push notifications whenever they are back in stock.
You can choose to Edit and customize the title or message with variables or simply enable the campaigns by clicking on the Play button.

Now that you have optimized your settings, you can sit back and analyze the automated campaign results and send out Push Broadcasts. You can create or choose from our templates to send out Flash Sales, Promotional Offers, or Seasonal Offers.
If in case you run into any issues, please feel free to contact us by clicking here. Our support team would be able to help you.


