Notice: There is no legacy documentation available for this item, so you are seeing the current documentation.
Are you looking to keep your customers informed with updates on their recent orders, give them a nudge to retry purchase requests, or boost your store’s reviews through web push notifications in your WooCommerce store?
If so, you’ve come to the right place! In this guide, we will walk you through the steps to set up and effectively manage web push notifications for your customers in your WooCommerce store.
Before You Start
Ensure you have the PushEngage Plugin installed on your WooCommerce store. This guide assumes you already have the WooCommerce and PushEngage
There are multiple campaigns that you can send out to customers for many use cases –
- Default Campaigns
- Push Broadcasts & Templates
- Drip Autoresponders
- Trigger Campaigns & Automation
Managing Default Notifications Settings
You can navigate to WooCommerce » Settings
Then navigate to Push Notifications Tab

Under this tab, you can go ahead and toggle all the notification type which you want to enable for now. This field also lets you decide that if you want to send to admin only or customers.

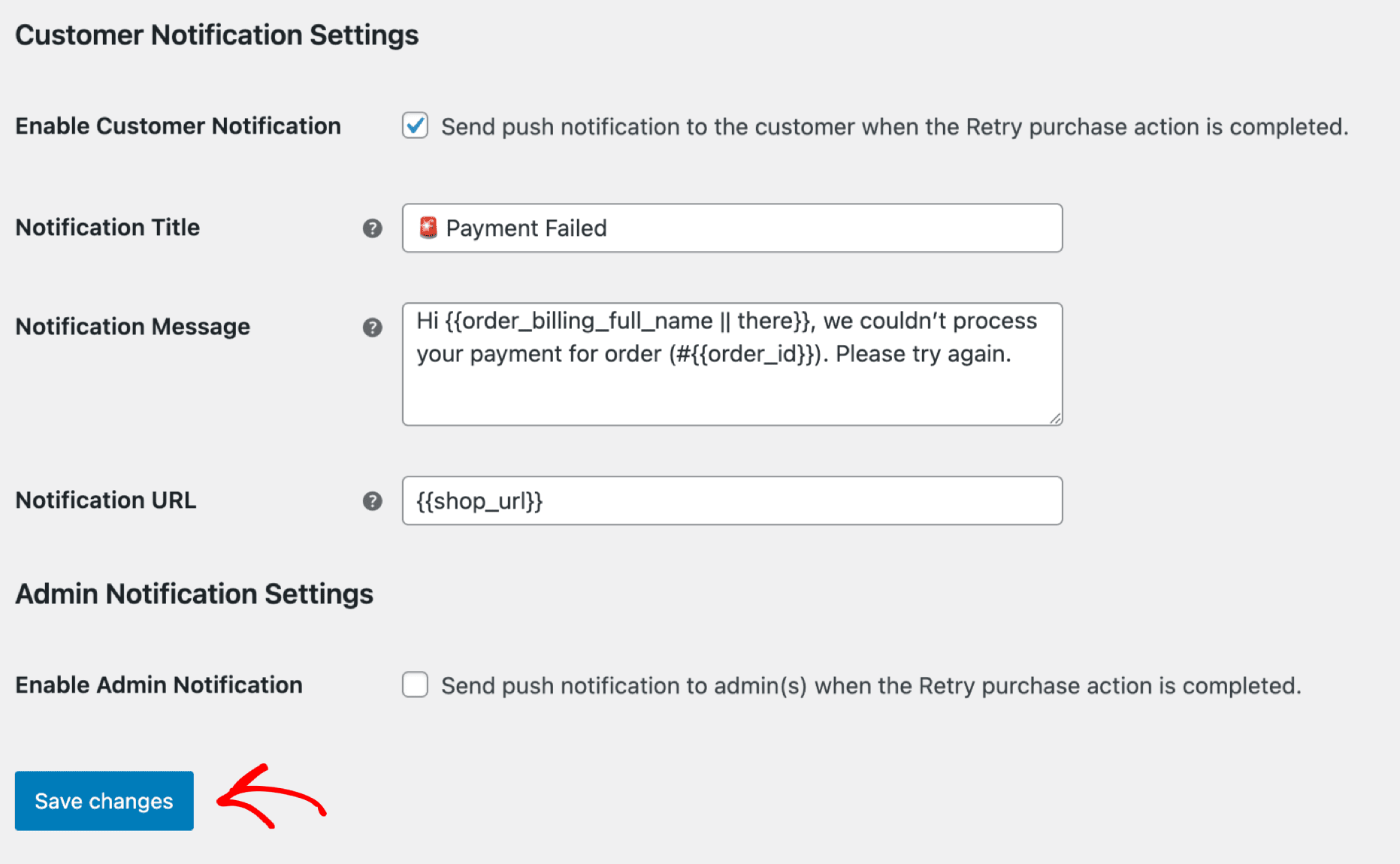
You can choose the campaign you would like to edit and click on Manage Button. You can check the box that enables sending campaigns to customers. For example, here we are setting up Push Notifications for Retry Purchase Request.
You can set up the notification Title & Message along with the checkout page URL.

Once you have updated the details, you can click on Save Changes Button.
Push Broadcasts & Templates
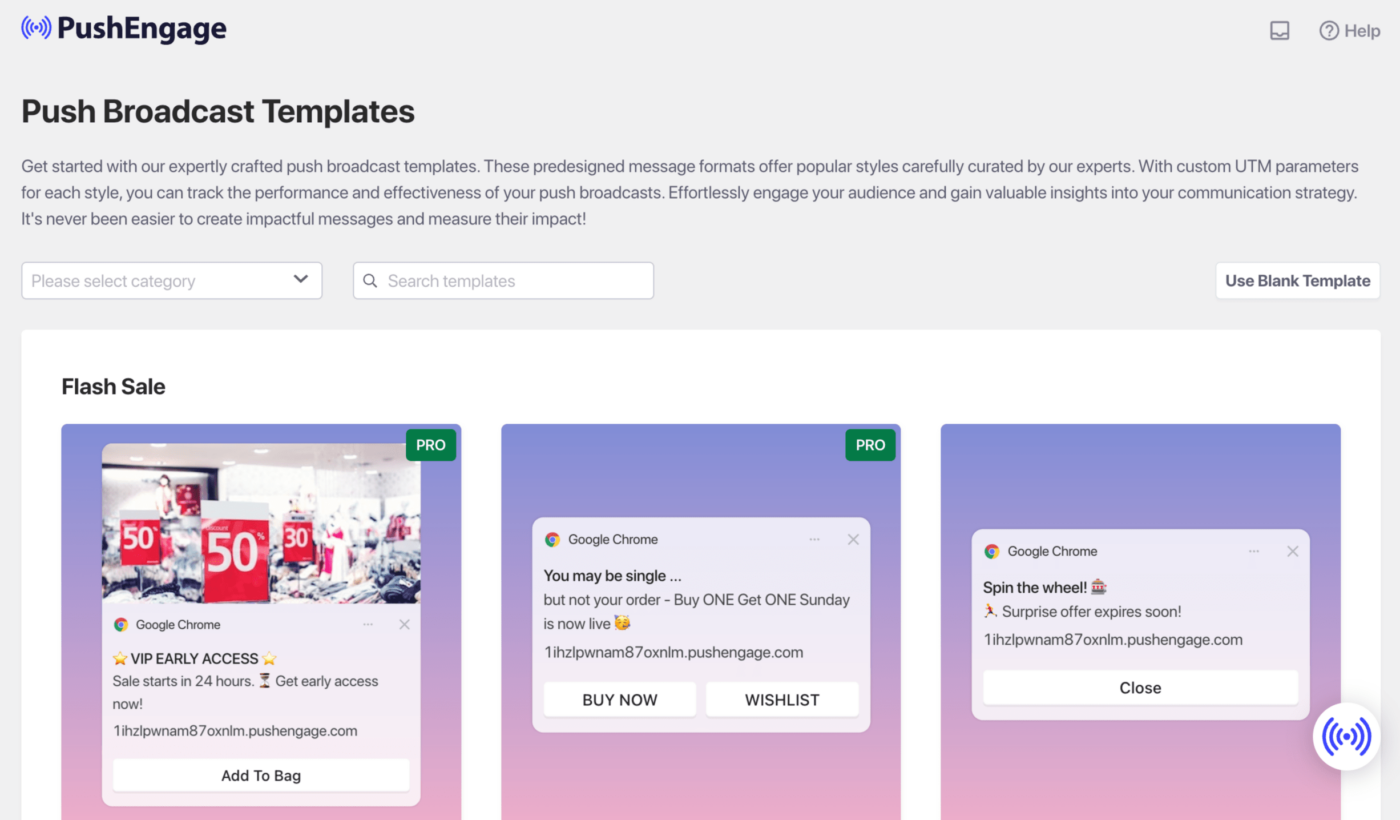
You can send out Push Broadcasts for Flash sale, seasonal offers or upselling the products.
You can log in to PushEngage Dashboard and then move to Push Broadcasts. It will help you to choose from variety of templates & categories and you can customize the Audience & Send/Scheduling options.

Here is the guide you can refer to creating the push campaigns within WordPress dashboard.
Drip Autoresponders
You can enable a Web Push Notification Autoresponder campaign and send it to all subscribed users or to a list/segment of users in PushEngage. Segment your users into specific lists, which can happen on specific pages, or when the user subscribes to a curriculum of notifications.
This is perfect to send out a Welcome Drip with discount coupon, or send out cross-selling campaigns, review requests and seasonal offers.
Here is the guide that will help you build a drip campaign.
Trigger Automation Campaigns
We have Triggered Campaigns, which are event specific campaigns. It is specific to goals, some examples are – Cart & Browse Abandonment Campaigns. These campaigns are pre-created for your store. You only need to ensure that the campaigns are enabled once your store is connected.
Enabling Cart and Browse Abandonment Settings
We have an automated Cart & Browse Abandonment Campaign, which is directly integrated with your store’s product feed. We have a start event and a stop event to prevent further notifications from being sent after the intended goal is completed.
Once your integration is complete, you can manage your cart and browse abandonment settings for your WooCommerce Store.
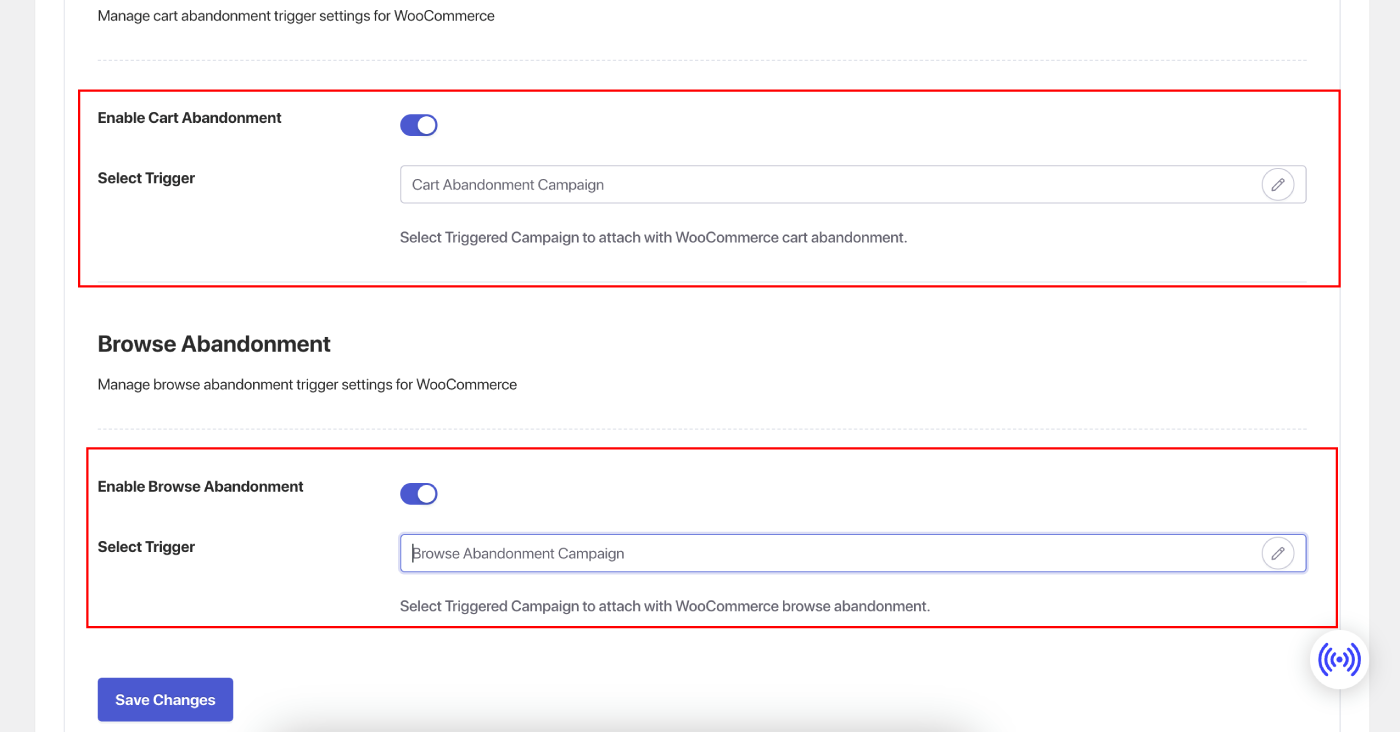
Navigate to Settings » Integrations Tab and under the WooCommerce section.
Enable ‘Cart Abandonment‘ and ‘Browse Abandonment‘ by toggling the switch on.

Customizing Campaigns
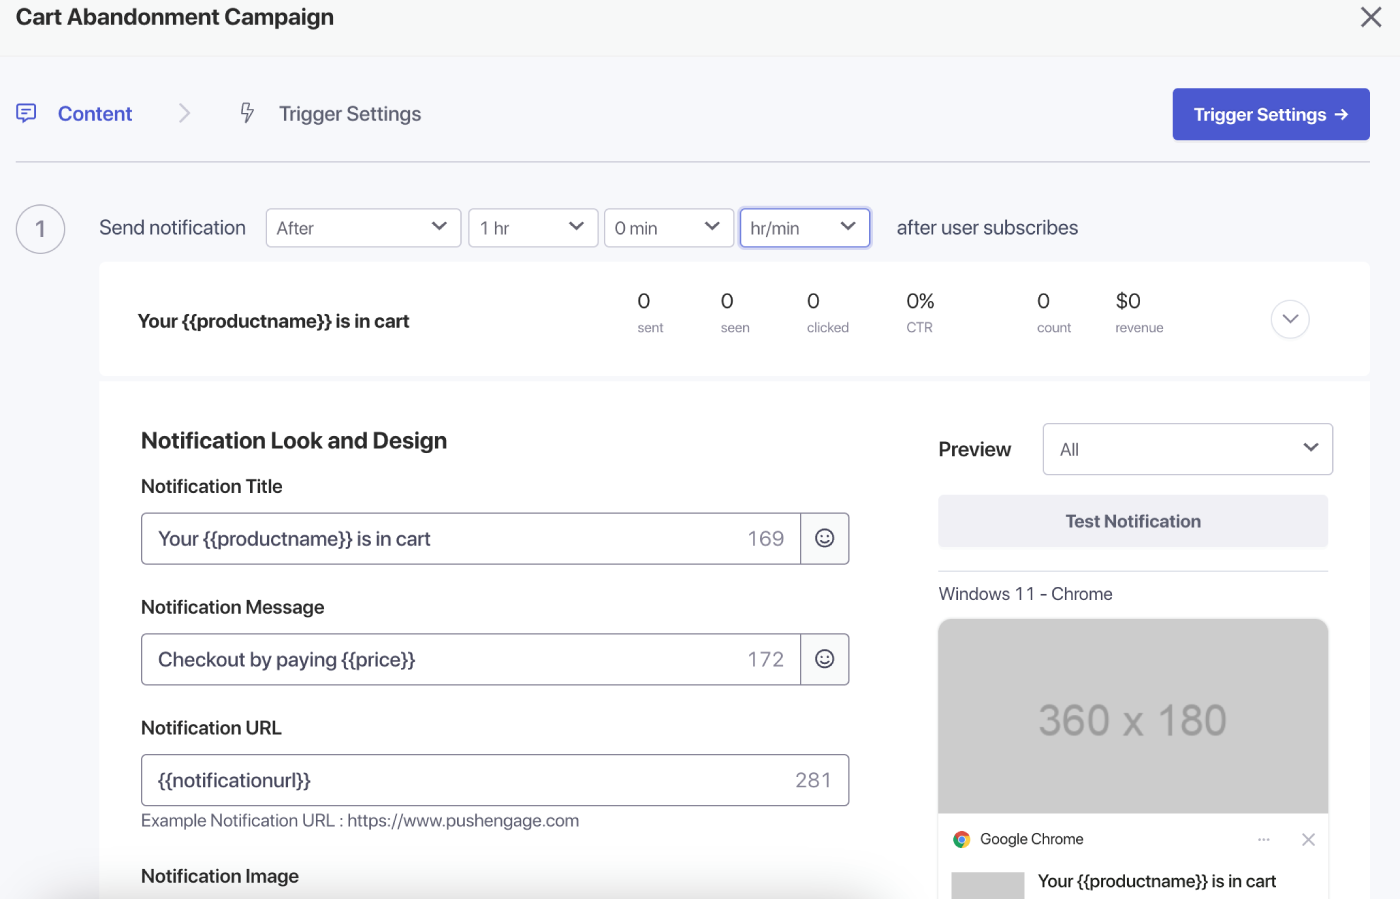
Navigate to ‘Triggered Campaigns’ and add multiple notifications to your campaign.
Specify the delay and conditions for each notification and add fallback variables.

Trigger Settings
Under ‘Trigger Settings,’ limit the frequency of notifications to prevent spamming your customers. Here, you can choose a daily or weekly limit. For example, if you have 2 notifications for a daily limit, then add 14 for the weekly limit so that even if people abandon more than 2 products a day, they are not spammed with all push notifications.
You can also add the UTM Parameters for these campaigns so it is easier for you to track in Google Analytics.
After setting up the triggers, save your changes and activate the campaigns. If enabled, you can view the campaign analytics and see the conversion of the goal revenue.
That’s it, you have created some powerful campaigns for your WooCommerce Store.
If you run into any issues, please feel free to contact us by clicking here. Our support team can help you.