Looking for a quick and easy way to get push notification subscribers on your site?
Imagine getting free traffic on autopilot every time you publish a new blog post without the time-consuming SEO campaigns. If you’re running a WordPress site, you already know how much work it is to promote your content and get readers to keep coming back to your content.
In this article, we’re going to show you how to get repeat visitors instantly every time you hit publish. And we’re going to do it using push notifications so that you don’t have to rely strictly on paid ads and SEO.
Sounds good? Let’s dive in.
Understanding Push Notifications
Before we get into the finer details of how to get push notification subscribers, let’s take a look at the basics of push notification marketing strategy. We’re going to make it simple and easy for you. So, don’t worry if you have no previous experience with push notifications.
What are Push Notifications?
A push notification is a short, clickable pop-up message that appears on a subscriber’s device and redirects the subscriber to your content with one click:
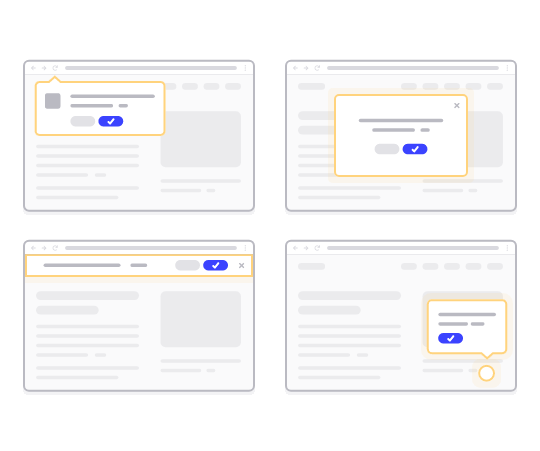
The best part is that the notifications pop up even if the subscriber isn’t using a browser. It’s like an email blast, but with a web push notification, your subscribers don’t need to be using an app to see your message.
In short: WordPress push notification is a simple way to send out a clickable link to your content to anyone who opted for them from your push notification popup.
With push notification sequences, your audience now has no excuse to ignore you. And unlike social media websites, there is no algorithm throttling your reach to get you to pay for ads.
The coolest part about web push notifications is that you can use them to complement your lead magnets and email opt-in forms. You can even use popups to collect push notification subscribers.
Benefits of Using Push Notifications
Let’s talk about why push notifications are important for your business.
How often do you create content and wait for it to take off? If you’re waiting for search engines and social media to explosively grow your site traffic, you should know:
- SEO doesn’t bring you explosive growth. SEO brings in steady growth over time.
- Search and social media ads are “pay to play”. You can only get spikes of traffic. To retarget that traffic, you’ll need to pay more.
- Social media virality is hard. And there’s no way of knowing if it will happen at all.
So, if traffic is that hard to get, how do you grow your sales? Forget sales, how do you even grow your site engagement predictably?
The answer is push notification campaigns. Here are a few key benefits of push notification campaigns:
- Improve User Engagement
- Retain Customers and Subscribers
- Increase Conversion Rates
- Target the Right Users
- Track Actionable Metrics
- Improve Your Customer Care Strategy
- Enhance Brand Consistency
Over the course of this article, we’re going to explain in detail how you can use these benefits to your advantage. If you’d rather check out real examples, you should check this article on the benefits of push notifications.
Selecting a Service to Get Push Notification Subscribers
Before you create a push notification campaign, you need to select a push notification service. A push notification service is a software that allows you to create push campaigns without any coding.
We recommend using PushEngage to get push notification subscribers.
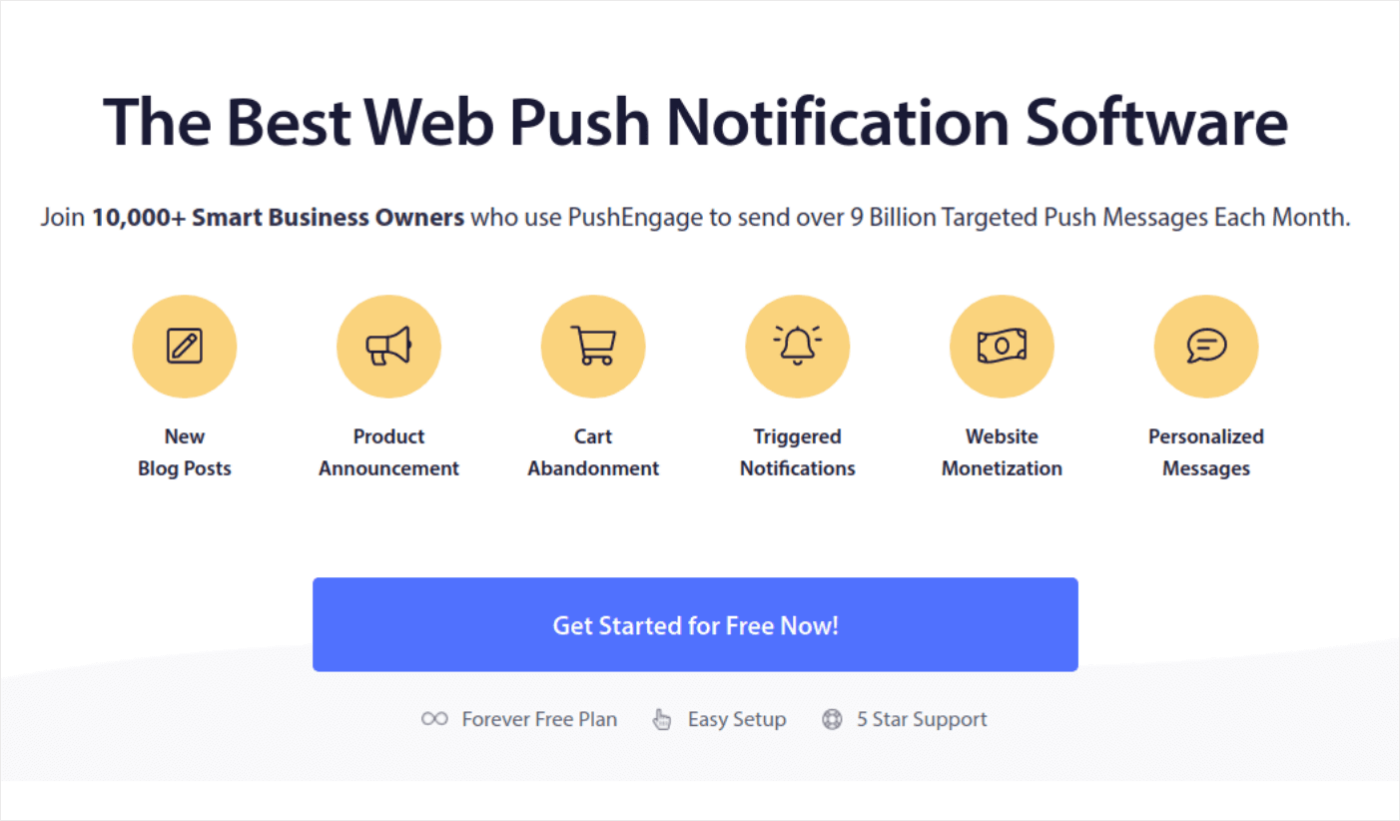
PushEngage is the #1 push notifications plugin in the world.
Push notifications help you grow your website traffic and engagement on autopilot. And if you’re running an online store, PushEngage also helps you grow your sales by helping you create automated eCommerce push notifications.
You can get started for free, but if you’re serious about growing your business, you should buy a paid plan. Also, before buying any push notification service, you should check out this guide to push notification costs.
Here’s a quick glance at what you get with PushEngage:
- High-converting automated campaigns
- Multiple targeting and campaign scheduling options
- Goal tracking and advanced analytics
- Smart A/B testing
- A Dedicated Success Manager
You’ll see that PushEngage is hands down the best bet if you want to build traffic, engagement, and sales for your business. And if you’re on a budget, you can always get a little bit creative with your push notifications.
NOTE: If you’re running a WordPress site, you should install and activate the PushEngage WordPress plugin.
Let’s go!
Step #1: Create a Free PushEngage Account
Head over to PushEngage and click on Get Started for Free Now:

You can get started with the free plan. But if you’re looking to send targeted push notifications, you should select the Growth Plan. Once you know which plan you want, click on Get Started to create your PushEngage account.
Step #2: Sign Up for PushEngage
Now, it’s time to create your PushEngage account. Start by signing up with an email address or a Gmail ID:
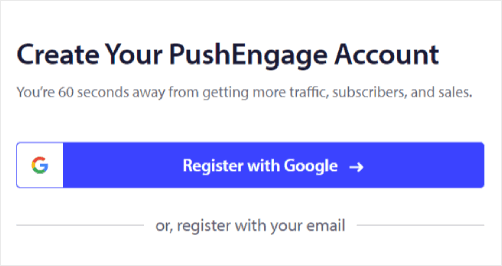
Then, fill out your account details:
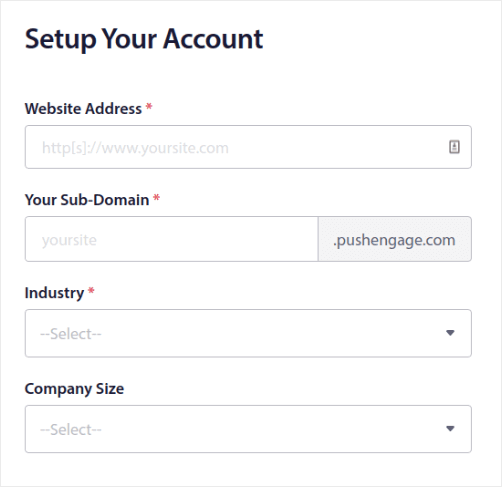
And add your credit card information to buy your plan:
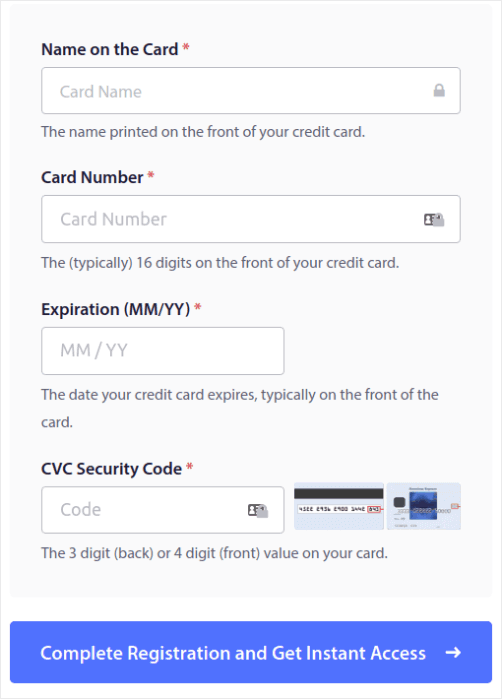
If you selected the free account, then your credit card will never be charged any money until you choose to upgrade your plan. And now, you’re all set to get access to your PushEngage dashboard. Just click on Complete Registration and Get Instant Access.
If you’ve used OneSignal or PushAlert before, you’ll see that PushEngage gives you a much cleaner experience from the dashboard. The OneSignal dashboard isn’t meant for advanced campaigns. For that, you’ll need the API more than the OneSignal plugin.
Step #3: Install WordPress Plugin to Best Measure Push Notification Engagement Rates
NOTE: If you’re not running a WordPress site, you should check out our installation guides to get started.
You’re done creating your account. So, head over to the PushEngage dashboard when you can track push notification engagement rates and follow along:
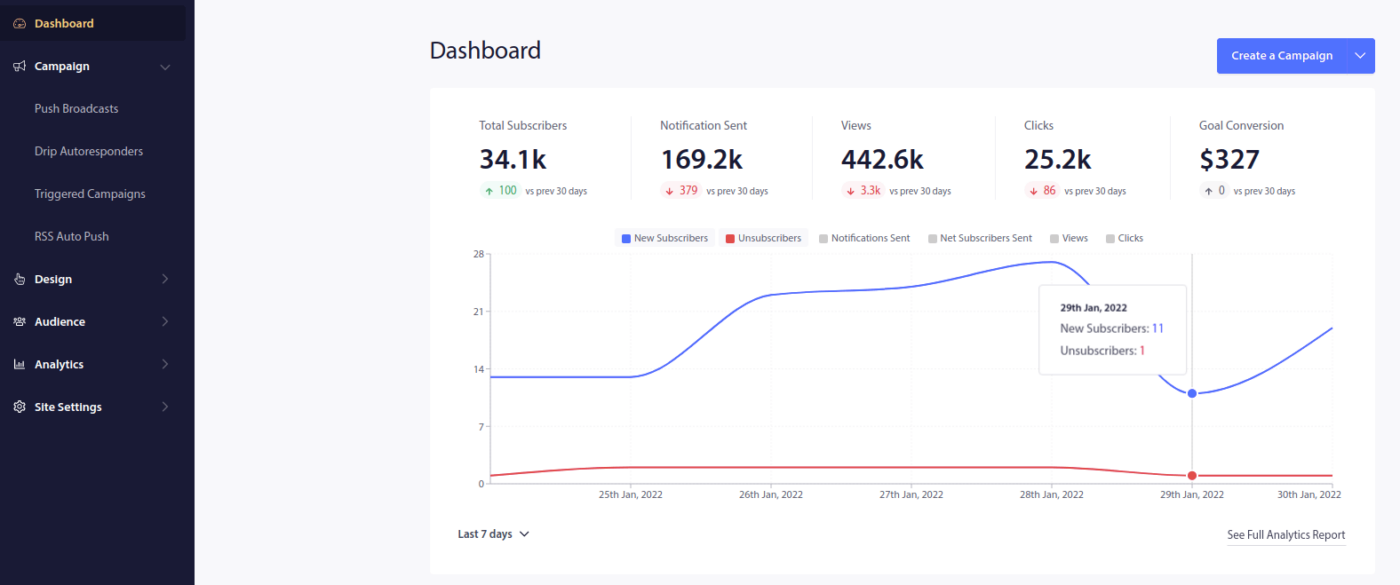
Click on Site Settings » Site Details and click the Click Here For Setup Instruction button:
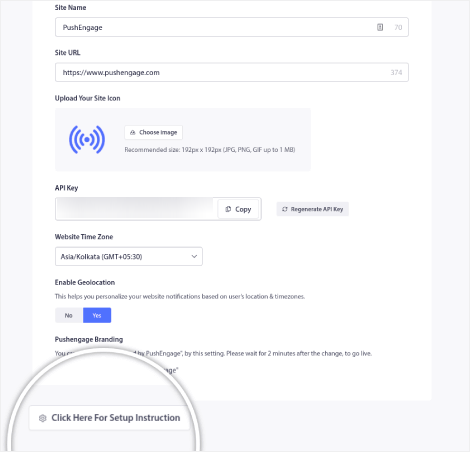
Click on the WordPress tab and click on the Install PushEngage WordPress Plugin button to install the plugin on your website.
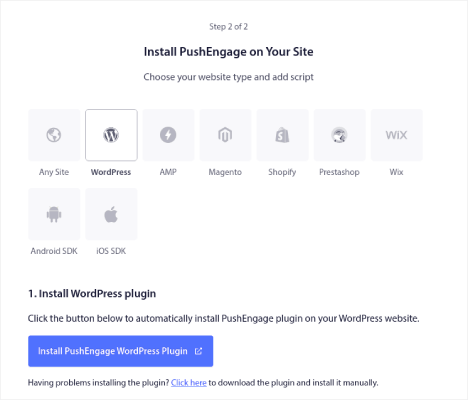
Here’s the cool part: When you created your PushEngage account, you already synced your website with your PushEngage account. So, click on the installation link in the PushEngage dashboard to automatically install the PushEngage WordPress plugin to your website.
Step #4: Connect Your WordPress Website with PushEngage
When you’re done installing and activating the PushEngage WordPress plugin, you’ll see the PushEngage onboarding wizard:
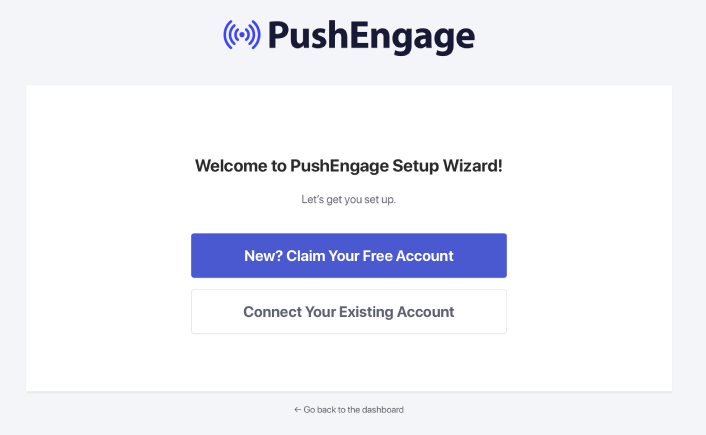
The wizard is fairly straightforward. If you’re a new user, click on New? Claim Your Free Account. And if you’ve already signed up, click on Connect Your Existing Account.
Next, you can select your site from the Select a Site dropdown under Connect a registered site if you’ve already registered a site during signup:
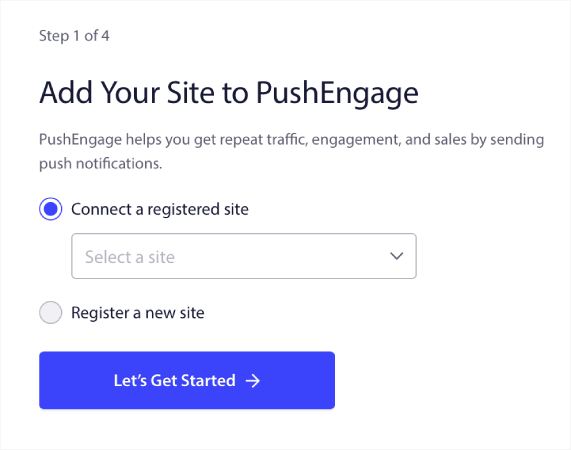
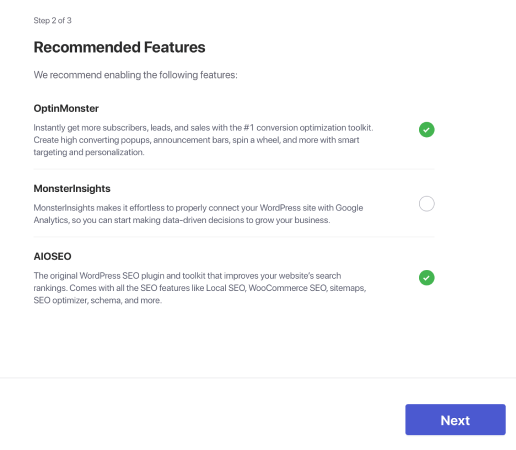
Or, you can click Register a new site to add a new site if you have a Premium pricing plan or higher. In the next step, the onboarding wizard will prompt you to install other must-have WordPress plugins.
If you followed each step correctly, you’ll see this success message from the wizard:
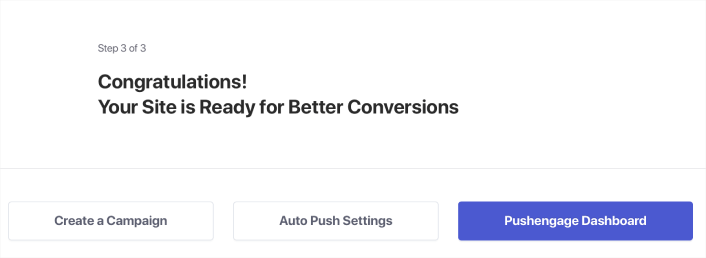
You are now ready to create campaigns and push notification popup modals.
Creating Compelling Content
Here’s a small secret that copywriters don’t want to tell you…
Copywriting is mostly driven by standard patterns. What looks creative on the outside is really just a well-known pattern. And having compelling content gets you much more traffic, engagement, and sales on repeat.
Let’s take a look at the different parts of the content for most winning campaigns.
Crafting Engaging Push Notification Messages
Netflix is the king of binge-worthy content. And their push notifications are just epic.
But how do they do it?
Netflix sends personalized push notifications just as much as it sends you personalized content recommendations:

Any fan of Narcos knows what that notification means. Copy like this instantly excites them because the copy draws on an existing fanbase that’s already familiar with the Narcos story.
So, what’s the key lesson here?
Personalized Recommendations + Story-Driven Copy = High Engagement.
And it doesn’t matter if you don’t have an existing database of raving fans. This method works for a small business with a small list of subscribers as well. Check out these push notification copy examples to get some more inspiration.
Leveraging Personalization
Personalized push notifications make your subscribers feel like they were tailor-made for them. The best part? Our customers get around 8% conversion rates for personalized campaigns.
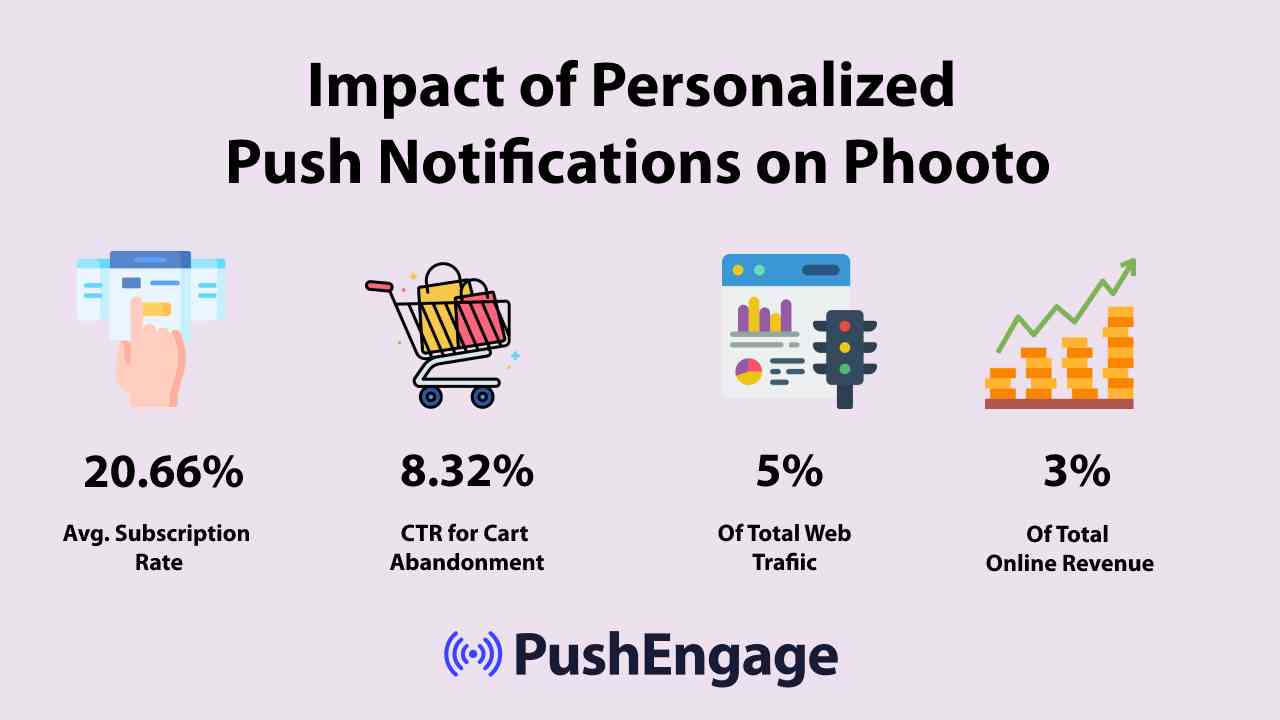
Clearly, personalized push notifications can change the way you do business online.
But according to a study, 70% of personalization experiences on an eCommerce website happen only when the user has logged into the account. But ideally, you’d want to offer a personalized experience even when they’re not logged in.
- Browse Abandonment Campaigns
- Inventory Alerts
- Price Drop Alerts
- Personalization By Location
- Cart Abandonment Campaigns
- Product Review Campaigns
- Live Event Reminders and Updates
Push notifications even help you reach out to your customers whenever they’re online, no matter whether or not they’re on your site.
Using Content Themes
Content themes are a great way to get people to subscribe to your push notifications. You can use different occasions such as Black Friday as content themes:
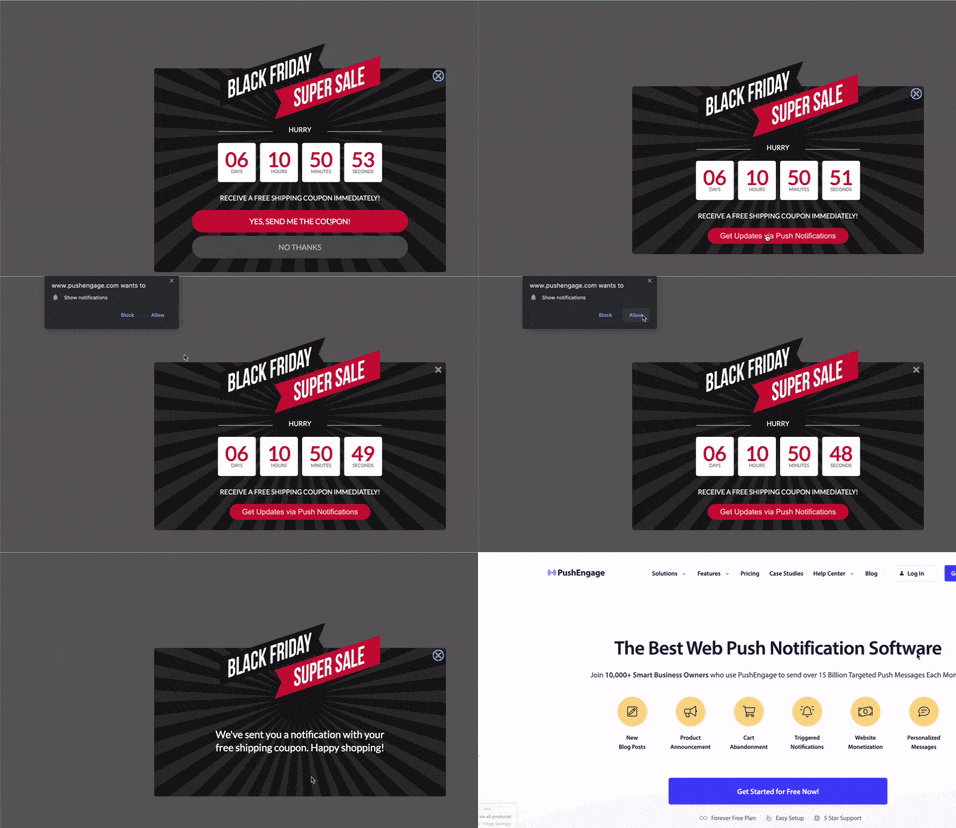
You can also use occasion based segmentation to send different types of targeted push campaigns. Even better, you can use these segments to create subscription widgets on your site:

A subscription management widget allows your visitors to choose what kind of push notifications they want to receive from you.
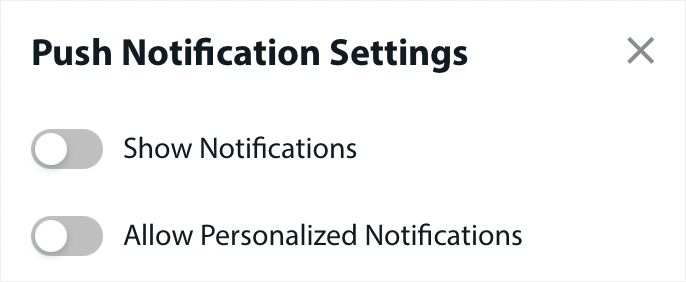
And you can even create push notification popups that automatically segment your subscribers when they subscribe.
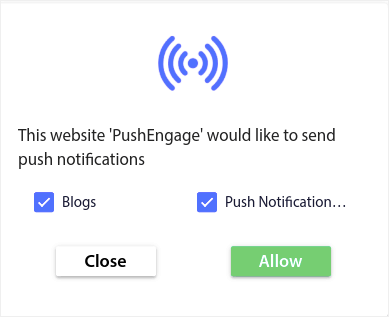
Content themes allow you to send only relevant content to your subscribers. This will help you boost your subscription rates and even your engagement rates.
Pro Tip: Remember to diversify your content themes. You can create multiple push notification optins to target different types of users. Creating multiple custom optins is a great way to increase your push subscribers from your existing content.
Building a Subscriber Opt-In Strategy
Custom content is one of the easiest ways to get push notification subscribers. But that’s not all it takes. You’ll also need a clear strategy to keep growing your subscriber list. Let’s take a close look at some of the most critical parts of an opt-in strategy.
Implementing a Clear Call-to-Action
A call-to-action button is the simplest way to get your website visitors to subscribe. By default, your push notification popups ask your visitors to subscribe. But you can change the copy to anything you want.
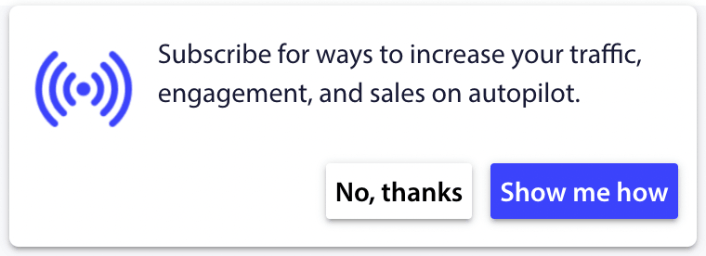
And what’s more is that you can customize the look and feel of it including your brand colors.
Pro Tip: You can use action buttons in your push notifications to get way more clicks.
Timing and Frequency of Notifications
There is such a thing as too many push notifications.
The number of push notifications you should send depends on your industry. That said, the best thing to do is send your customers 2 notifications a day at most. And no more than 5 a week.
An average of 1 notification a day works even better.
Unless you have something genuinely important to tell your subscribers, of course:
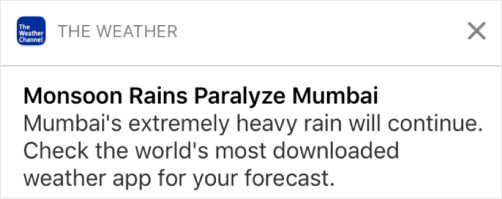
You could easily come off as too aggressive and annoy your subscribers. That’s a great way to lose push notification subscribers. But you will have to connect with your customers. And you need to send them promotional and transactional notifications.
Check out this article on how many push notifications you should send for even more tips.
You can also schedule your push notifications in different ways.
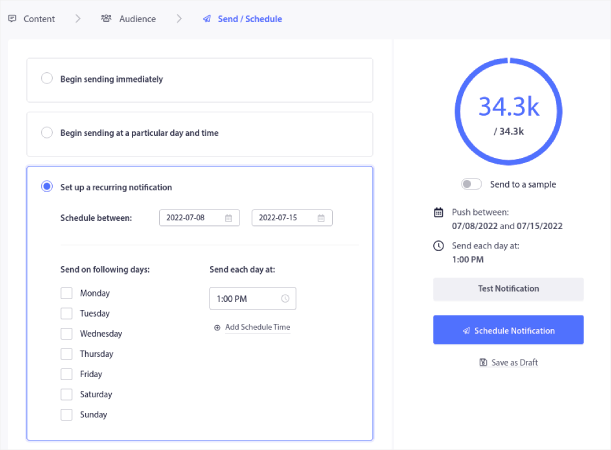
It’s super easy to schedule push notifications to get sent:
- Immediately
- At a particular date and time
- As a recurring event
Know how many notifications to send and when to send push notifications will reduce your unsubscribe rates dramatically.
Pro Tip: If you get to a point where your push subscribers are not engaging with you, you can launch a retargeting campaign to rengage with them. If that doesn’t work, you can always clean up your subscriber list.
A/B Testing to Get Push Notification Subscribers
Split testing is a good way to get push notification subscribers to stay subscribed. But what can you split test in a push notification?
The most common performance metrics for push notifications are:
- Click rate: The click rate on a push notification is how often your subscribers saw your push notification and then clicked on it.
- View rate: The view rate of a push notification is how often a subscriber received your push notification and saw it before it expired.
- Goal conversions: You can set goals for your campaign and set up goal tracking for your campaigns. The goal conversions is a measure of how many times you achieved your goal.
To increase your view rates, you want to use a large image in your push notifications. Using images in your notifications instantly makes it more appealing.
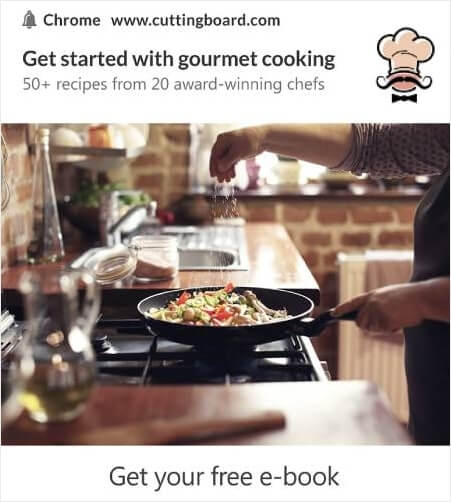
You can also experiment with power words in your push notification title.

So, you can A/B test notifications with images and without one. You can also test view rates by split testing push notifications with and without power words in the title.
If you’re looking to improve your click rate, you want to focus on the core message and work on making it super relevant. Mostly, this is about one of two things:
And there’s nothing to A/B test in that area. But you can A/B test your click rates with the Call to Action (CTA) buttons on your push notifications. Try A/B testing push notifications with one or no CTA against one with two CTAs.
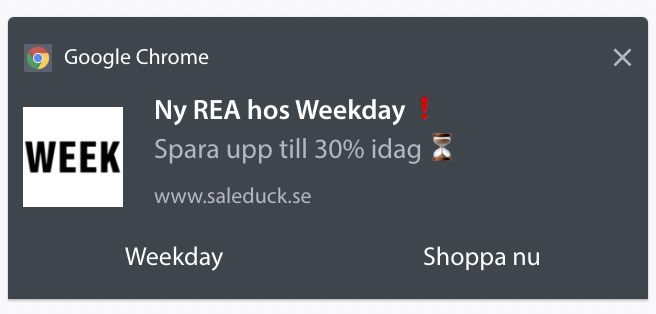
If you’re not sure how to create multiple CTAs, check out this article on how to add buttons to your push notifications.
With goal conversions, it’s mostly a matter of setting up relevant eCommerce push notifications. So, again, there’s not a LOT to split test here. That said, if you can optimize your push notifications for better clicks to a really good offer, your goal conversions will increase.
Improving How to Get Push Notification Subscribers
Over time, you can improve the optin rates for your push notification popups. With any good push notification service, you get detailed optin analytics.
Every conversion toolkit under the sun comes with its own pop-up analytics. So, why should push notification popups be any different?
Here’s what’s epic…
You can get analytics not just for your push notification campaigns but also for your opt-ins!
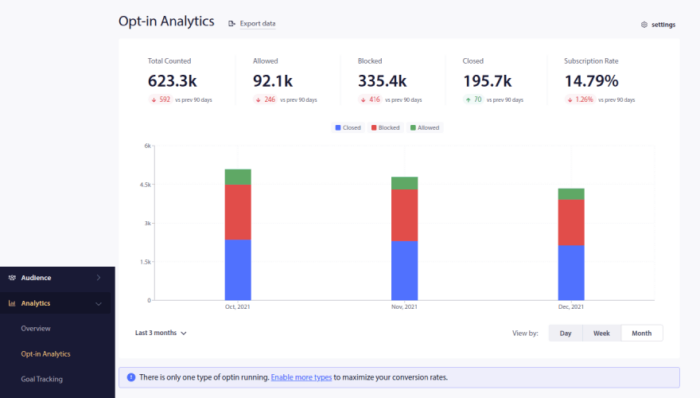
Paying attention to your optin analytics is a good way to get push notification subscribers. At the same time, we also recommend getting feedback from your subscribers about your push notification campaigns.
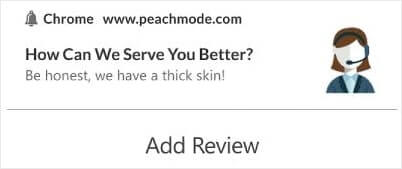
You can create a simple landing page with a form to collect reviews and feedback about your campaigns.
Privacy Concerns When You Get Push Notification Subscribers
According to GDPR, you must obtain explicit consent before collecting or processing any personal information of an EU resident or citizen.
Now, push notifications are a lot like emails but even more constrained. You can ONLY send out push notifications to your subscribers. Unlike emails, you can’t send a single push notification randomly to someone who’s not subscribed.
Where GDPR meets push notification software is that you get push notification subscribers. So, in a sense, you are collecting consumer data.
Of course, it’s not the same as an email opt-in. With an email opt-in, you have to capture the email address, but you can capture a LOT of additional data. Take a look at this one by HubSpot:
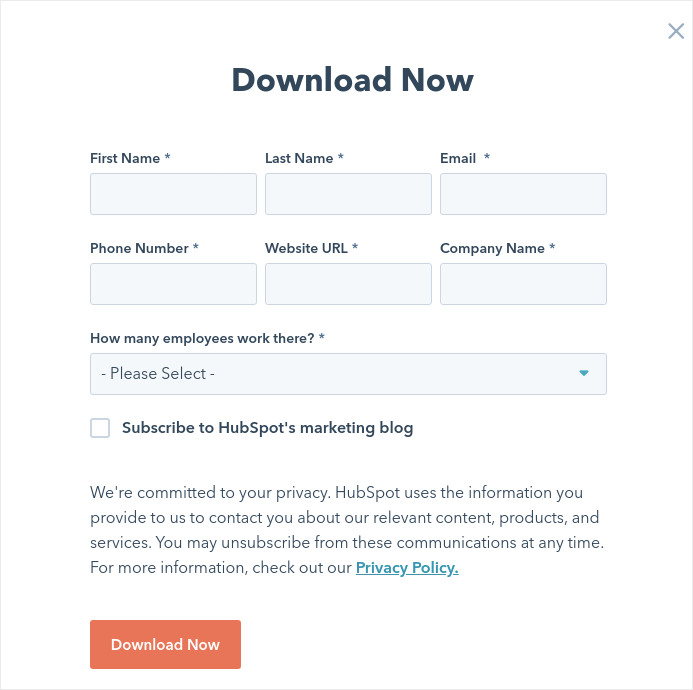
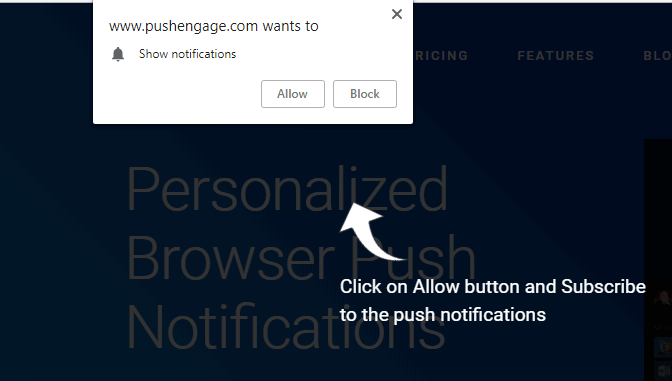
But with push notifications, you capture the combination of the device and the IP address to generate a key that is unique to the customer’s device. That’s what happens when people opt for your push notifications by clicking ‘Allow’:
Additionally, PushEngage can store the geolocation of your subscribers so that you can create personalized push notification campaigns. This includes the country, state, and city at the time of subscription.
But as you can probably understand, this is entirely based on consent. When someone opts for push notifications, they give you consent to send them marketing notifications. So, push notifications are already compliant with GDPR by definition because they operate on a consent-first paradigm.
What to Do After You Get Push Notification Subscribers
Now that you know how to get push notification subscribers, it’s time for you to start building your campaigns. Start with checking out more examples of how you can use push notifications effectively:
- 21 Best Website Welcome Message Examples You Can Use
- How to Add A Web Notifications WordPress Plugin to Your Site
- 75 Epic Push Notification Examples You Can Steal Right Now
- 15 Push Notification Copy Examples to Inspire You
- 7 High-Converting Push Notification Optin Examples (2022)
- 11 Creative Push Notification Examples You Can Steal Right Now!
You should also check out our article on push notification best practices to get the most out of your push notification campaigns.
But none of this will move the needle for your brand unless you start sending push notifications.
So, if you haven’t already, get started with PushEngage today!
