At PushEngage we believe in transparency and want to ensure there is NO vendor locked-in when your sign up. We have even If you wish to enable web push notifications on safari, and have your subscribers portable, then you need to create your own safari web push certificate, and configure it in PushEngage. This step is similar to creating your own FCM key for Chrome.
Here’s the step-wise breakdown that you can follow to create your own certificate.
Before creating the certificate, you would need a few things –
- An active Apple Developer Account – Currently this developer account costs $99/year.
- Unique Push ID for your website (can be created using developer account)
Following the four steps, you can create your own safari web push certificate
Step 1 – Create a Certificate Request
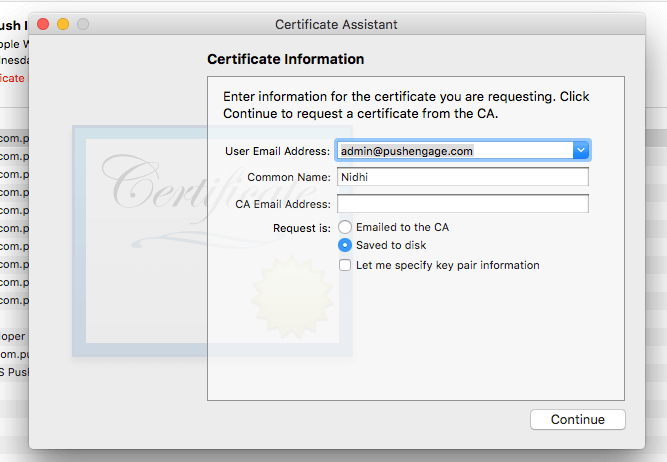
- Launch Keychain Access App and navigate to Keychain Access > Certificate Assistant > Request certificate from Certificate Authority

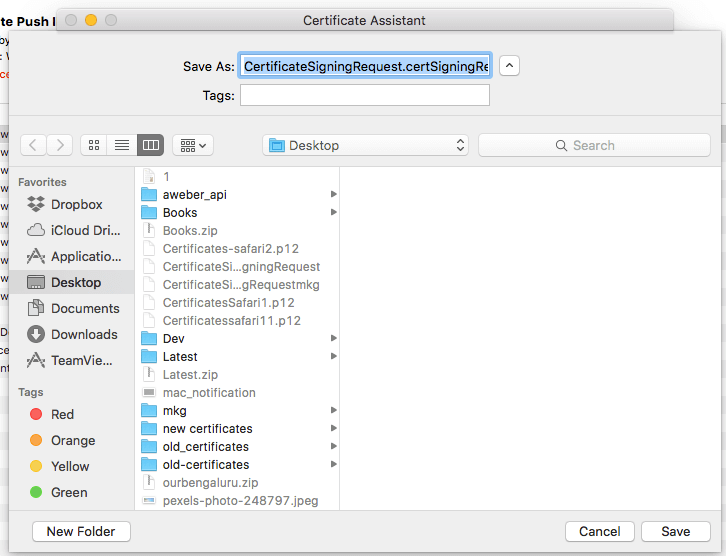
- In certificate information add an email address and name then click on Save.
Step 2 – Set up Web Push Id for APNS
- Login to Apple Developer Console > Identifiers > Website Push IDs and on top right section click on +
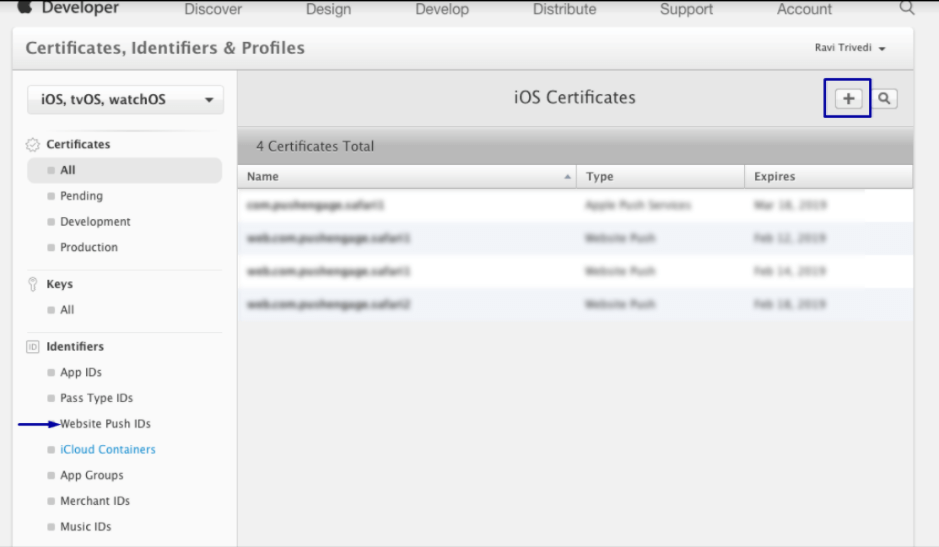
- You will be redirected to the next window and there add website Push ID Description and unique identifier. Once done, click on Continue.

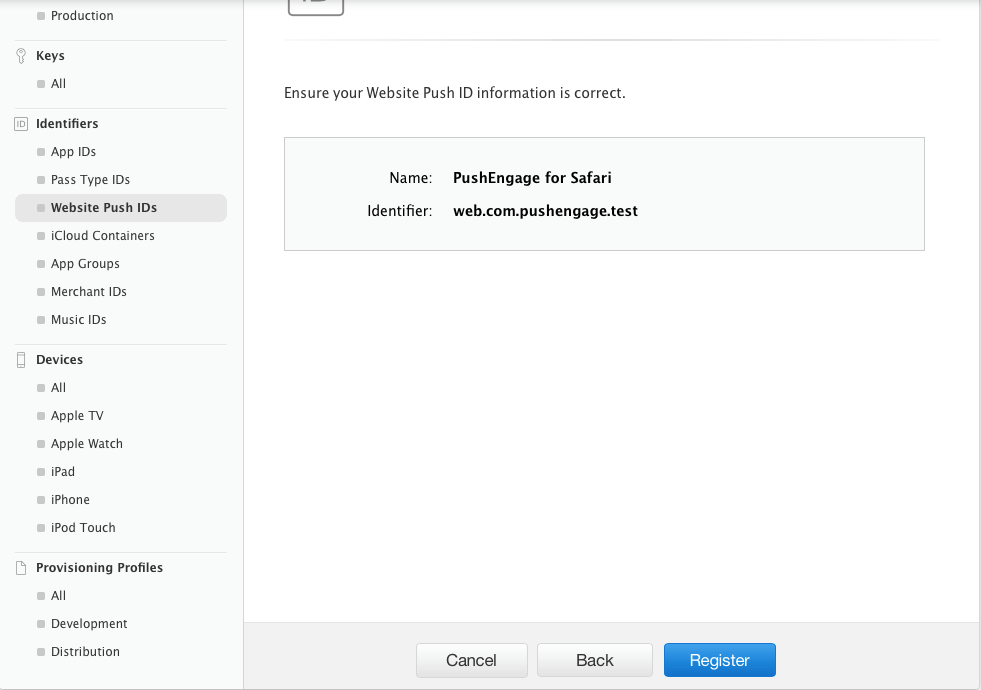
- In the next window ensure that your website Push Id is correct and then click on Register
Step – 3 Generate Web Push Certificate
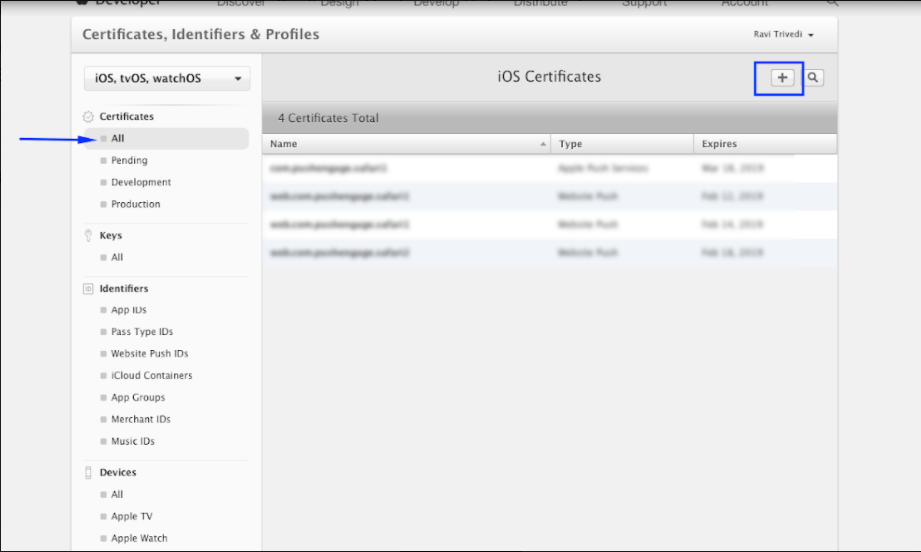
- Navigate to Certificate > All > click on +
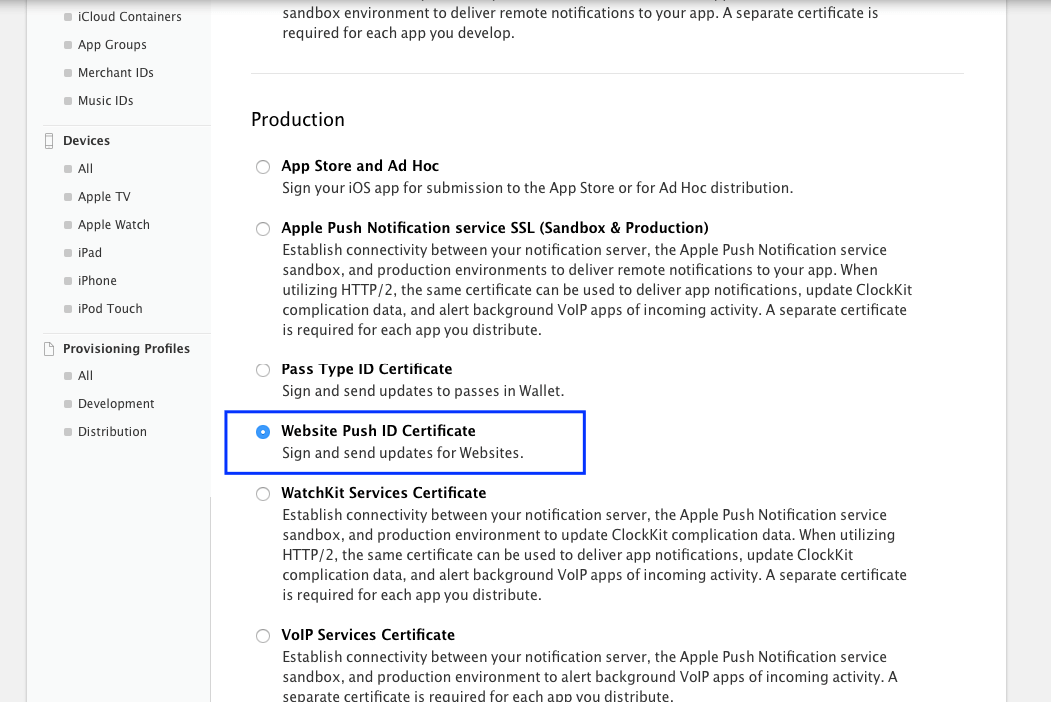
- Select Website Push Id Certificate > Continue
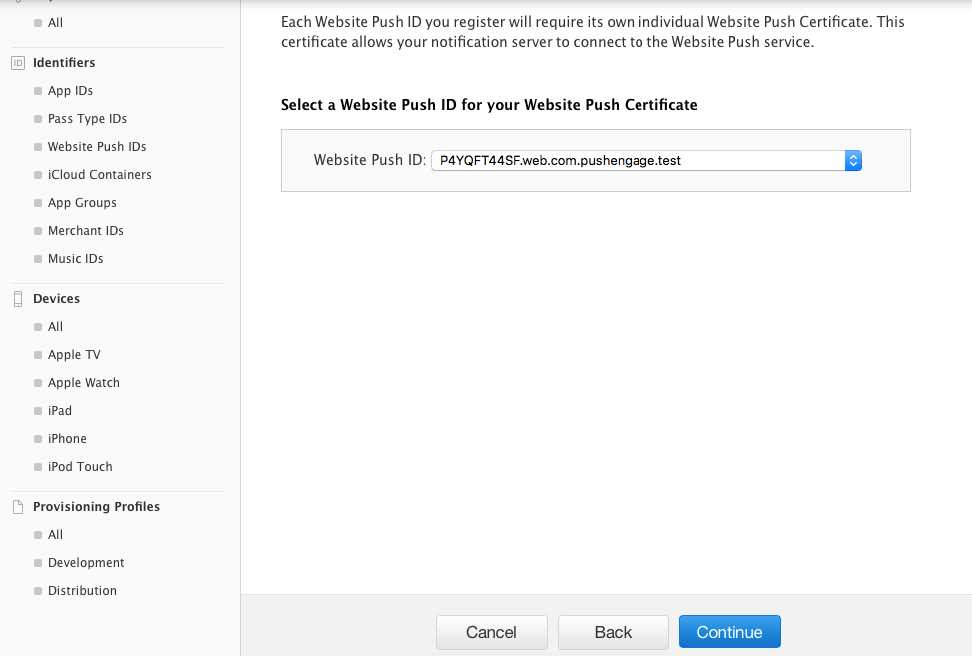
- Select the Website Push Id that you created in Step 2 and click on continue
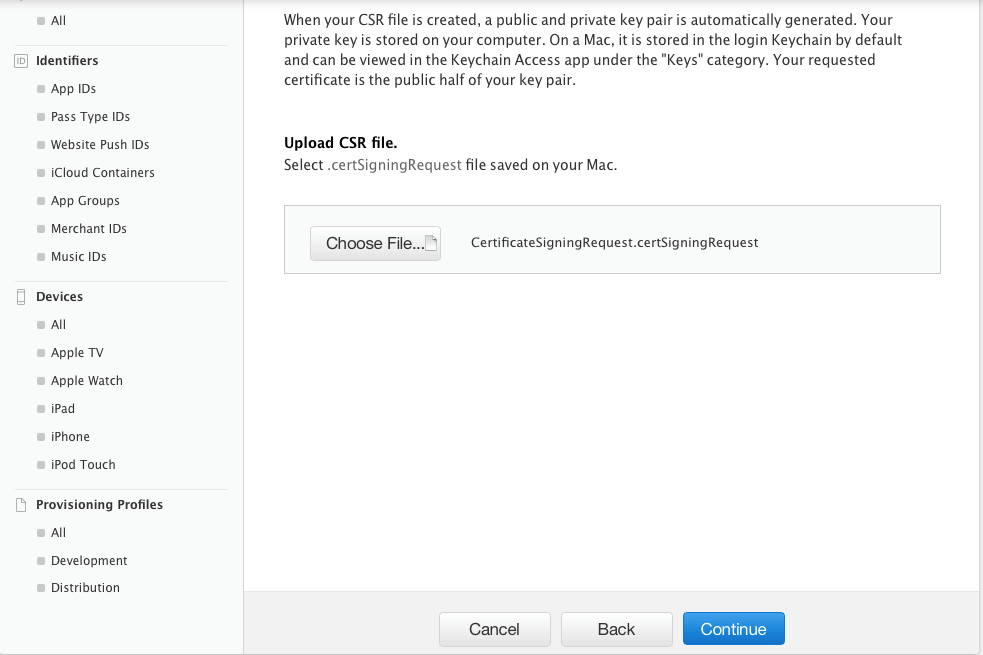
- Now add the CSR certificate that you created in Step 1 and click on continue
- On the next window, you will get a message “Your Certificate Is Ready”. Download it as it will be used to send notifications to your subscribers.
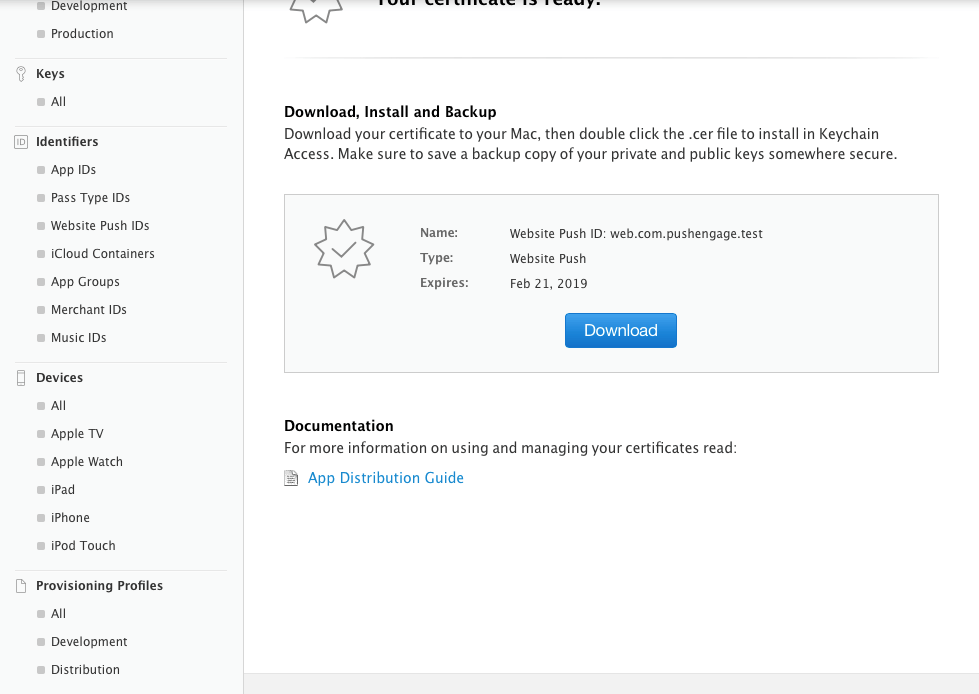
- Now you must install and export the certificate. So, double click on Downloaded Certificate and your certificate will be installed in keychain Access App
- To export the certificate – Go to keychain App > Certificate > Right click on certificate > select Website Push ID for which certificate was created > then click on Export
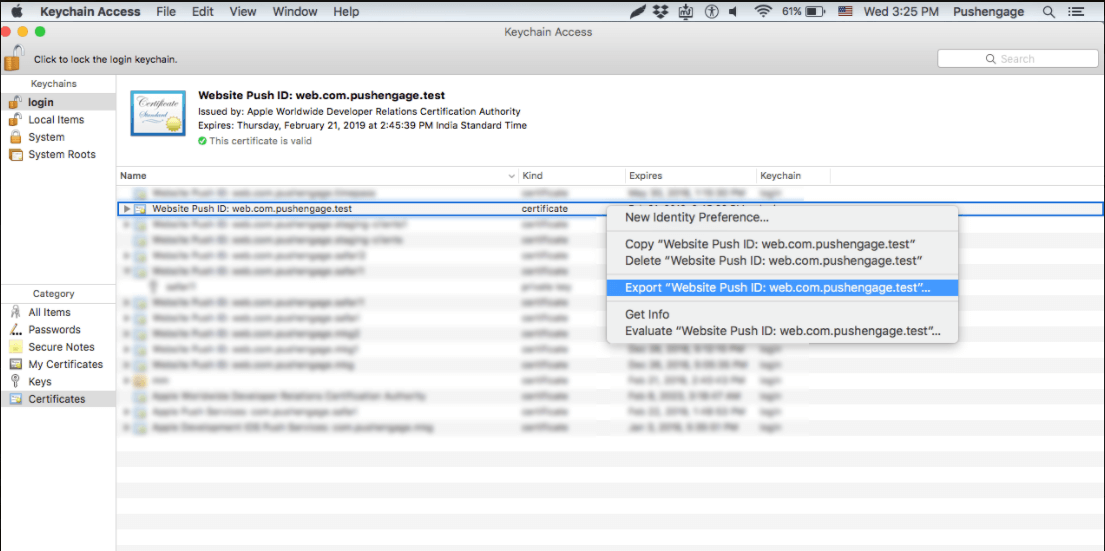
- Use Personal Information Exchange (.p12) format while saving certificate
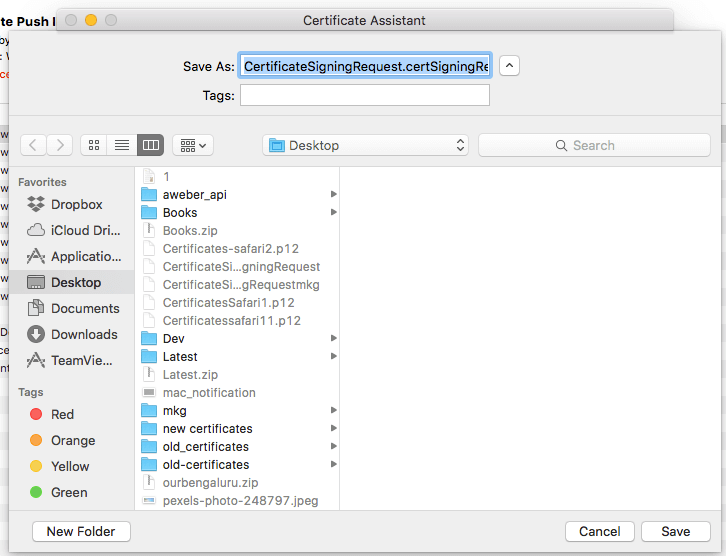
- In next window, you can choose to create a password or to leave it blank then click on OK
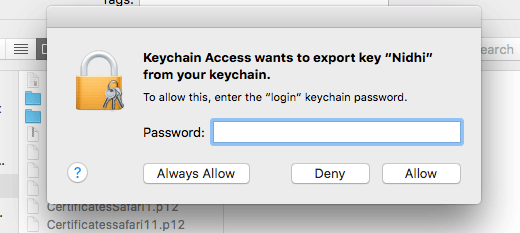
- Click Allow to export the certificate to MAC
Step 4 – Upload Your Certificate to PushEngage
- Navigate to Settings > Safari web Push Settings > Enter Website Push Id > Private key file and password. Once done click on Update.
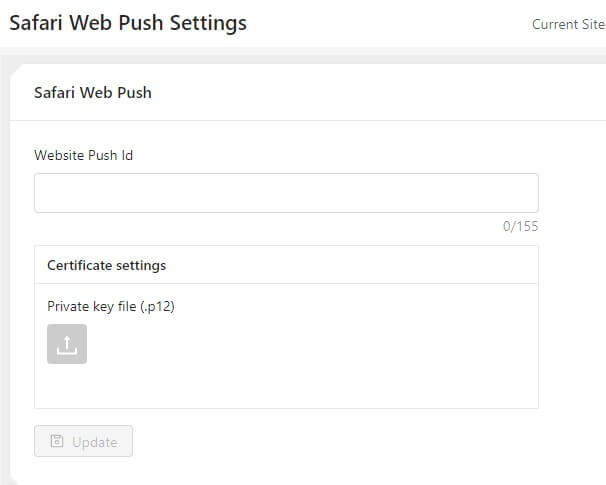
- If settings are done correctly you will get a message “Settings successfully updated “
That’ all and you can now send notifications to your subscribers using Safari. We also support push notification on chrome and firefox browser as well.

First sentence: At PushEngage we believe in transparency and want to ensure there is vendor locked-in when your sign up.
Should be:
At PushEngage we believe in transparency and want to ensure there is NO vendor locked-in when your sign up.