X-Cart is one of the most popular eCommerce site builders in the world. Using X-Cart, you can create a full-blown online store in seconds. But how do you add push notifications to an X-Cart site?
Push notifications can help you increase traffic, engagement, and revenue for your store by creating very simple push notification campaigns. The best part is that push notifications can be really affordable and simple to execute.
In this article, we’re going to show you step-by-step how to add web push notifications to X-Cart.
We’re going to show you how to do it using PushEngage. PushEngage is the best push notification software in the world and we highly recommend that you use the software to send your push notification campaigns.
Let’s dive right in.
How to Install Push Notifications on X-Cart
Installing push notifications to X-Cart isn’t really difficult. As long as you follow each step in this tutorial, you’ll be fine.
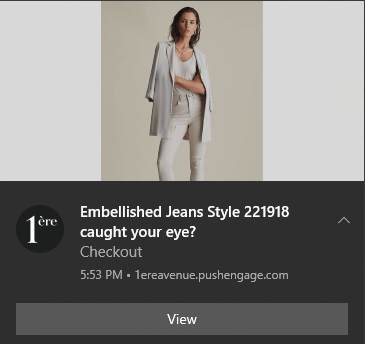
At the end of it all, you should see a welcome push notification on your site like this one:
Let’s dive in.
Step #1: Set Up Your PushEngage Account
Head over to the PushEngage home page and click the Get Started button:
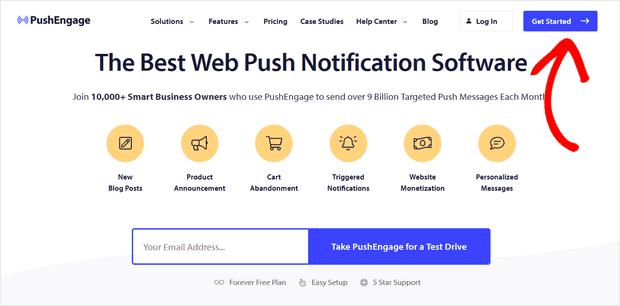
You can try out PushEngage for free. But we recommend selecting a paid plan to unlock all the powerful features it offers. Since X-Cart is an eCommerce site builder, you should ideally get the Enterprise package to get full access to automated push notification campaigns.
Once you’ve signed up for your PushEngage account, head over to your PushEngage dashboard and go to Settings » Site Settings » Installation Settings:
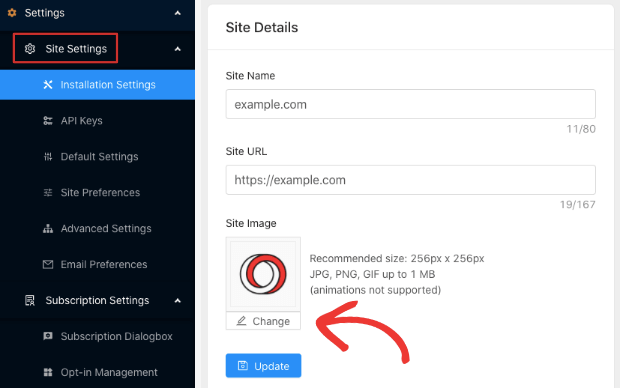
You can set your logo, site name, and site URL here. Once that’s done, we’ll move on to the installation. But you should really get this done right now so that you can test your push notifications later.
Step #2: Get the Installation Code from PushEngage
To install push notifications, you’ll need to get an installation code from your PushEngage dashboard. Head over to Settings » Site Settings » Installation Settings:

Depending on whether your site has an SSL certificate installed, go to either the HTTP tab or the HTTPS tab to get your installation code.
Copy this Javascript code snippet. You’ll need it soon.
Step #3: Place the Installation Code in Your X-Cart Site
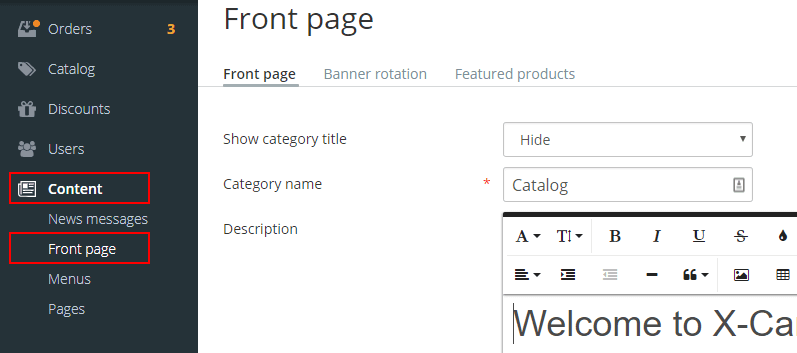
Log in to your X-Cart dashboard and head to Content » Front Page:
In the text editor, select Code View to and paste the PushEngage installation code snippet you got from the PushEngage dashboard:
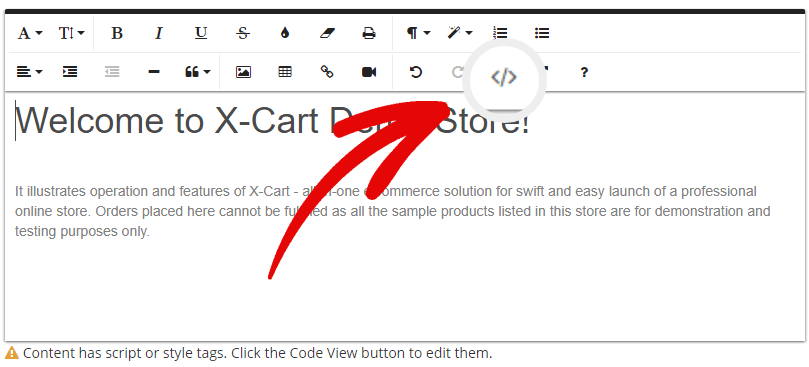
When you’re done, hit Update. And you’re done!
Step #4: Configuring the PushEngage Opt-In
Finally, in your PushEngage dashboard, go to Settings » Subscription Settings » Subscription Dialogbox » Edit:
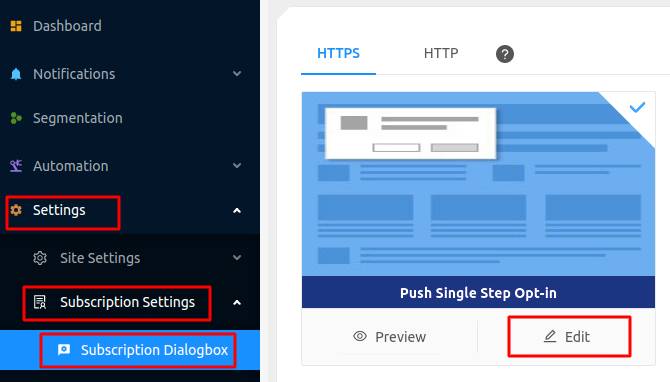
Here, you can customize your push notification opt-in. The best way to approach this is to treat it like any opt-in. You want to give your visitors a solid reason to subscribe. If you need some help with that check out our article on how to create a custom push notification opt-in.
And if you’d like some templates to get started, you should check out this article on high-converting push notification opt-ins.
Step #5: Create a Welcome Notification
Now that you’re done setting up the opt-in, it’s time to test if it’s set up the right way.
The best way to do this is to create a welcome notification and then subscribe to your push notifications to see if everything works. A welcome notification is a push notification you send a new subscriber to confirm their subscription and welcome them on board.
So, how do you do that?
Head over to Settings » Site Settings » Installation Settings and configure your welcome message:
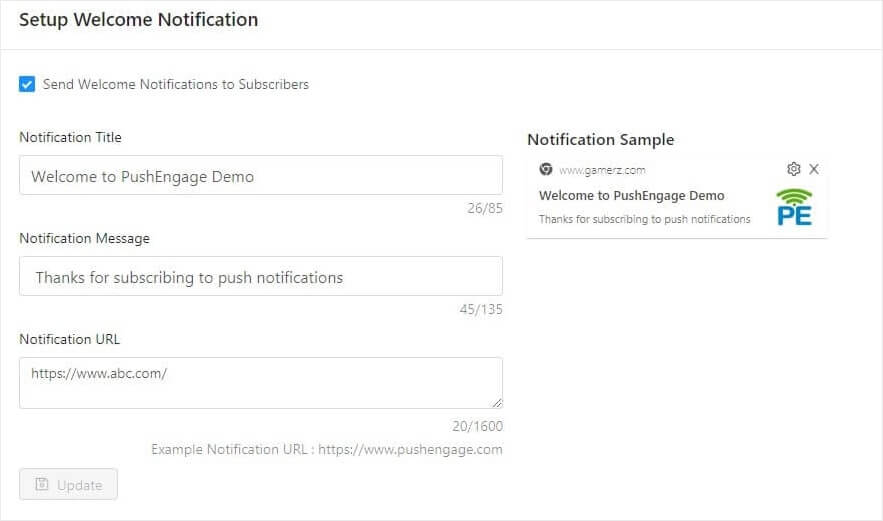
And it’s really that simple.
Now, all you have to do is head back to your site and subscribe to your own notifications. At this point, it’s also a really good idea to conduct a full test of your push notifications setup because you’re ready to create campaigns now. It’ll help you troubleshoot common issues before your visitors see them and start complaining about a broken user experience.
Wrapping Up
That’s all for this one, folks!
If you’ve already added web push notifications to your X-Cart site, you should really start building your push notification campaigns next. A good place to start is to check out our article on creative push notifications for inspiration.
But if you’re a marketing pro and you don’t need any help with creative ideas, you should take a look at our article on automated push notification campaigns. These are more advanced ideas that keep growing your traffic, engagement, and revenue on autopilot.
We recommend creating your campaigns using PushEngage. PushEngage is the #1 push notification software in the world and your campaigns will be in good hands.
So, if you haven’t already, get started with PushEngage today!
