Do you know how to configure cross-sell campaign using web push notifications? Cross-sell campaign is very effective in eCommerce business. It can increase the average basket order and thereby overall revenue. In this article, we will show the exact steps to create cross-sell campaign using push notifications.
Every eCommerce business wants to increase its revenue. One of the trigger push notification campaigns to increase sales is Cross-Sell Push Notification campaign. If you implement a cross-sell campaign correctly, then cross-sell products will be automatically visible to your customer. There are many tools for an eCommerce website to create cross-sell campaigns. You can use the Website Push Notifications service to send cross-sell notifications. There is no harm in showing a complementary product to customers when they make a purchase. It makes their buying experience much easier and increases your brand value.
Check out some of Cross-Sell Notification examples for eCommerce website:
- If a user has purchased “mobile phone”, you can send “power bank” or “phone case” as cross-sell product
- If a user has purchased “Bed Sheet”, you can send “pillow cover” or “pillow set” in your cross-sell push notification
- If a user has purchased “dress”, you can send matching “jewelry” in your Push Notification
Cross Sell Notification is all about offering a complementary or similar product to what the user has purchased. It helps you to showcase the breadth of your product category.
How to configure Cross Sell Web Push Notification Campaign
- Making a Cross-Sell Campaign for users who bought the mobile phone. Cross Sell product is “Power Bank”
- Go To Segmentation -> Create Segment. Name the segment as “Mobile-Purchased”.
- Update users Dynamically to the above segment when the user makes Mobile Purchase.
- How to add users Dynamically to the segment after purchase:
We can suggest two ways to do it: session based or cookie based.
Cookie-based: Save the category information in the cookie. When the user clicks on Make Payment, save the category information in the cookie.
Thank You / Payment Success Page: Once the user makes the payment, you show the Page, check the Cookie and see if the Category is “Mobile”. If yes they call the below function:
_pe.addSubscriberToSegment(‘Mobile-Purchased’);
The above function will add the user to the segment “Mobile-Purchased”
This completes your adding user to the segment dynamically. - Next, go to Drip Auto-Responder to create Cross Sell Campaign
- How to Create the campaign:
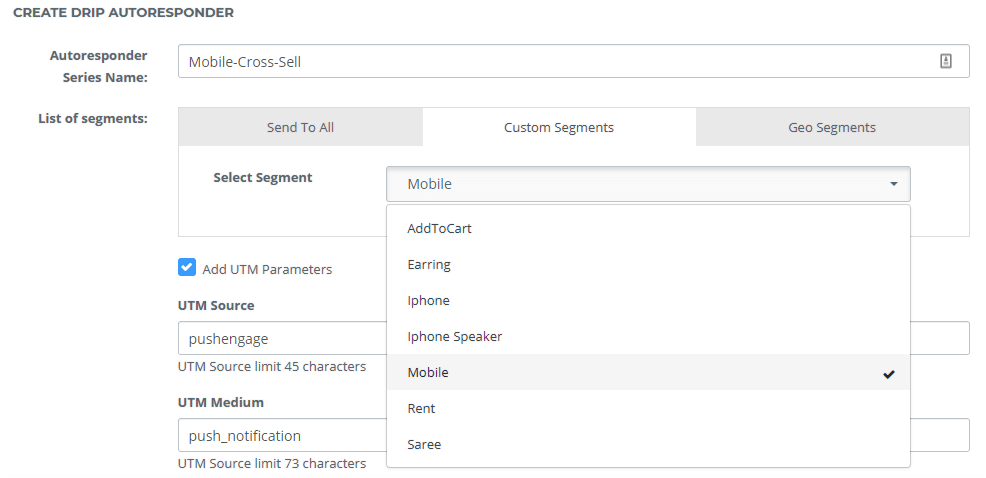
From Dashboard, Go to -> Automation -> Drip -> Create Drip Auto Responder. Give a name to the Drip Responder like “Mobile-Cross-Sell”. In the Audience Selection, choose the segment you have created. In this case, select the “Mobile-Purchased”. - Create Notification For Cross Sell: Now create Push Notification series to cross-sell.
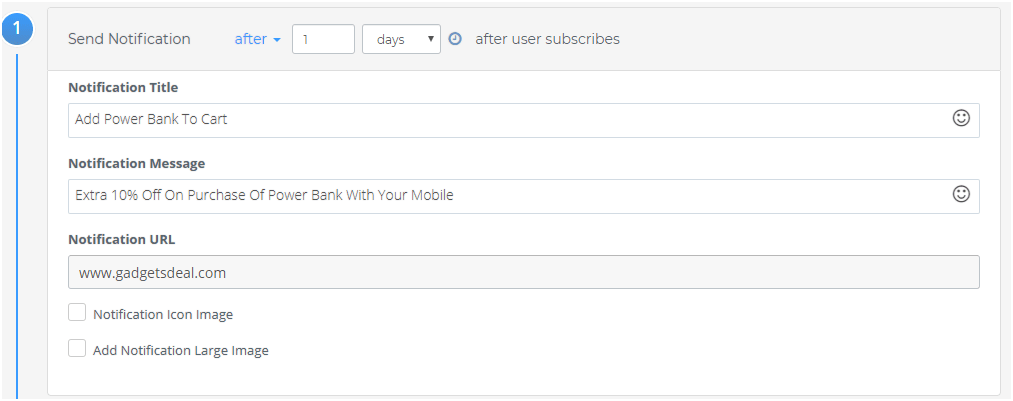
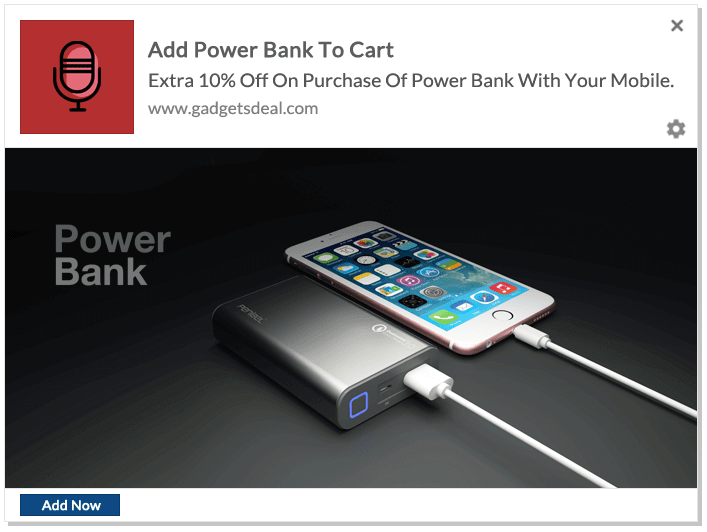
Identify the products to cross-sell with mobile. In this example, we are using a power bank as the cross-sell product. You can add multiple notifications to cross-sell more products.
The notification will be sent after 1 day of purchase. You Cross Sell Push Notification campaigns is set.
Setting up cross-sell campaign is very easy. Check out the below tactics which can help to make your Cross Sell Push Notification effective:
- Send images or videos: Share an image or video with the product that customer bought along with the cross-sell product. Especially in the case of fashion. If you are showing matching jewelry to the customer for the recently bought dress, then show a visual showing how the product will complement their recent purchase
- Offer: Many times giving extra offers will convince the user to go for the 2nd purchase. You can include discount coupon along with the Cross Sell Notification to increase your conversion rate.


