Looking for a way to add push notifications to your BigCommerce site?
That’s a really great decision.
Push notifications can help you generate a lot of traffic, engagement, and sales on autopilot and with very little effort. And it’s really easy to add push notifications to a BigCommerce site. So, it’s really a quick win.
In this article, we’ll show you how to add push notifications to BigCommerce even if you’ve never done it before.
For this article, we’re going to use PushEngage to set up push notifications on your BigCommerce website. PushEngage is the #1 push notification software in the world. So, your campaigns will be in good hands.
But even if you’re not using PushEngage, this process should be fairly similar to other vendors.
Let’s dive in.
How to Install Push Notifications on BigCommerce
Installing push notifications on BigCommerce is super easy. Just follow these steps and by the end of this article, you should be able to send push notifications from your site like this one:
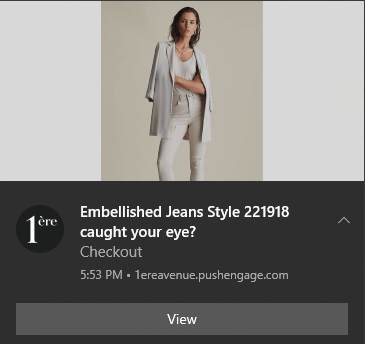
And you don’t have to run a huge business to leverage the power of push notifications. You can do the same thing very effectively even if you’re running a small business site with very little traffic.
Let’s dive in.
Step #1: Set Up Your PushEngage Account
Head over to the PushEngage home page and click the Get Started button:
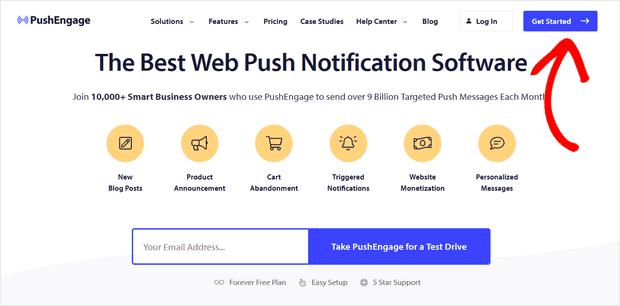
You can select the free plan to try out PushEngage, or choose a paid plan if you’re serious about growing your business. The paid plans come with more campaign options and the ability to build even bigger subscriber lists.
Once you’ve signed up for an account, head over to the PushEngage dashboard and go to Settings » Site Settings » Installation Settings:
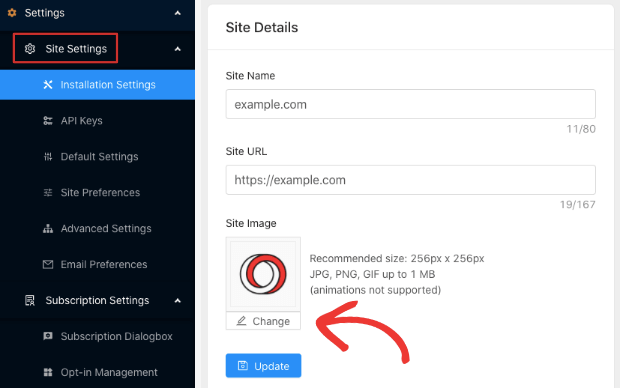
This is where you configure your site details and branding. Go ahead and set a logo and site URL for your push notifications. You should do this right now so that you can test your push notifications properly.
Step #2: Get the Installation Code from PushEngage
Next, you’ll need to head over to the PushEngage dashboard and get the installation code. Go to Settings » Site Settings » Installation Settings:

Depending on whether your site has an SSL certificate installed, go to either the HTTP tab or the HTTPS tab to get your installation code.
Copy this code. You’ll need it later.
Step #3: Place the Installation Code in Your BigCommerce Site
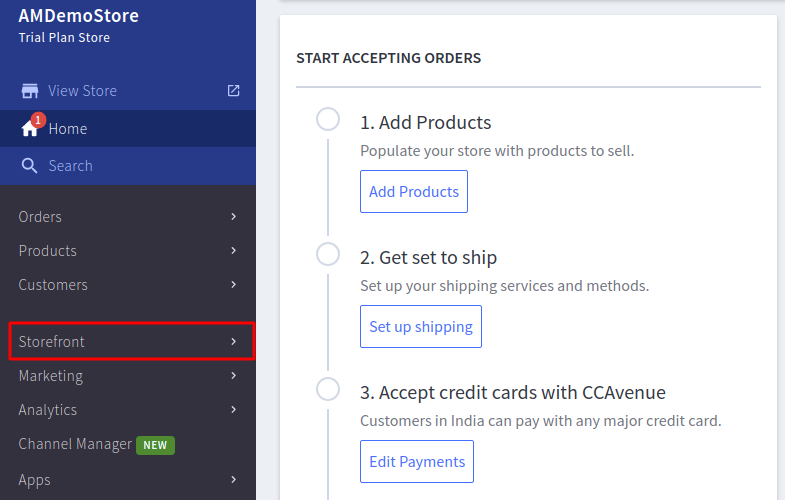
Log in to your BigCommerce dashboard and click on Storefront:
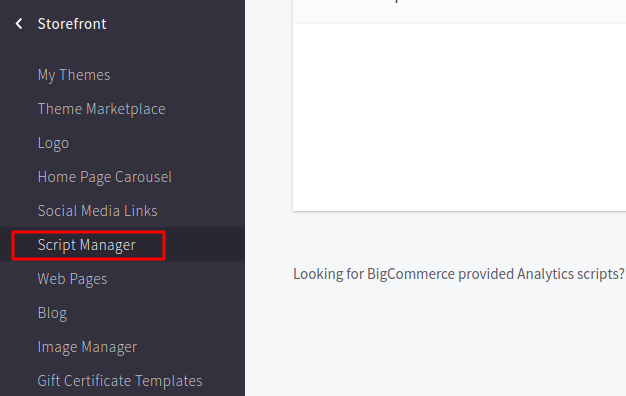
Then, go to Script Manager:
Under Installed Scripts, click on Create a Script:

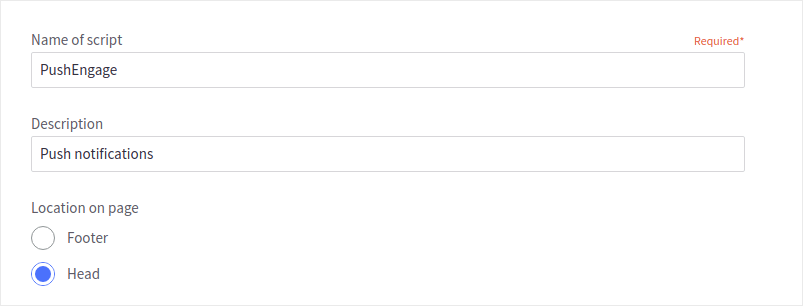
Create a new script with a name and description and set the Location on Page to Head:
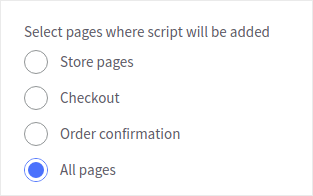
Add the script to All Pages:
Set the Script Category to Targeting; Advertising:

And finally, set Script type to Script and paste in the Javascript installation code you received from PushEngage in the Script contents:

When you’re done, hit Save and you’ll see your push notification installation script in the BigCommerce Script manager.
Step #4: Configuring the PushEngage Opt-In
Finally, in your PushEngage dashboard, go to Settings » Subscription Settings » Subscription Dialogbox » Edit:
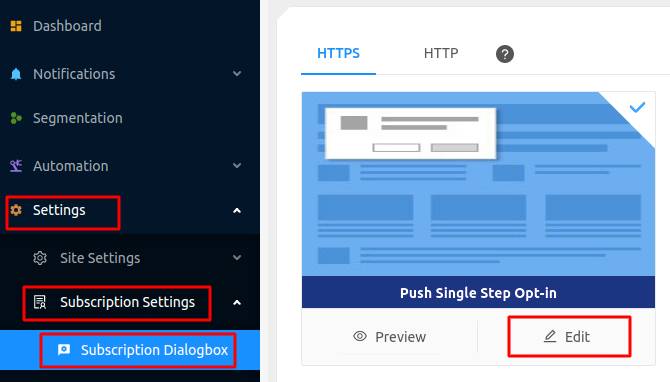
From here, you can customize your push notification opt-in. If you need help with that, you should check out this article on how to create a custom push notification opt-in.
If you need some inspiration, you can check out this article on high-converting push notification opt-ins.
Step #5: Create a Welcome Notification
Once you’re done setting up the opt-in, your site can collect subscribers.
But how do you know if your push notifications are working properly?
We recommend that you create a welcome push notification to test if your setup went smoothly. A welcome notification is a push notification you send a new subscriber to confirm their subscription and welcome them on board.
Head over to Settings » Site Settings » Installation Settings and configure your welcome message:
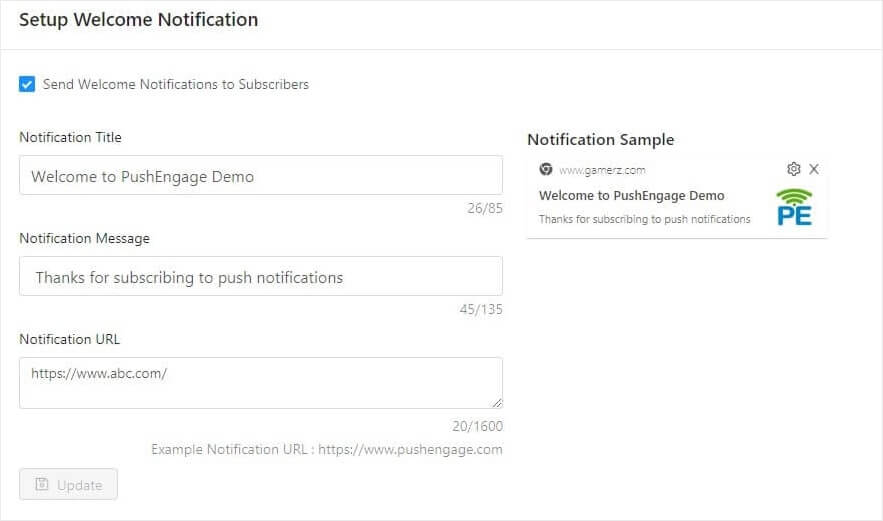
Finally, head back to your site and opt for your own push notifications to test whether it’s all working smoothly.
And that’s all there is to it!
You have successfully set up push notifications on your BigCommerce site. It’s time to head back to your PushEngage dashboard and start creating your push notification campaigns.
Wrapping Up
That’s all for this one, folks!
If you’re new to push notifications, you should follow a full-blown push notification testing process before you go live. It’ll help you troubleshoot common issues before your visitors see them and start complaining about a broken user experience.
And if you haven’t already, go ahead and give PushEngage a try. PushEngage is the #1 push notification service in the world. So, if you’re serious about growing your business, you should invest in PushEngage.
