Looking for a resource on how to make money selling documents online?
You’ve already been through a lot like selecting the right platform, building your eCommerce site, creating products to sell, and working on your pricing model. But then you realize exactly how many different ways there are to sell digital products online.
There are a bunch of plugins that help you sell digital downloads on WordPress.
But how do you choose the right plugin to start selling? Is the plugin free? Do you get all the features you need or do you have to buy other plugins later on to actually start selling?
The most confusing part is…
Is the plugin that you’re looking at even meant for digital downloads? Or is it a general store plugin that’s mostly meant for selling physical goods and you’re stuck with a ton of unnecessary settings that you don’t even need?
Don’t worry. In this article, we’re going to show you step by step how to make money selling documents on WordPress. The best part? You can complete the setup in 10 minutes or less!
Let’s dive in.
Why You Should Start Selling Documents Online
Ever thought about turning your words into gold? 🌟
Whether you’re scribbling notes, crafting a masterpiece, or sharing wisdom, there’s a world out there hungry for your content. And guess what? You don’t need to be a tech wizard or invest in fancy gear to start selling documents online.
All you need is a solid internet connection, and you’re set to go.
Here’s the scoop:
- No Hassles, More Profits: With online docs, you avoid the price tags of printing. Plus, imagine shipping content to someone in Tokyo or Toronto in seconds. That’s the power of the web!
- Update on the Fly: Made an oopsie? No worries. Fix and update your online documents without the drama of reprints.
- Variety is the Spice: From nifty worksheets, spiffy templates, to even your grandma’s secret pie recipe, there’s a crowd for every doc. Don’t believe me? Here are some hot-sellers:
- Cool worksheets (like budget planners or self-help guides)
- Resume templates or presentation slides
- E-books or how-to guides
And the list goes on!
Formats? Let’s Keep It Simple:
Ever wondered what those funny extensions like .PDF or .DOCX are? They’re just ways your computer reads documents. Think of them as different flavors of ice cream. 🍦
Here’s a quick cheat sheet:
- .DOCX/.DOC & .GDOC: Think Word or Google Docs. Best for things people might want to tweak, like resumes or templates.
- .PDF: Perfect for guides or anything you just want to read. No edits here!
- .EPUB: This one’s for e-books. You know, the stuff you read on your Kindle.
- .XLSX/.XLS & .GSHEET: Excel or Google Sheets. For the number crunchers and data lovers!
- .PPT, .GLSLIDES & .KEY: Presentation slides. Because we all need some fancy visuals!
Not sure which to pick? Think about your readers. If they just want to read, go for a PDF. If they’d like to play around, maybe a .DOCX. And if you’ve got a mix, bundle ’em up in a ZIP file.
How to Start Selling Documents on WordPress
Now that we understand why you should start selling documents online, it’s time to show you how to get started. Don’t worry if you’ve never done this before. This article is meant for complete beginners. All you have to do is follow along.
Let’s get started.
Step #1: Selecting the Right Plugin
The most popular eCommerce plugin on WordPress is WooCommerce. Hands down, if you’re selling physical goods, you should use WooCommerce. But you’re not selling physical goods.
This article is all about how to sell digital goods on WordPress. For digital products, there’s no better eCommerce plugin than Easy Digital Downloads.
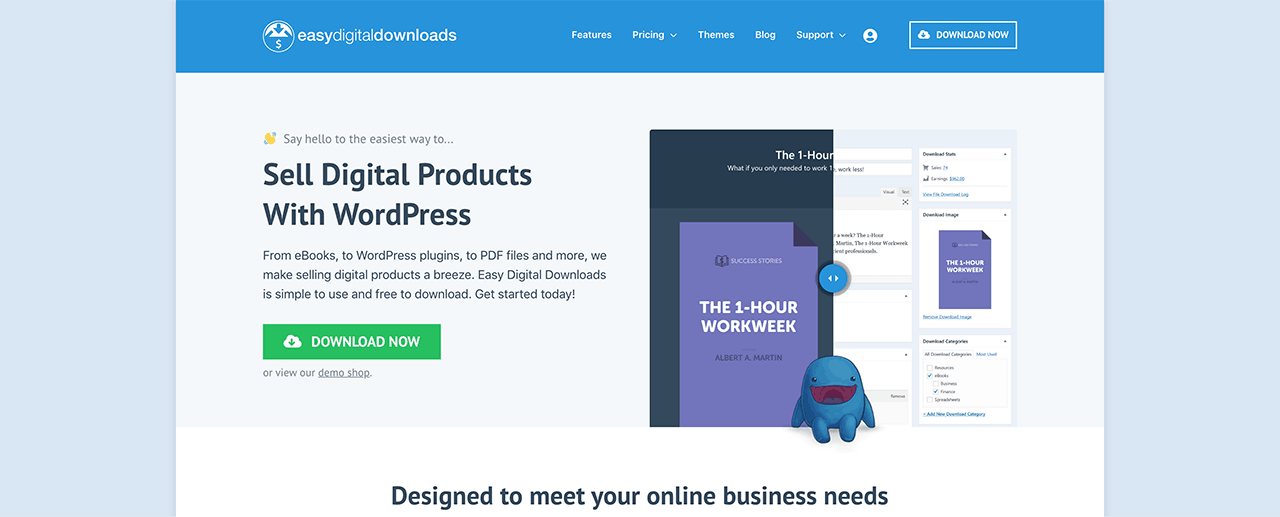
Easy Digital Downloads focuses entirely on selling digital products. So, you don’t have to deal with unnecessary options and UIs you get on WooCommerce. It’s super easy to set up an online store using Easy Digital Downloads and you can use the plugin to sell any digital product including:
- Software
- eBooks and PDFs
- Documents
- Videos
- Audio and music files
- Photography, graphic designs, and digital art
And practically any other type of media file under the sun. You also get a ton of cool features such as:
- Multiple payment gateway integrations
- A software license creator for licensing models such as plugins and games
- Recurring payments for subscription model businesses
- Multi-vendor platforms for marketplace sites
- Email marketing integrations to grow faster
- Custom deliverables for freelancers
- Commissions for affiliates and marketplace vendors
- Reviews for your products
- Custom wallet for your customers
- Instant product comparison tables
- Product showcases
And more. You can check out their full list of features and how easy it is to use these features in our review of Easy Digital Downloads.
Step #2: Setting Up Easy Digital Downloads
Now that we know a little bit about why you would want to use Easy Digital Downloads, it’s time to check out how to set up the plugin. First, go ahead and install the plugin. If you’re not sure how to do that, check out this article on how to install WordPress plugins.
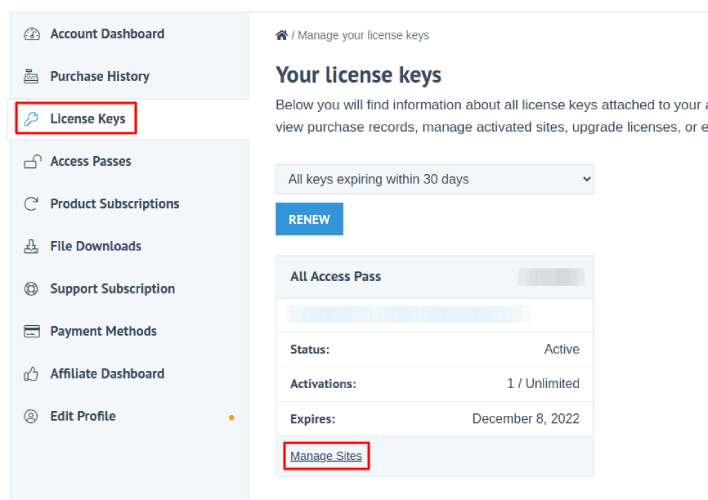
Then, head over to your Easy Digital Downloads dashboard and head over to License Keys, and click on Manage Sites:
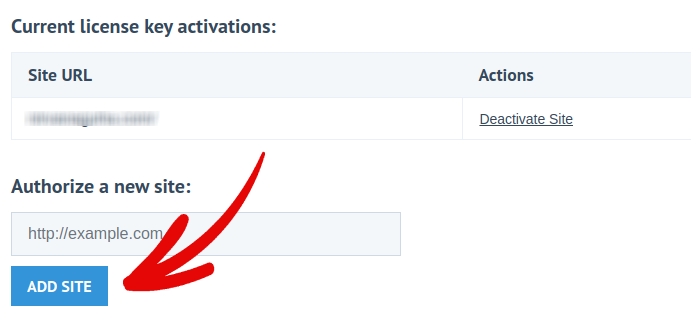
And add your site to the dashboard:
After that, all you have to do is set up your payment processor. Head back to your WordPress dashboard. You should see a new section in your WordPress dashboard called Downloads.
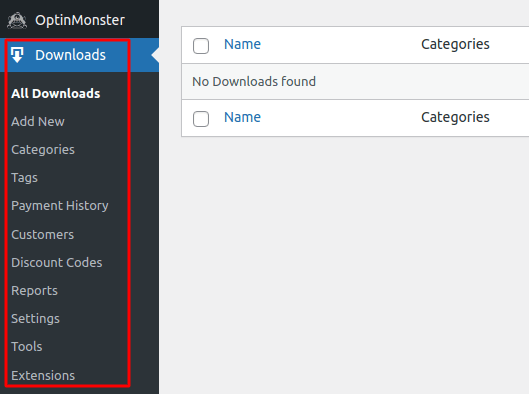
Click on Downloads » Settings and then click on the Payment Gateways tab to choose and set up your payment gateway.
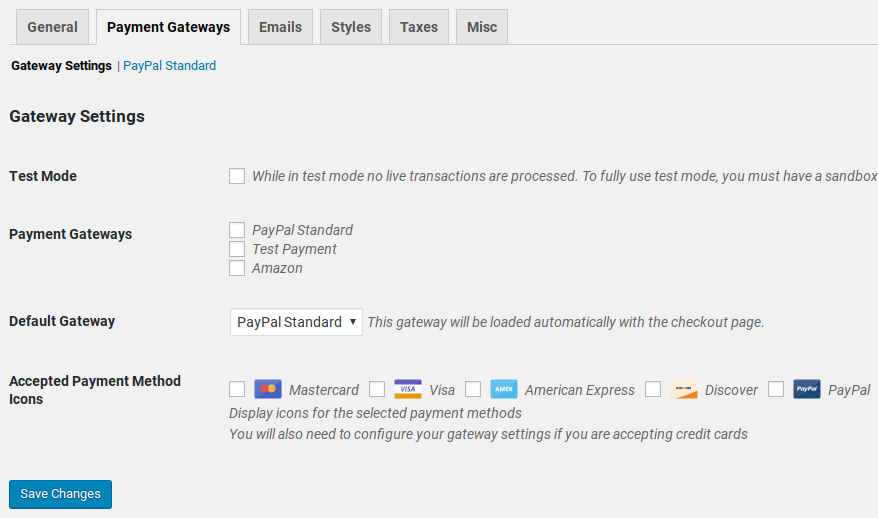
And you’re all set up!
Step #3: Adding Documents to Your Store
Now that your store is ready, it’s time to start adding digital products to your store.
By default, Easy Digital Downloads will create and set up pages for your eCommerce store. The primary checkout page, success page, failed transaction page, and purchase history page is pre-defined. So, you’re ready to start uploading your products to your store.
Go to Downloads » Add New:
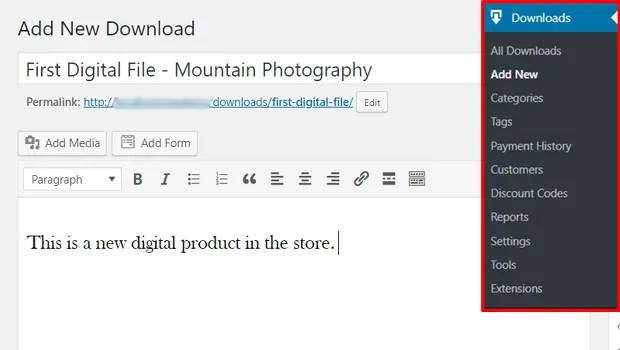
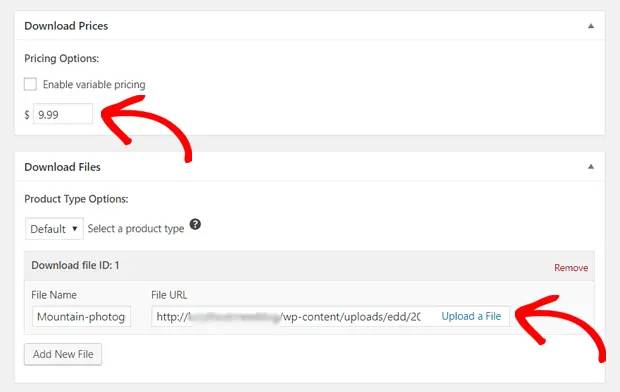
Give your product a title and a description to get started. Then you’re good and ready, scroll down to the Download Prices section to set the price for your product. Then, upload the file for your product:
Next, you’ll want to upload a nice featured image for your product. This is the image that goes up on your product listings. So, make this count by uploading a super attractive design.

Then, scroll up to Download Settings and review the download options. If you’re selling documents as a limited edition product, you can set a limit on the product downloads. If not, go with the default options:
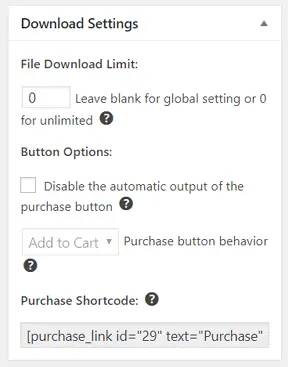
Finally, add any product category or tag that’s appropriate for your product:
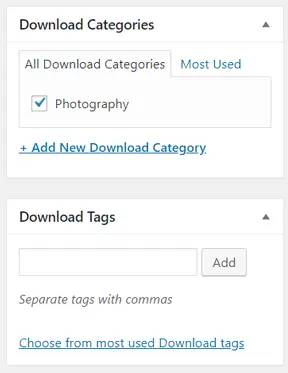
That’s it! Go ahead and click on Publish to publish your very first digital product.
Here’s what your product page will look like without any customization at all:
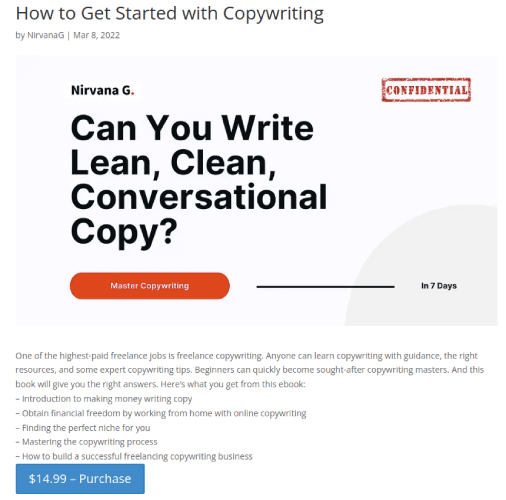
Go ahead and customize your page now.
How to Start Selling Documents on WordPress Even Faster
Now that your product is up, it’s time to selling documents online.
A great way to increase your sales is to create automated push notification campaigns. Push notifications can be a really great tool to increase repeat traffic, engagement, and sales on your site. If you’re new to push notification campaigns, check out these incredible resources that will help you grow much faster:
- 7 High-Converting Push Notification Opt In Examples
- How to Setup Web Push Notifications on Your Website
- How to Convert Subscribers To Buyers Using Web Push Notifications
- How to Add a Web Notifications WordPress Plugin to Your Site
We recommend getting started with PushEngage for your push notification campaigns. PushEngage is the #1 push notification software in the world. So, your campaigns will be in safe hands and you can get super creative with your push notifications. Like this one:

If you’re serious about growing your business, you should invest in PushEngage.
