With PushEngage you can now personalize your drip campaigns bypassing the Country and the City name. When a user subscribes to push notification we capture the geolocation of the subscriber at the time of subscription. Now, you can use such details and send a personalized web push to your subscriber as per their Geo-Location.
Who Can Use It?
This feature is available only from Large Business Plan onwards and for the custom plan who are using automation tools and drip.
If you are a Free/Pro/Business Plan user and you wish to use Drip Notifications you can contact the sales team at [email protected]. You can also take trial and use free push notification service.
How To Set Default Geo Location?
PushEngage captures the geolocation of the subscriber at the time of subscription. But if the subscriber is using a proxy network while subscribing or geolocation is disable from your dashboard the region name is marked as Unknown. In this case, if you pass the attributes {{PE_City}} or {{PE_Country}} the value these attributes will pick will be undefined. Hence, the first step is passing a Default Country and City name for such users. Here’s how you can do it –
Navigate to Settings > Site Settings > Default Settings. Select Default Custom Parameters.
Enter the City and Country name and save the settings.
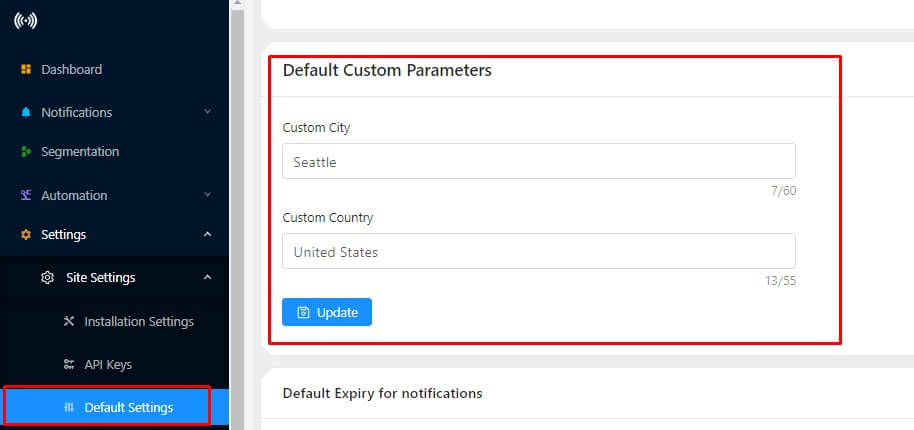
In this way, the subscribers whose region is marked as unknown will get the Country and City name mentioned in Default Custom Parameter Settings.
How To Create a Personalized Drip Campaign?
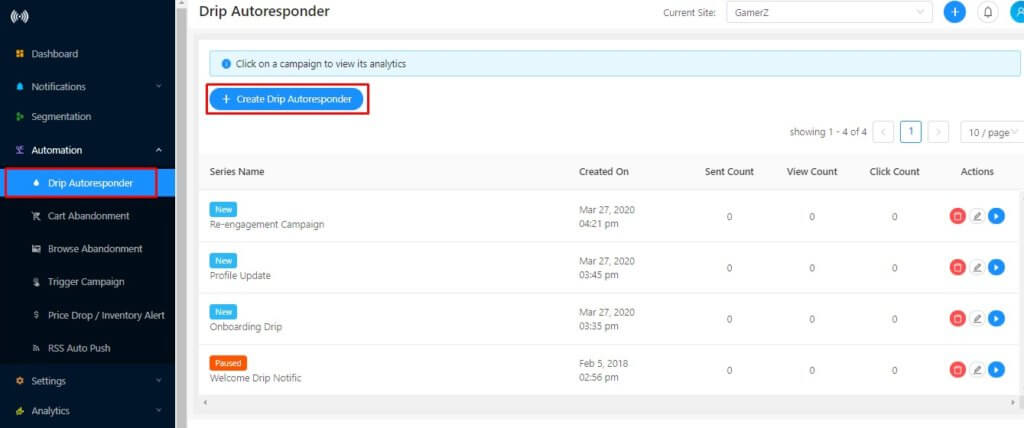
Step 1 – Navigate to Automation > Drip Autoresponder. Click on “Create Drip Autoresponder“
Create a Drip campaign for your website.
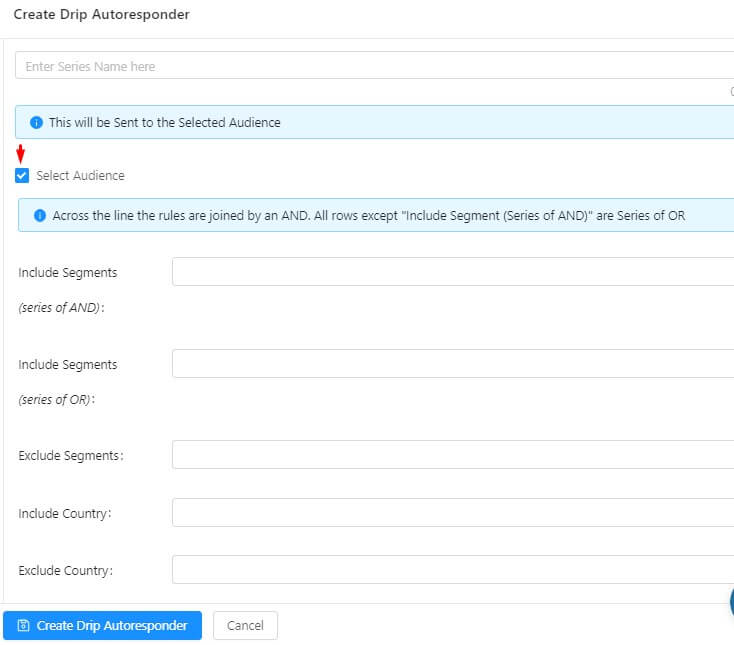
Step 2 – Enter a Drip Autoresponder Series Name and enable UTM parameters if you want. Then you can decide if you wish to send this drip to all the users of a particular segment. If you want to send to All, uncheck the “Select Audience” button. If you want to be selective then check the button and it will show you the option to add a custom audience.
Step 3 – Create a drip campaign like this requires no extra lines of code. You will check a template of the drip having variables in the notification title and message field. You can edit it as per your campaign design. While entering the notification title and message you can pass the variable {{PE_CITY}} or {{PE_COUNTRY}} where ever needed.
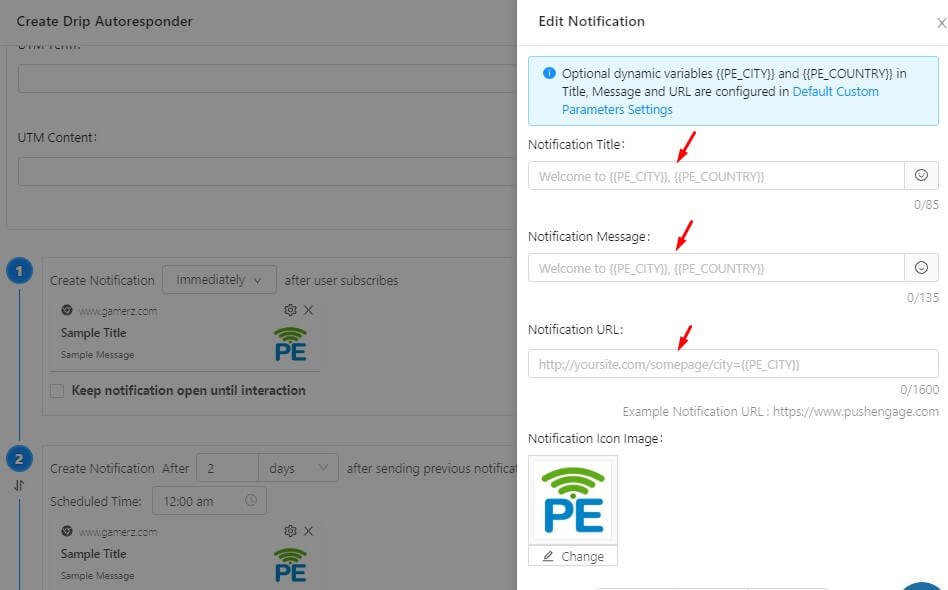
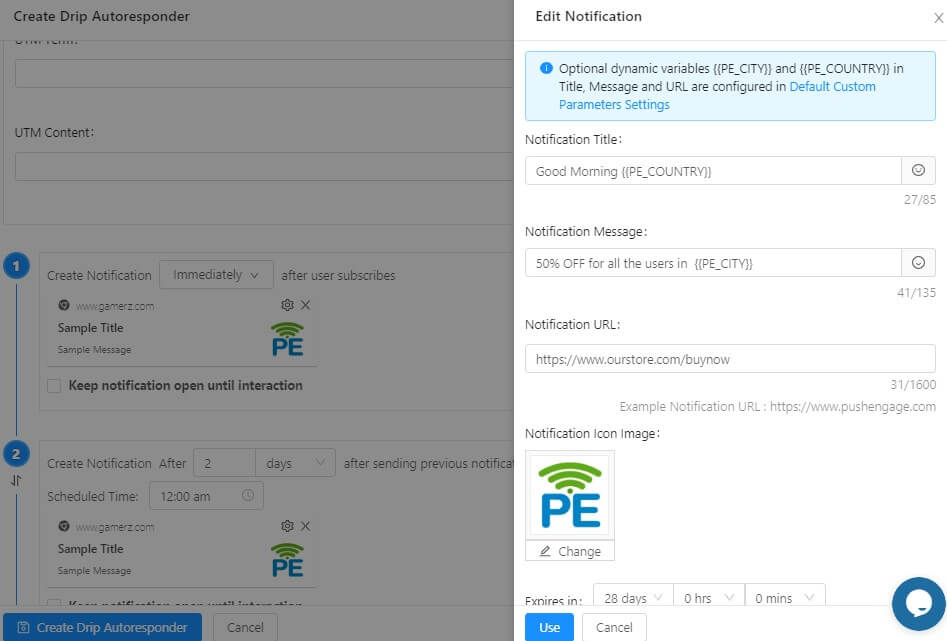
Step 4 – Create a Drip Campaign for your subscribers and pass the variables int the notification title and message field.
Step 5. You can set up a series of notification in the same way and add the notification image, expiry time and the condition when you wish to send your first drip. Once done click on Save and Launch the Campaign.
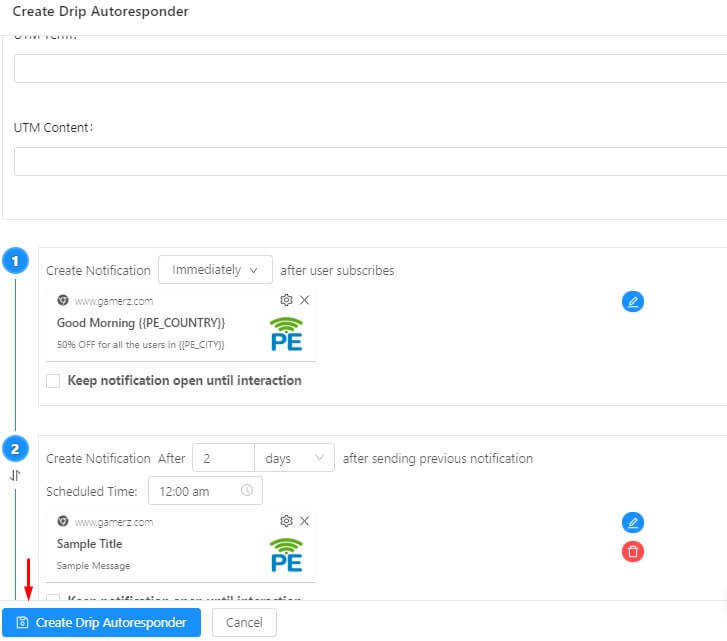
Step 6 – The drip campaign will work the same way as before the only difference is, it will show the name of the country and city as per the subscriber’s location. to check the analytics you can navigate to Automation > Drip > Analytics.
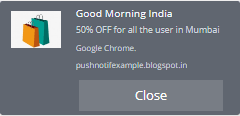
This personalization feature can be used now only in Drip automation. If you are already using drip campaigns, then this feature will make your drip campaigns more effective. We are working on extending support for same other campaigns as well that are cart and browser abandonment, and regular notification sending.

This website was… how do you say it? Relevant!!
Finally I have found something that helped me.
Thank you!