Looking for a way to add a Weebly mobile push notifications app to your site?
Push notifications can help you quickly grow your repeat traffic, engagement, and sales. But what service should you use to send push notifications? Will it be worth your time? Can you afford web notifications as a marketing channel?
And most importantly, do you need a development team to launch your marketing campaigns?
In this article, we’re going to show you how to add a Weebly mobile push notifications app site step by step with no coding in ten minutes or less. Weebly is a great platform to create your very first website. So, once you’re done setting up your Weebly website, it’s time to dive into this tutorial.
Let’s dive in.
How to Install a Weebly Mobile Push Notifications App
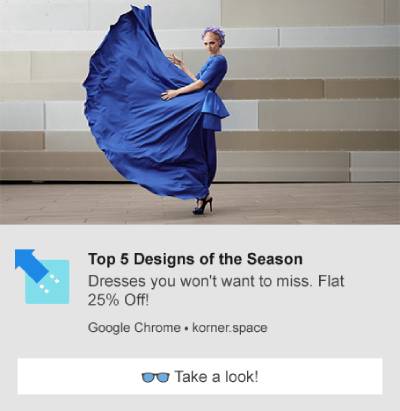
Installing a Weebly mobile push notifications app isn’t really difficult. Just follow these simple steps and by the end of this article, you should see a welcome push notification on your site like this one:
Truth be told, we don’t really prefer using Weebly as a website builder. In our honest opinion, WordPress or even Shopify gives you way better features and functionality. So, if you can shift to WordPress or Shopify, now might be the best time to do it.
But if you’re sticking to Weebly, don’t worry. It’s still easy to install push notifications to your site.
Let’s dive in.
Step #1: Set Up Your PushEngage Account
Head over to the PushEngage home page and click the Get Started button:
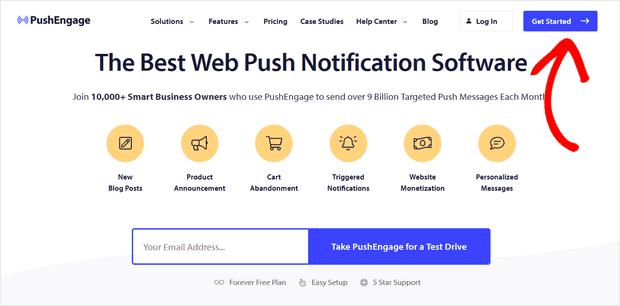
You can select the free plan to try out PushEngage, or choose a paid plan if you’re serious about growing your business. The paid plans come with more campaign options and the ability to build even bigger subscriber lists. Push notifications cost very little to get started and you can use your credit card to buy a plan.
If you’re running an eCommerce site, we highly recommend getting a paid plan so that you can set up eCommerce push notifications. Push notifications are great for launching new products from your online store.
Check out the pricing plans and select a plan to get started. Once you’ve signed up for an account, head over to the PushEngage dashboard and go to Site Settings » Installation Settings:
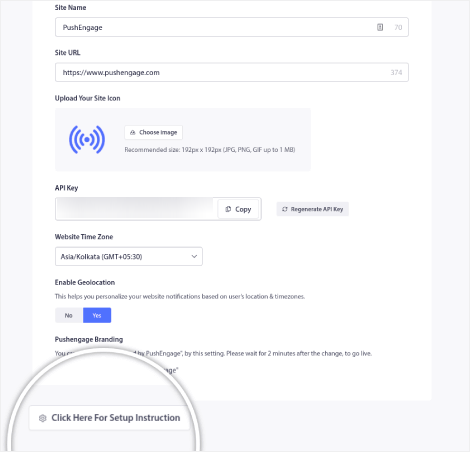
This is where you configure your site details and branding. Go ahead and set a logo and website URL for your push notifications. You should do this right now so that you can test your push notifications properly.
Step #2: Get the Installation Code from PushEngage
Next, you’ll need to head over to the PushEngage dashboard and get the installation code. Inside Installation Settings:
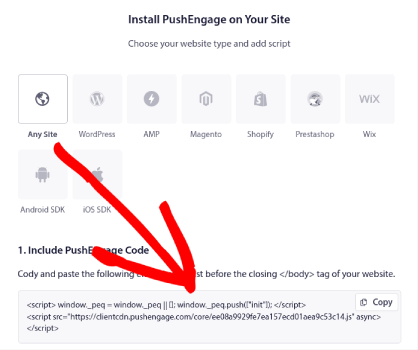
Depending on whether your site has an SSL certificate installed, go to either the HTTP tab or the HTTPS tab to get your installation code. For WordPress sites, there’s no need for this installation code. The plugin takes care of everything. This applies to WooCommerce sites as well.
But since you’re running a Weebly site, just copy this installation code.
Step #3: Place the Weebly Mobile Push Notifications App Installation Code in Your Site
Log in to your Weebly account, head over to Settings » Tracking Tools, and go to the Add custom header code section:

Click on the Add new code button and paste the PushEngage installation code.
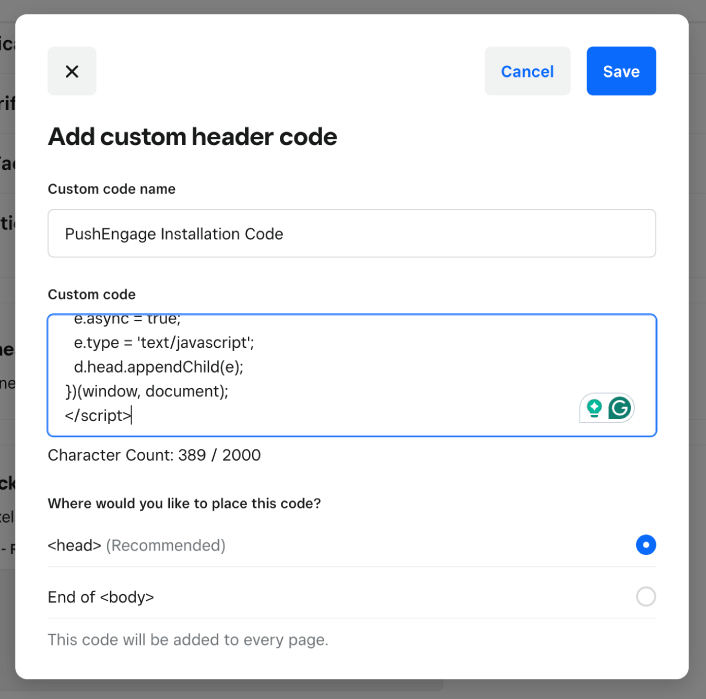
When you’re done, click the Save button.
NOTE: Under the section “Where would you like to place this code?”, ensure the selected option is <head>.
Step #4: Configuring the Weebly Mobile Push Notifications App Opt-In
Finally, in your PushEngage dashboard, go to Design » Popup Modals:
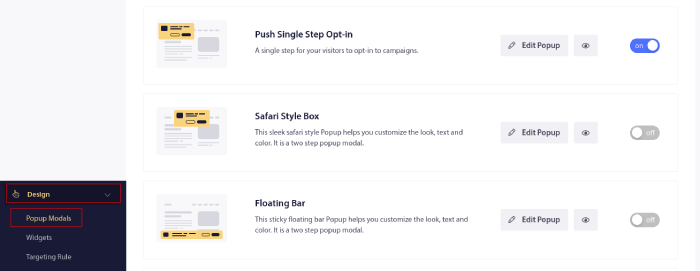
From here, you can customize your push notification opt-in. If you need help with that, you should check out this article on how to create a custom push notification opt-in.
If you need some inspiration, you can check out this article on high-converting push notification opt-ins.
Step #5: Create Welcome Web Push Notifications
Whether you have a new store or an established one, website welcome messages are absolutely essential. Welcome push notifications are great for:
- Confirmation: You want to confirm that your new subscriber is indeed subscribed to your web push notifications.
- Re-engagement: Welcome campaigns are a great way to get your subscribers to come back to your site.
- Sales: You can give your new subscribers a welcome offer with discounts, freebies, and coupons.
Let’s create a welcome push notification campaign now. Head over to your PushEngage dashboard and go to Campaign » Drip Autoresponders » Create New Drip Autoresponder:
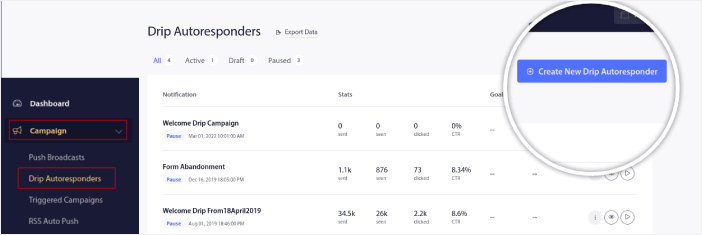
Give your drip campaign a name that you can easily remember. Then, set the first push notification to go out immediately after a visitor subscribes to your push notifications.
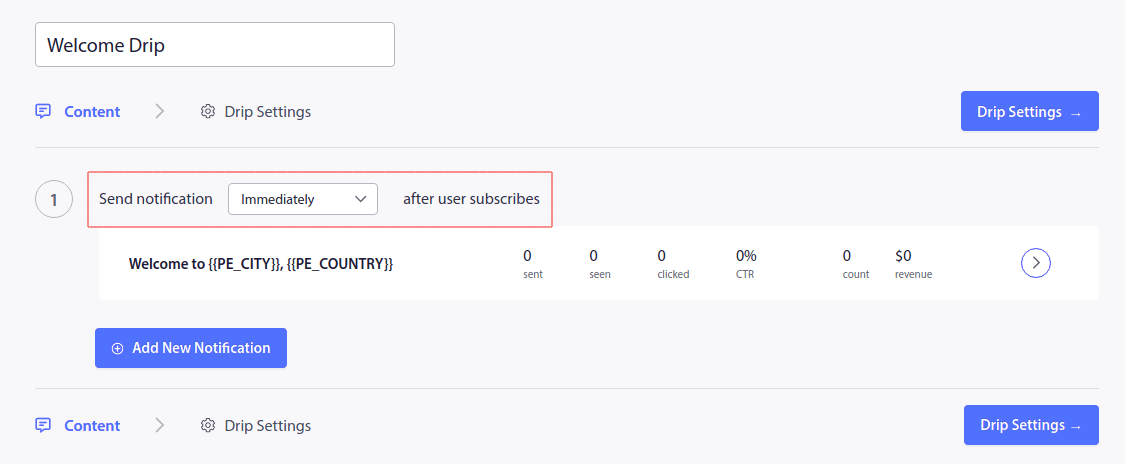
You can edit the notification to create custom content for your welcome message. When you’re done, click the Add New Notification button to add more notifications to the sequence. You can edit the new notifications and set a custom delay between each notification.
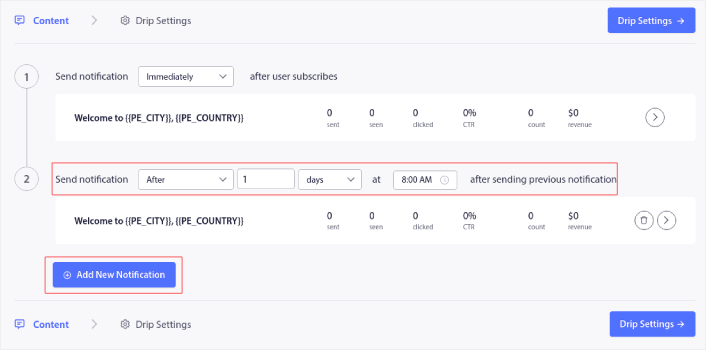
You can add as many notifications as you like, but we recommend creating a welcome drip with 5-7 notifications.
After that, select your audience in Drip Settings:
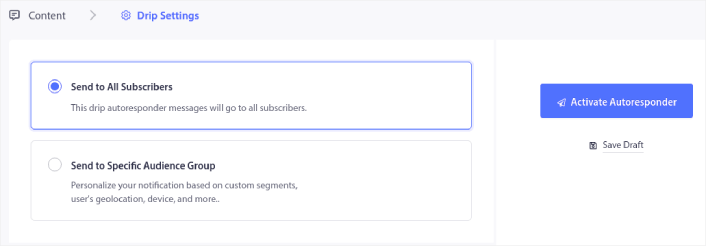
You can send different welcome drips for different segments by using the Send to Specific Audience Group option. This is especially useful when you’re segmenting visitors when they opt for push notifications. When you’re happy with your targeting, click on the Activate Autoresponder button. And you’re done!
NOTE: You can schedule real-time notifications as well. So, if you want to send notifications from a mobile app on Android or iOS, PushEngage is a great choice for you.
You have successfully set up Wix push notifications on your site. It’s time to head back to your PushEngage dashboard and start creating your push notification campaigns.
What to do After Adding a Weebly Mobile Push Notifications App
That’s all for this one, folks!
If you’re new to push notifications, you should follow a full-blown push notification testing process before you go live. It’ll help you troubleshoot common issues with the functionality before your visitors see them and start complaining about a broken user experience.
You should check out some of these incredible resources to understand how push notifications can help grow your business before you invest in an extension:
- How to Boost Your Web Push Notification Opt-In Rate (7 Ways)
- How to Use Form Abandonment Tracking to Recover Lost Leads
- 11 Automated Push Notifications That Sell Even While You Sleep
One of the best things about push notifications is that you can create templates for your campaigns very easily. If you need inspiration for your campaign templates, check out these epic push notification examples.
And if you haven’t already, go ahead and give PushEngage a try. PushEngage is the #1 push notification service in the world. So, if you’re serious about growing your business, you should invest in PushEngage.
