If you’re running an eCommerce website, you’ll know this already…
Every time you run out of stock on any product, you’re missing out on sales.
So, what do you do? Store a never-ending supply of all your products without knowing if they’ll sell?
No! There’s a much better way to recover your sales.
Just send out a back-in-stock alert.
Using back-in-stock emails and push notifications, you not only keep track of exactly who wanted to buy your product when it was out of stock…
… But also send them a high-converting message letting them know that they can buy it now!
Trust us when we say it: Back-in-stock emails work like a charm.
In this article, we’ll go over what a back-in-stock alert is and how you can send one.
We’ll even throw in a couple of templates that work really well!
So, let’s just dive right in!
What’s a Back-In-Stock Alert?
A back-in-stock alert is a simple email or browser push notification that tells your subscriber that the product they were looking to buy is now back in stock and ready to purchase. A back in stock push notification or a back in stock email is a personalized campaign because it talks about products that the subscriber is definitely interested in.
Having out-of-stock products creates a dip in sales, especially if the product is popular. It’s also really disappointing to see that the product you wanted to buy so badly isn’t in stock.
One way to handle this issue is to label out of stock products clearly so that no one clicks on them to try and buy the products:
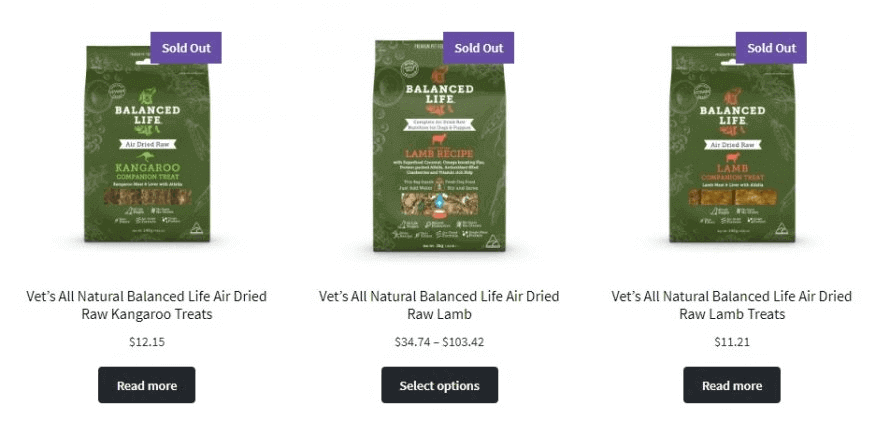
But honestly, this is plain wasteful. If your shoppers never even click on the product, then there’s no way for you to know that they were definitely interested in specific products.
In other words, there’s no way to recover that sale. Chances are that they’ll buy the next best alternative from someone else.
This is exactly why a back-in-stock alert is so effective at winning back sales.
Back in stock alerts can be sent out as an email or as a push notification. It’s flexible that way. So, naturally, we recommend setting up both.
Don’t worry, we’ll show you exactly how to set up back in stock alert emails and notifications in a few minutes.
Benefits of Sending Back-In-Stock Alerts
One of the questions that we get from many of our eCommerce customers is why a back in stock email works so well.
There are entire studies that dive into the neuroscience of why people buy different products. But that’s a topic for another day. For now, let’s just talk about what we’ve seen with our existing customers.
Back-in-stock alerts:
- Show the customer that you care: It’s a really simple gesture, but it shows that you care about all your customers and that every order matters to you. Just caring about your customers goes a long way in helping you grow a brand.
- Boost revenue: By itself, back-in-stock alerts can generate a lot of extra revenue. But coupled with cart abandonment recovery campaigns, you can make a lot of sales that you would have definitely lost otherwise. This is exactly how WickedWeasel generates up to $4000 a week.
- Can be a drip campaign: A super-cool way to improve on your back-in-stock alert is to add a simple follow-up sequence that reminds your subscriber to buy the product before it goes back out of stock. One reminder is great. A full sequence of follow-ups is way better.
Very cool stuff! So, now that we all understand what a back-in-stock alert is and why you would want to use one, let’s get started and set it up!
How to Set Up Back In Stock Push Notifications
PushEngage is a push notifications software that helps you build automated push notification campaigns for pretty much anything. This includes setting up back-in-stock push notifications as well. So, naturally, we’ll be telling you how to set up a back in stock push notification alert first.
Now, if you haven’t tried out PushEngage yet, we highly recommend you install the free version today. Push notifications can increase your click-through rate by up to 200%! So, we recommend using push notifications and email campaigns to get better results from your marketing.
So, how do you set up back-in-stock alert push notifications?
Head over to the PushEngage dashboard and click on Automation » Price Drop / Inventory Alert:
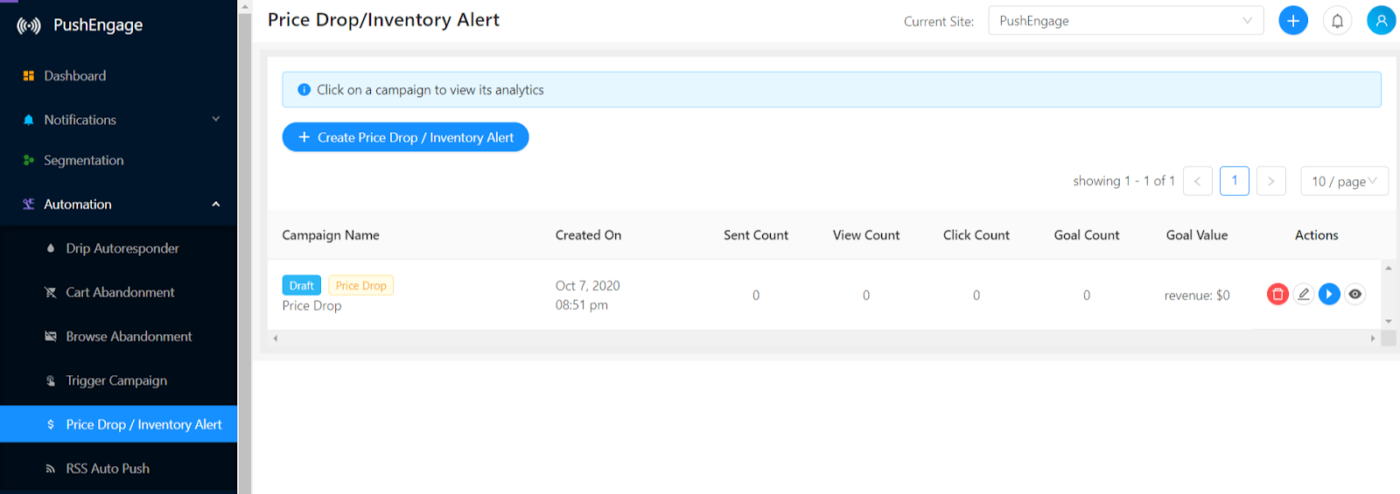
And click on the + Create Price Drop / Inventory Alert button. Now, give your campaign a name and click on the Inventory toggle option to create a back-in-stock alert:
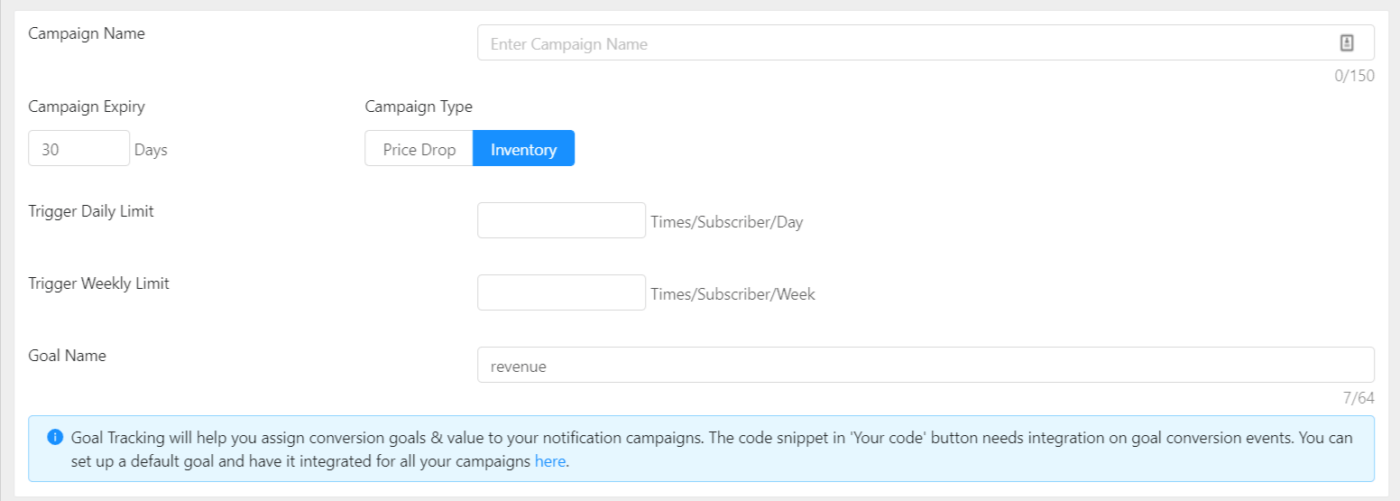
We usually recommend leaving the frequency to once a day and no more than thrice a week.
The default goal here is to generate more revenue. So, leave that as it is.
If you use an analytics tool such as Google Analytics or Firebase, you should definitely set a UTM parameter for your campaign:
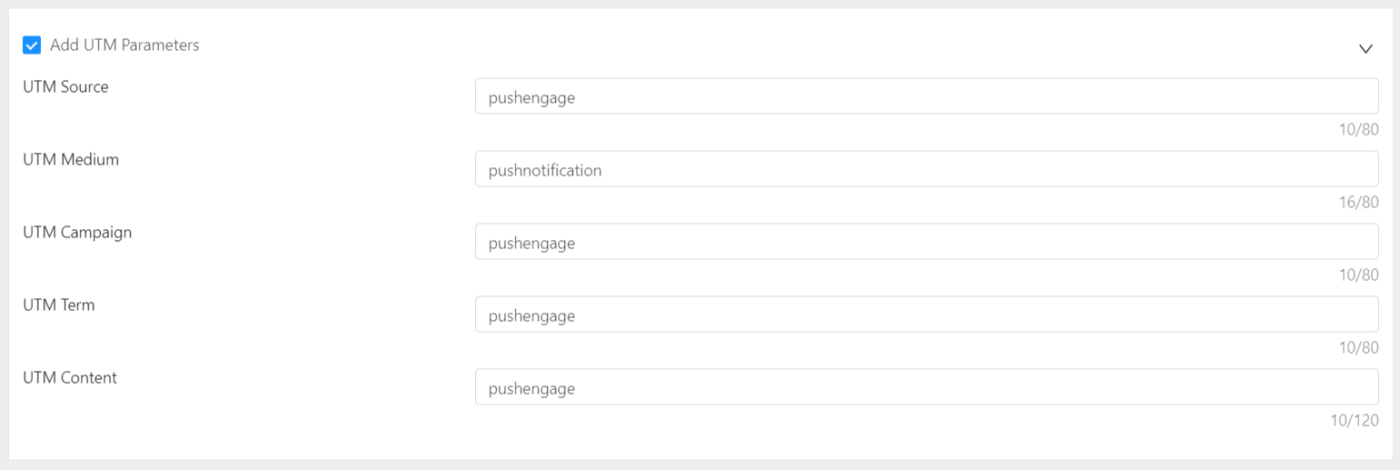
NOTE: This is completely optional. You can get advanced goal tracking and analytics from the PushEngage dashboard. You should set up a UTM parameter only for third-party analytics tools.
Now, create your back-in-stock push notification alert:
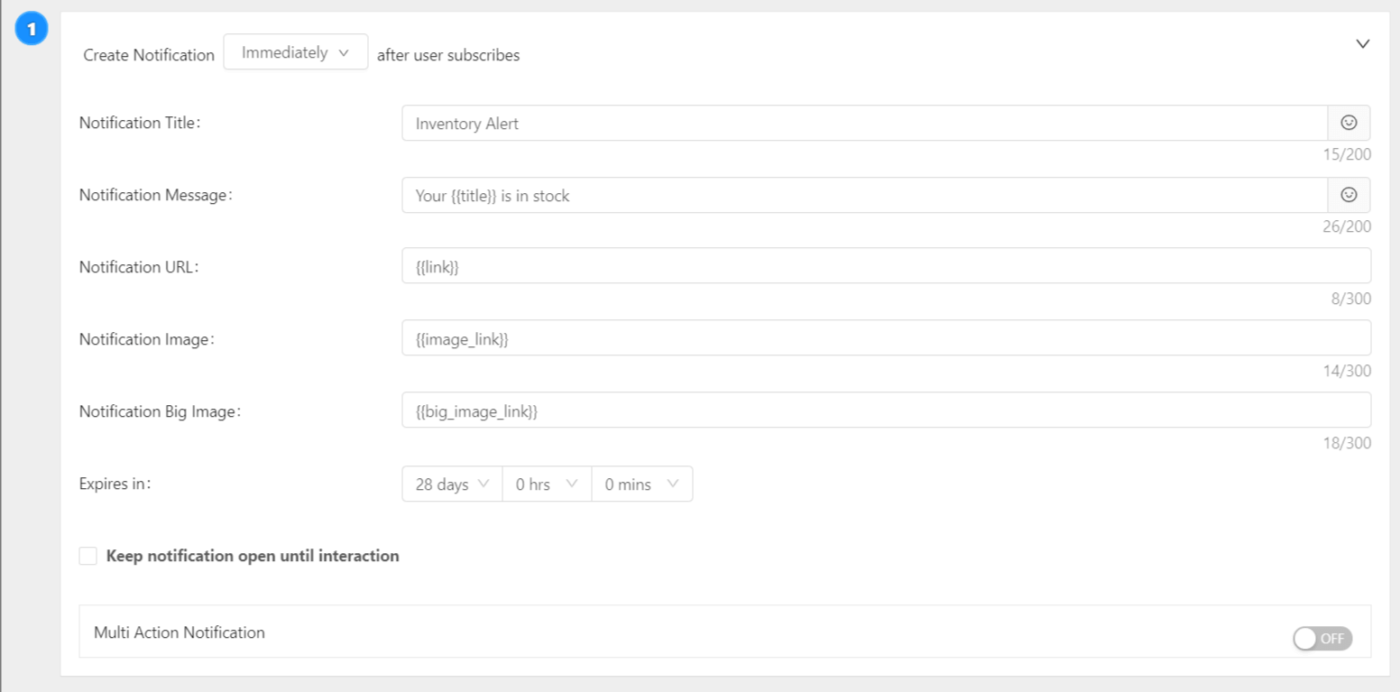
And you’re pretty much done!
You can add more notifications to create a drip sequence if you want to. Just click on + New Notification at the bottom left:

Once you’re done, click on Your Code and get the Javascript code used to fire the campaign:
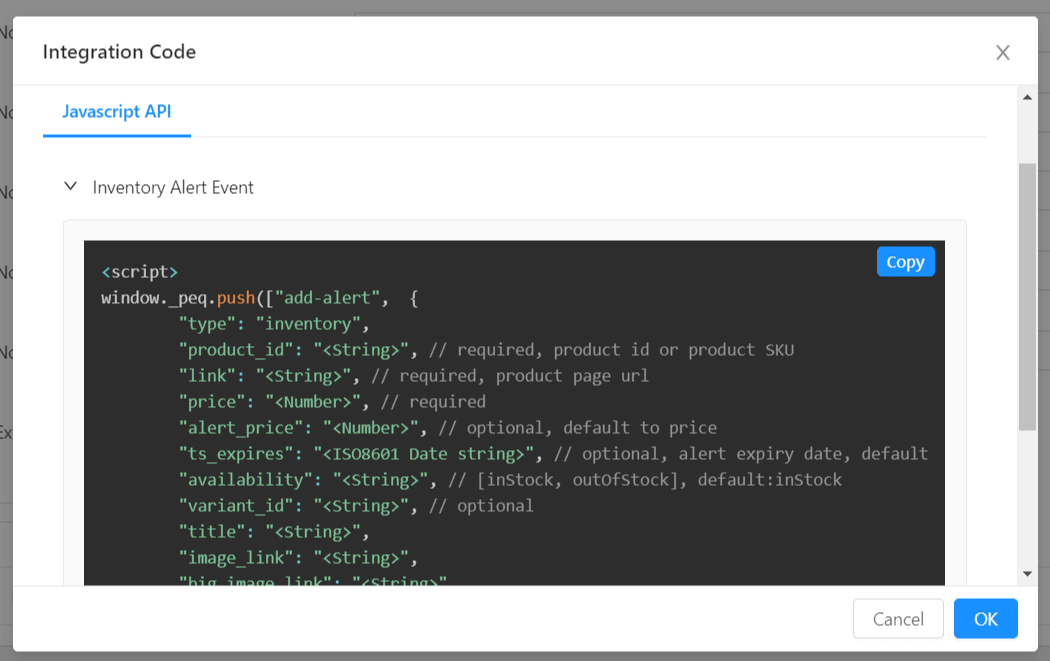
NOTE: There’s another snippet for Goal Tracking if you scroll down in the pop-up window. You need to copy that as well if you want to get proper analytics on how well your campaign is doing.
The next bit is a little bit technical. You’ll need to create an event after creating the campaign. Next, you’ll have to integrate the PushEngage Javascript Product Update API to send the back-in-stock alerts.
In order to protect your privacy, we depend on you to integrate this code on your end and allow PushEngage to get access to your products. Sadly, the cost of privacy is a little extra work in this case.
Honestly, it’s best to ask your technical team to handle this part. We don’t recommend trying to integrate our API unless you know how to code. If you’re stuck with this, please feel free to get in touch with our Customer Success team. We’ll help out in any way we can.
Once it’s fully set up, this is what your back-in-stock alert should look like:

Here’s a pretty simple and neat workflow template you can use to create your first inventory alert on PushEngage:
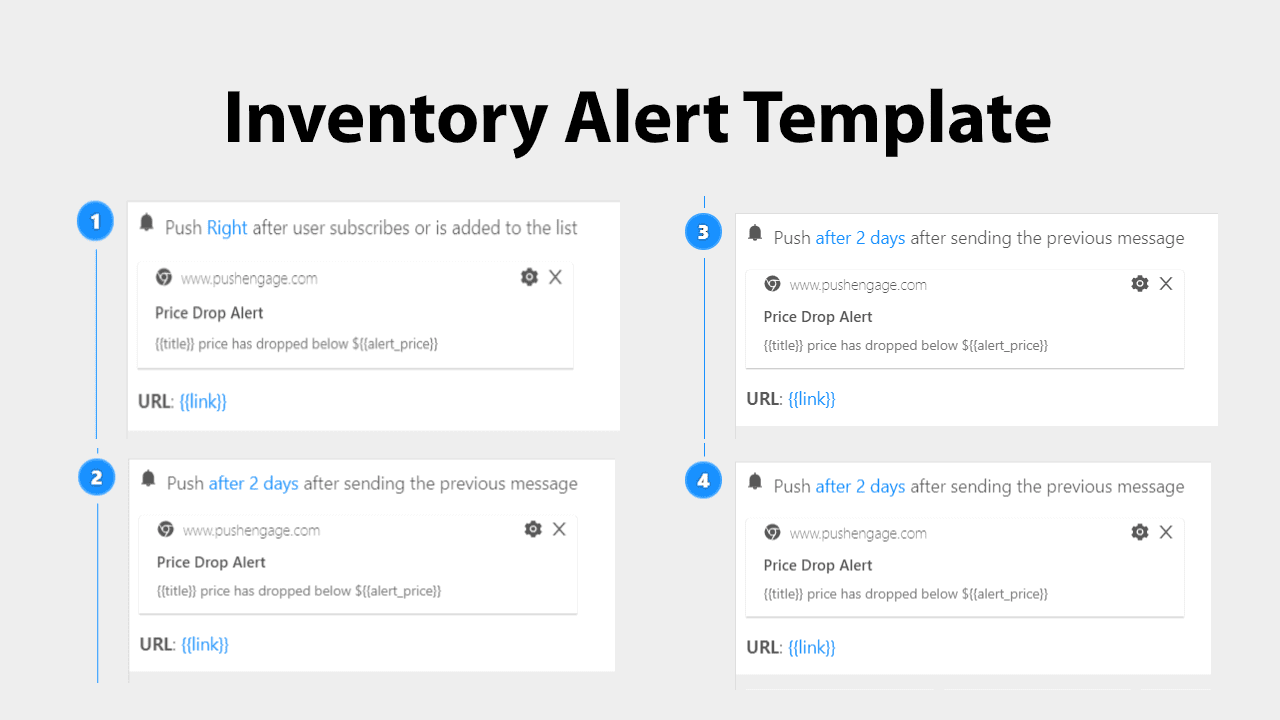
Let us know in the comments below if you found this template useful. If you found it useful, we’ll create more of these in the future.
That’s all for push notification alerts. Let’s talk about back in stock email alerts next.
How to Send Inventory Alert Emails
Emails are probably the most familiar tool for any marketer. So, it only makes sense to create a back-ins-stock email alert as well.
Now, if you have a WordPress website or a WooCommerce store, then you should probably just set up a back-in-stock notifications plugin. This will help you get past most of the tedious setup tasks with an Email Service Provider such as Constant Contact or Drip.
NOTE: Typically, any WordPress back-in-stock notification email plugin uses the default WordPress mailer to send emails. This is NOT a good practice and you’ll get loads of deliverability issues. We recommend using SMTP.com with WP Mail SMTP.
Now, let’s talk about how you can set up a back-in-stock alert for WooCommerce using Drip.
If you don’t know what Drip is, it’s an email automation tool that helps you create visual workflows for automated email campaigns. The best part is that Drip specializes in eCommerce marketing. So, it’s the perfect tool to send a back-in-stock email.
You can also use Constant Contact as an alternative to Drip, but the rest of this walkthrough is for Drip. Constant Contact is also built in a similar way, so it shouldn’t be too different.
Back to Drip, now…
From the navigation menu, click on Automations » Campaigns and click on the + New Campaign button:

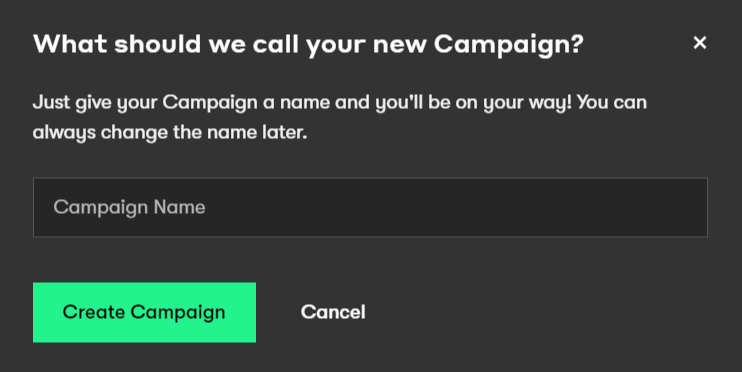
In the popup, name your campaign:
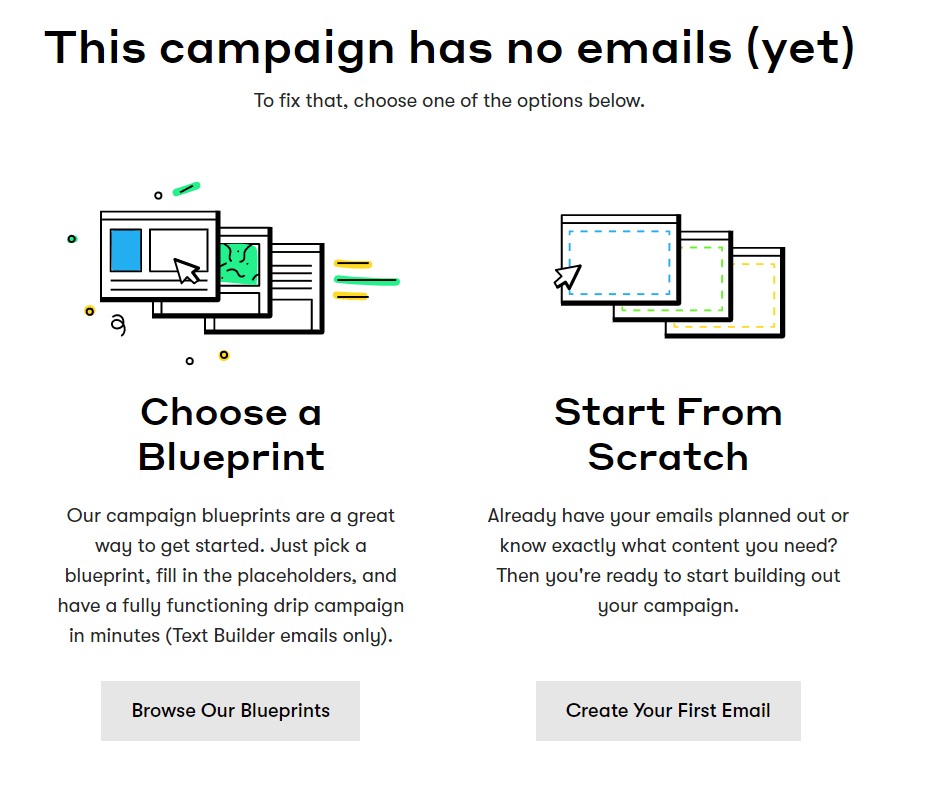
Now, add your emails by clicking on Create your first email option under Start from scratch:
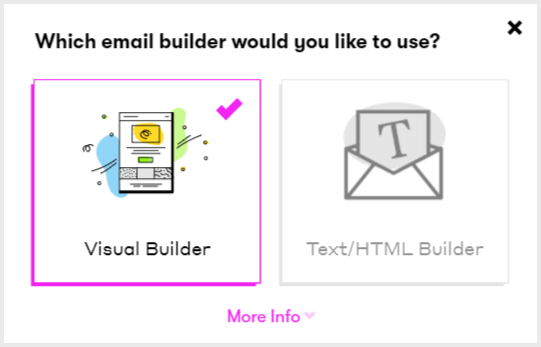
I typically use the Text/HTML Builder, but feel free to use the Visual Builder if that makes you more comfortable:
Here, you’ll want to add the emails for your back-in-stock campaign.
Head to Automation » Workflows to create visual automation. As with the previous part of this exercise, click on the + New Workflow button:

This is what it should look like:

You can name your workflow just by clicking on the name.
Then click on Define your trigger…
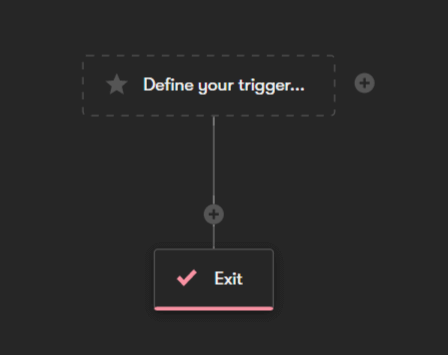
From the popup, click on the dropdown that says Drip:
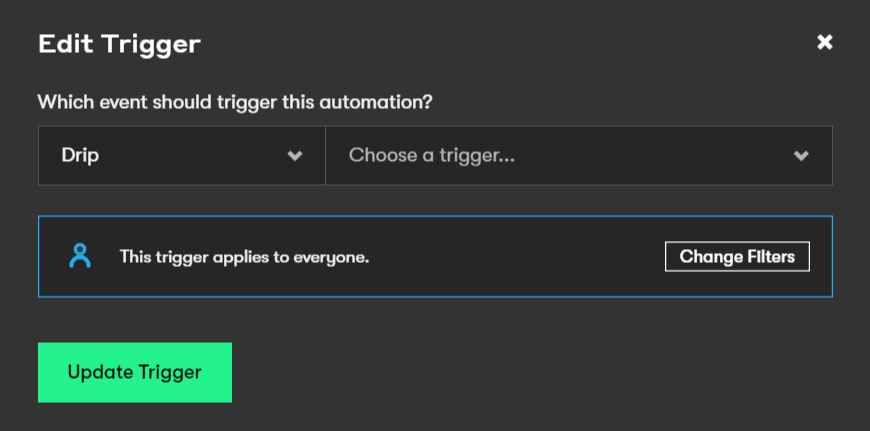
Select WooCommerce instead and click on Choose a trigger…
Click on Viewed a product tag and click on Update Trigger.
Now, there are many ways to move this forward, but we typically recommend using either a tag or an event. This is where you would want to call in your developer to either use Drip’s API to create events or a custom tag.
Either way works just fine.
If you’re looking for a back-in-stock email template, you should definitely check out these templates by Really Good Emails for inspiration.
What Next?
Well, that was it for sending back-in-stock emails and push notification alerts. Did you learn something new? Was this article helpful?
Leave a comment down below and tell us what helped you the most.
Also, you should check out our other features as well. If you’re running an eCommerce website, chances are that you’ll benefit a lot from PushEngage’s deep integrations. We’d recommend starting with our cart abandonment and price drop alert features.
Campaign ideas are really difficult to come by. We’ll be sharing some epic playbooks and campaign ideas for push notifications soon. So, stay tuned!
And if you haven’t already, get started with PushEngage today.
